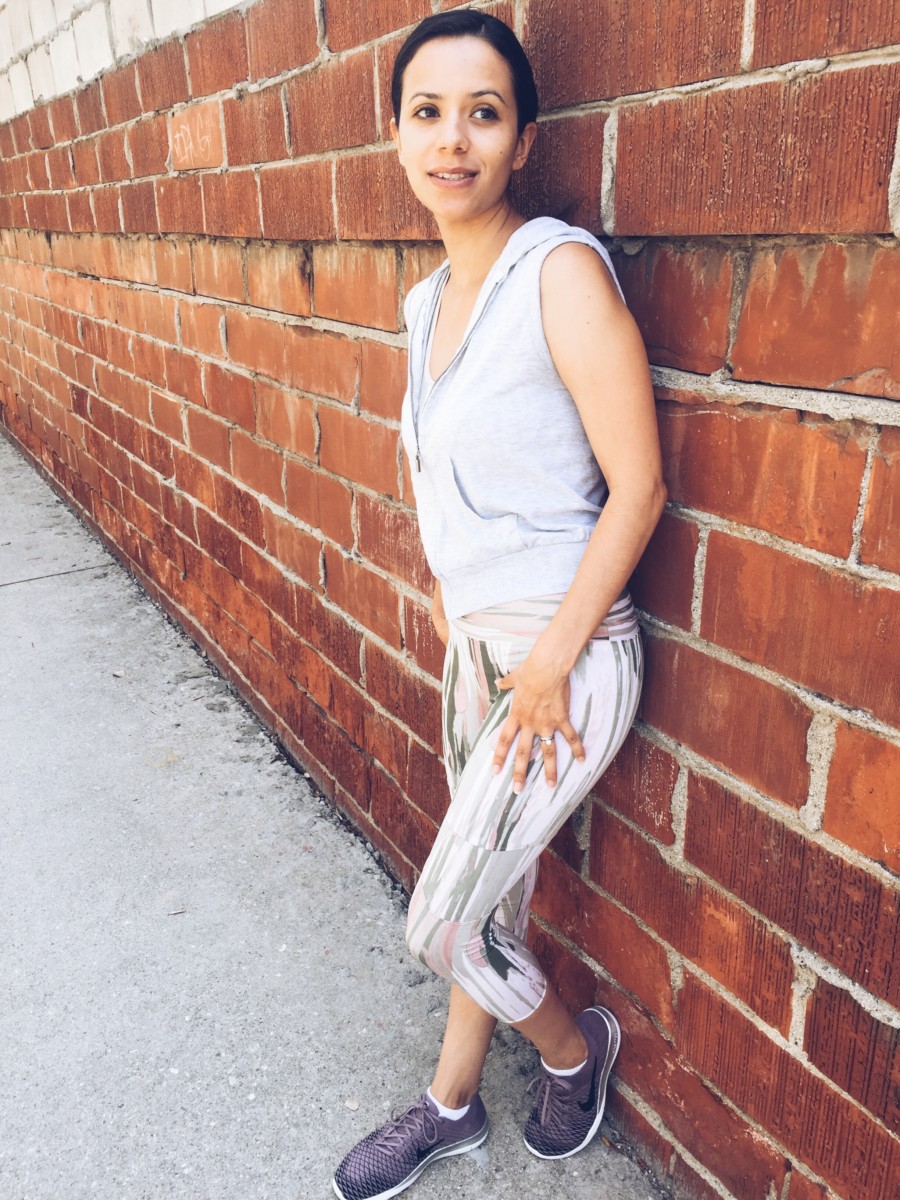
I finally finished Aires! Let me tell you, July was not a very productive sewing month. Sometimes life happens and the things you love get pushed to the side. Finally, I got some time and completed my project. I now have a full workout outfit for the first time ever!
The Low Down:
The Aires PDF pattern from Colette is a pair of capri fitted athletic tights with a hidden pocket. You can order the pattern by itself from Colette Patterns or subscribe to their monthly online publication Seamwork and use one of your two monthly credits to download the pattern. This pattern should take 3 hours if you make no mistakes unlike me. 🙂
Materials:
- All-purpose polyester sewing thread
- Ballpoint needle
- Ballpoint twin needle (optional)
- 2 yards of ¼” knit elastic
- Any mid to heavy weight athletic fabric with 4-way stretch (at least 25%) such as nylon, spandex, and rayon blends such as ponte knit and milliskin
- Stretch mesh fabric for contrast panel (optional)
Purchased from:
I purchased my materials from the Los Angeles fabric district. I’m using the same fabric that I used for the Ultimate Sports Bra from So Sew Easy.
The Process:
I think this is my first official pair of me made pants
Aires is a bit of a different pattern. Most patterns you cut on the fold but since this is a knit most of the pattern pieces are cut as one whole piece. With this in mind it is necessary to not only have enough fabric to distribute the full pattern pieces correctly but also you need to really pay attention to whether the pattern piece needs to be placed face up or down.
I decided to trace the pattern pieces so I could lay them out all at the same time. This was especially important because I was using a printed fabric and needed to make sure all the pieces were in the right direction.
Despite my self-imposed setbacks this was a fairly straight-forward project. I used a standard sewing machine and it worked out great. I sewed my Aires in a size XS.
Thanks to cutting out the full pieces all the notches and circles matched up nicely. I was a little nervous about the hidden back pocket but it was actually really quite logical and so much easier than I realized.
I used a medium zigzag stitch to sew the pieces together and for topstitching. I really liked how the topstitching turned out. You can use a cover stitch or a twin needle but zigzag worked just as well for me.
Hiccups:
There were more than I anticipated of my own doing of course.
Realizing that I needed duplicate pieces I ended up tracing the original patterns but I forgot to look at the cutting layout! Well I actually did look at it but I made a mistake and cut two pieces in the same direction because I didn’t double check my work.
I found this out when I tried to sew my legs together only to find I had two left legs. I actually realized earlier I had made a mistake but I was just like “close enough!” haha I paid for that later.
My machine also decided to pull its same old tricks and I ended up using the seam ripper quite a bit.
Recommendations:
The directions and photos were really clear and concise. I do believe this would take anyone 3 hours as long as they pay close attention to the directions and cutting layout.
Don’t forget to use the stretch guide when selecting your fabric! You can find it on page 3 of your PDF instruction manual.
When cutting out your fabric I would suggest using a rotary cutter if you have one.
Happy Sewing!

