Maybe you are new to sewing or are brushing the dust off your trusty old sewing machine and need a refresher on what this machine actually does. In that case, this article will define the anatomy of a sewing machine and how it is supposed to function. Every machine is going to be different but they all have basically the same components. If you know where your sewing machine manual is I recommend taking it out for reference for the anatomy of your sewing machine as you read this article.
This post contains affiliate links. When you click and make a purchase from these links, we might get a commission. It doesn’t cost you anything extra!
Anatomy of a Sewing Machine
Sewing Machine Fundamentals – Anatomy of a Sewing Machine
When it comes to domestic sewing machines there are two common types of sewing machines: Mechanical or Electric sewing machines and Computerized sewing machines. These sewing machines will also come with detailed user manuals that you will find very handy regardless of your sewing skill level. Let’s dive in below:
Mechanical/Electric Sewing Machine – Anatomy of a Sewing Machine
A mechanical sewing machine is considered a basic sewing machine. It is an electric machine that operates using a system of knobs and dials. These knobs and dials will allow the user to adjust the settings and functions. For example, you will likely have a dial that will display a variety of stitches. You simply turn that dial to the stitch you would like to use. The same goes for thread tension and stitch length. You will find that mechanical sewing machines do not have an internal computer system or a digital screen that you will find with newer technology. However, manual sewing machines are still a very popular choice for sewist today. These are great sewing machines that are great for a beginner or someone who wants a traditional no nonsense machine.
Computerized Sewing Machine – Anatomy of a Sewing Machine
A computerized sewing machine is the next step in technology from the mechanical or electric sewing machine. Instead of manually adjusting knobs and dials you can refer to an LCD display and a series of buttons. These types of sewing machines are on the pricey side but they offer time saving features such as automatic needle threading, automatic thread cutters and a variety of stitches. Stitches can include not only your basic stitches but embroidery stitches, quilting stitches and for some you can even download a custom embroidery design. Computerized sewing machines are plentiful on the market and can be found in a broad range of pricing to fit most budgets.
Related Article: Guide to Types of Sewing Machines
Sewing Machine Manuals – Anatomy of a Sewing Machine
Your sewing machine manual is important in understanding the anatomy of your specific sewing machine. It is a good idea to read through this manual before you attempt to use you machine. A sewing manual will not only provide you with a diagram of the anatomy of your sewing machine it will teach you how the specific functions of your sewing machine work. Both mechanical/electric and computerized sewing machines have the same general anatomy but where they differ is what advanced features they offer. Referencing your manual to learn about these features will ensure you will get the most out of your sewing machine. But first, find out what you need to do to get your sewing machine up and running.
Related Article: Best Sewing Machines for Lingerie Makers
Anatomy of a Sewing Machine – Sewing Machine Front
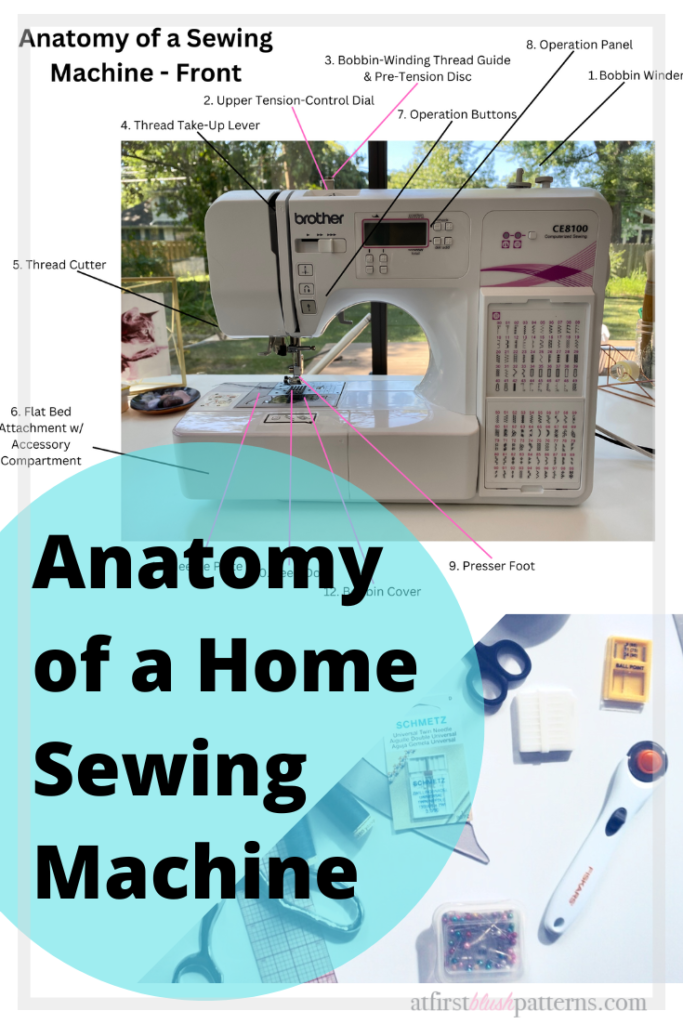
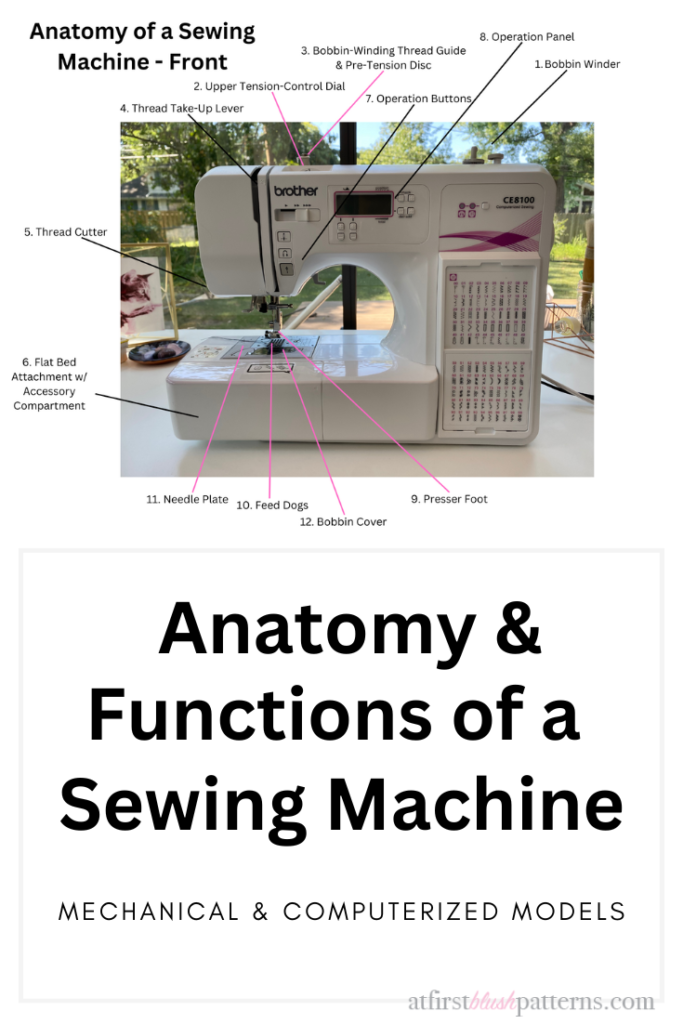
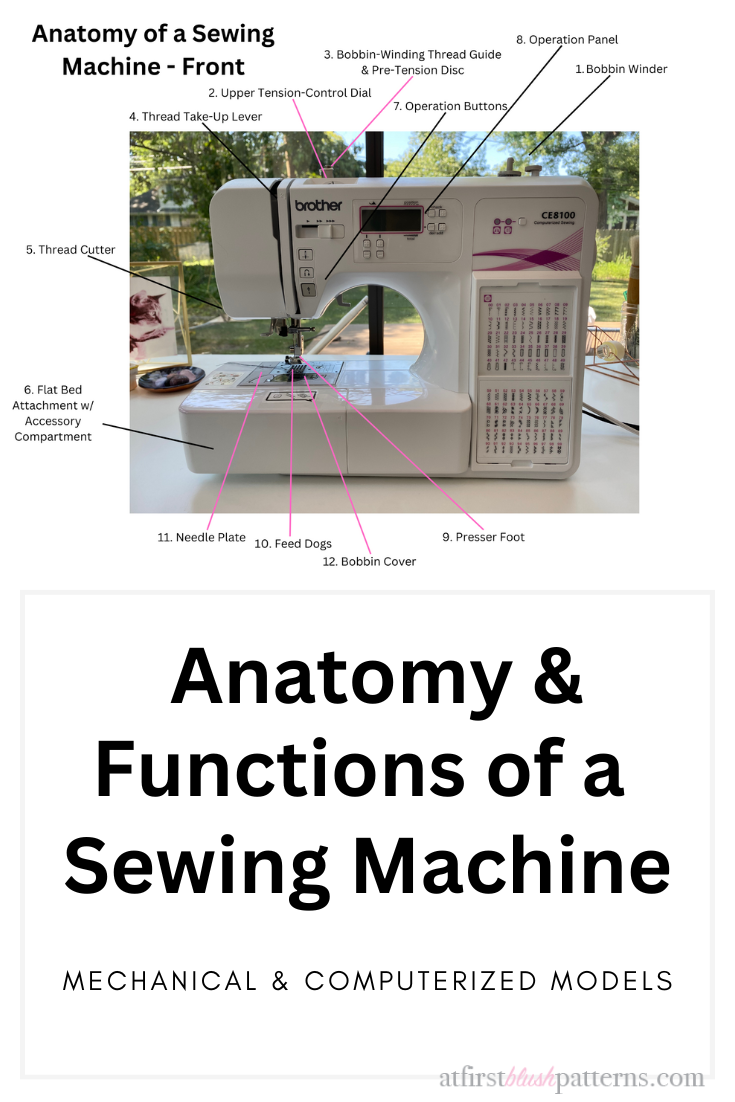
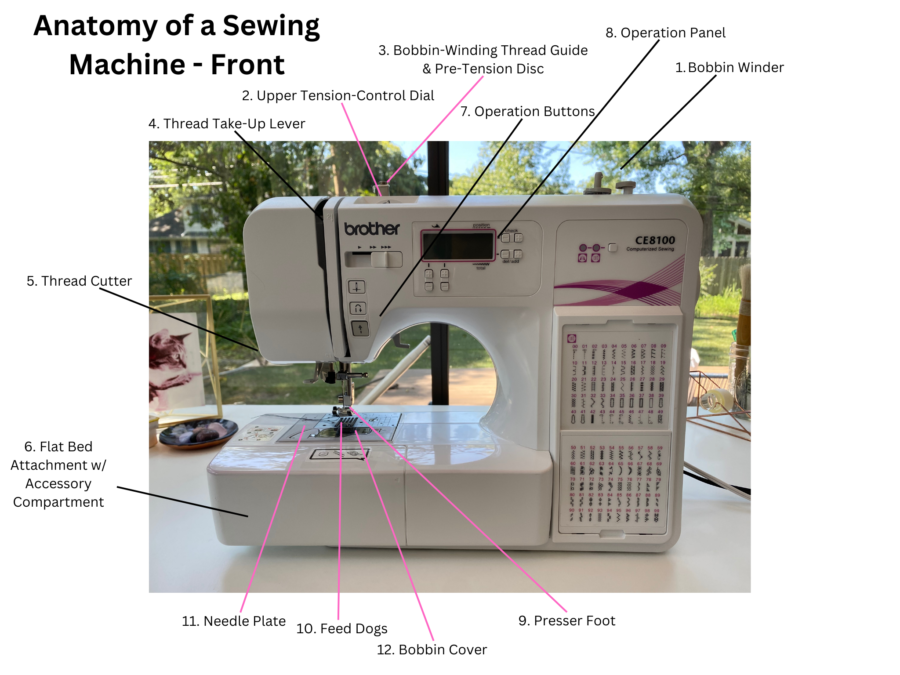
I will be sharing the anatomy of my Brother CE8100 Sewing and Quilting Machine (similar model linked). This is a computerized sewing machine that also has quilting capabilities. You will see features on this sewing machine that you do not see on a mechanical or electric sewing machine. When labeling and defining the features below I referred to the sewing machine’s operation manual.
Sewing Machine Parts – Front
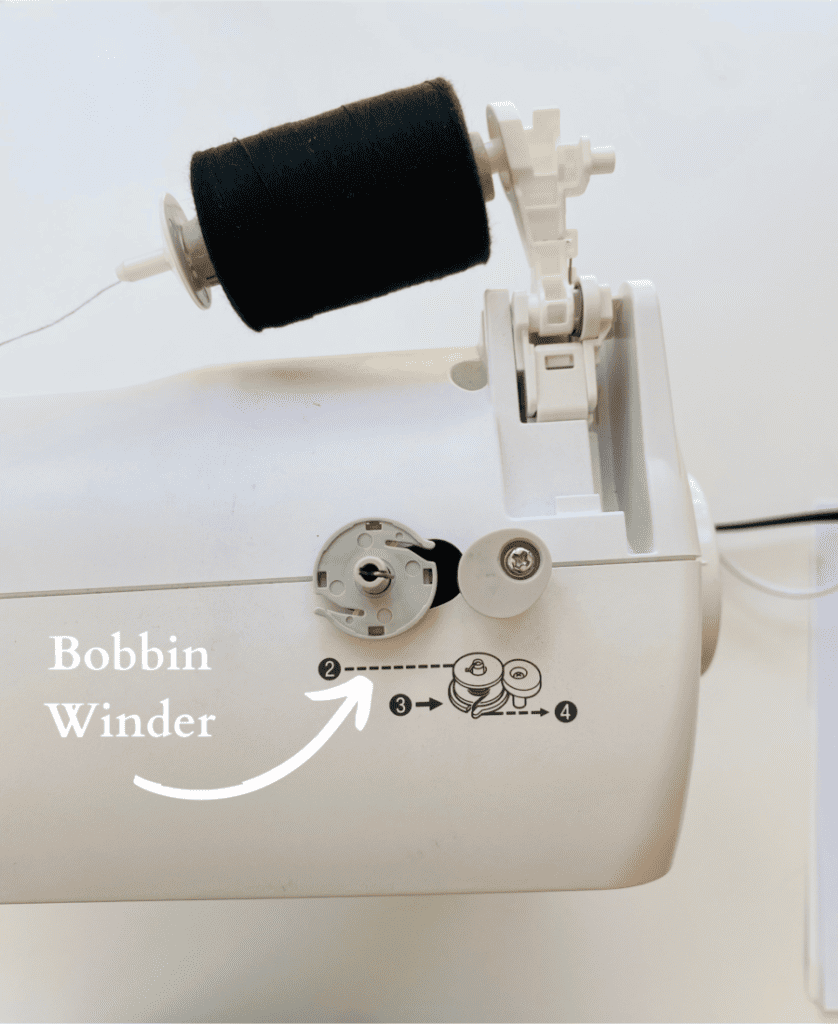
1. Bobbin Winder
The bobbin winder winds thread onto the bobbin. This will be used as your lower thread spool.
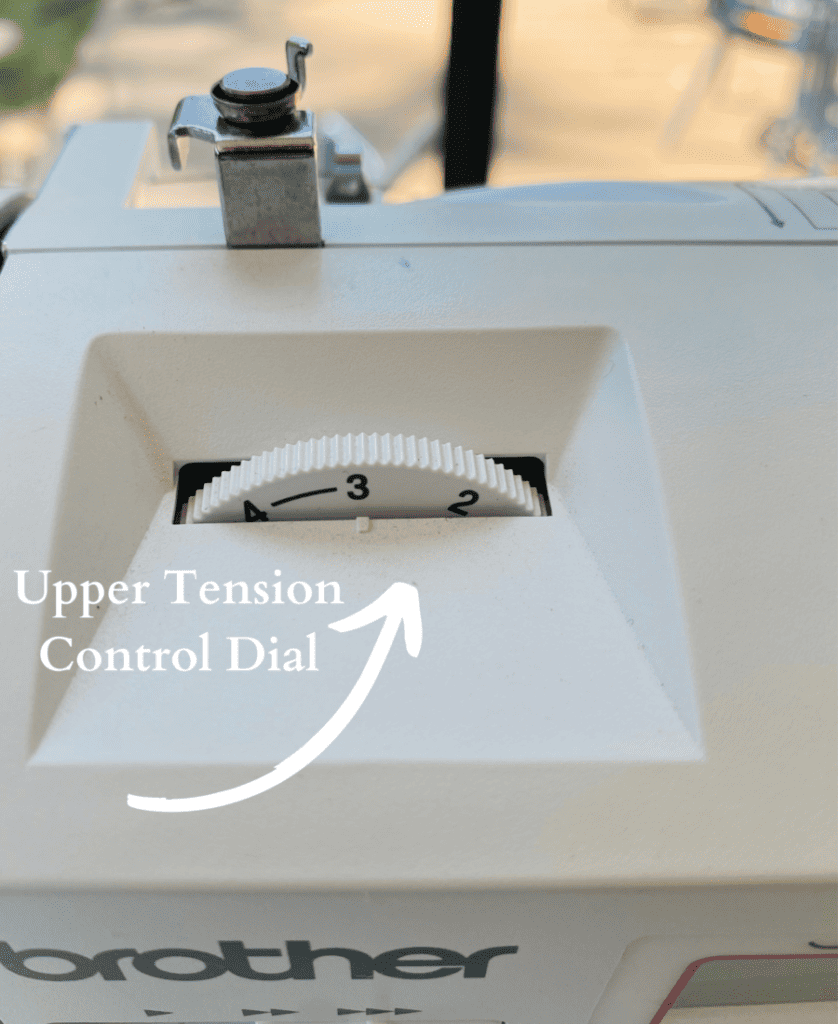
2. Upper Tension-Control Dial
Controls the tension of the upper thread.
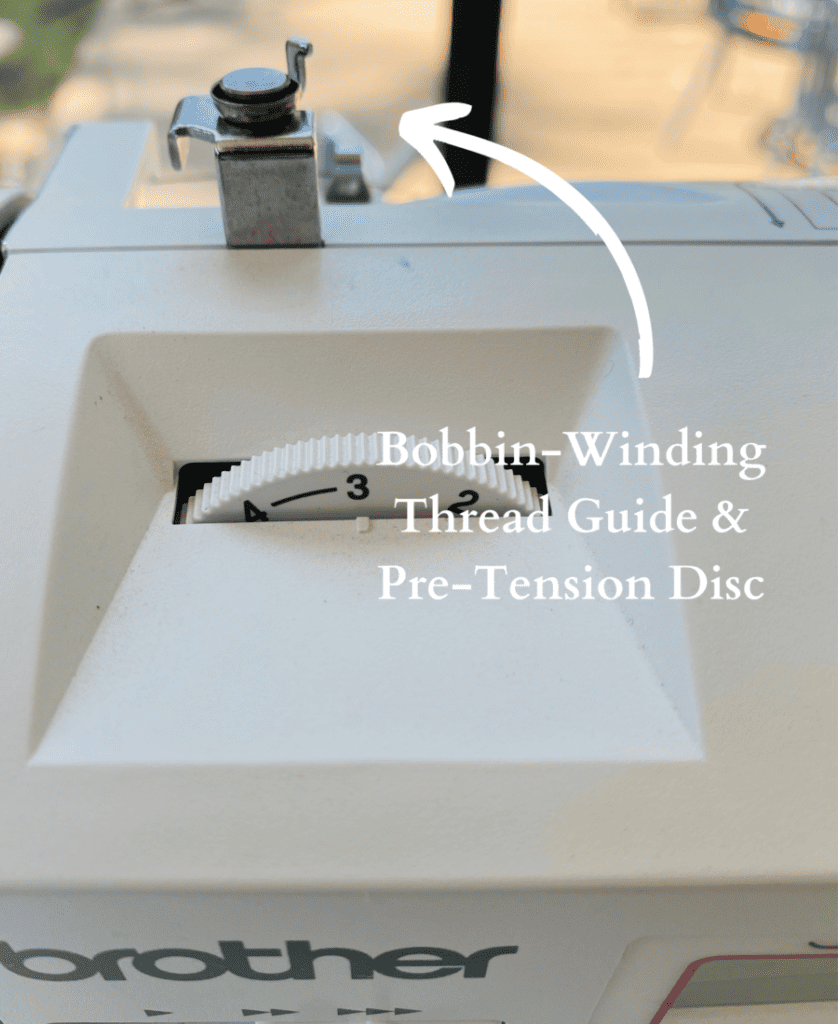
3. Bobbin-Winding Thread Guide and Pre-Tension Disc
When winding the bobbin, thread is passed under the thread guide then around the pre-tension disc.
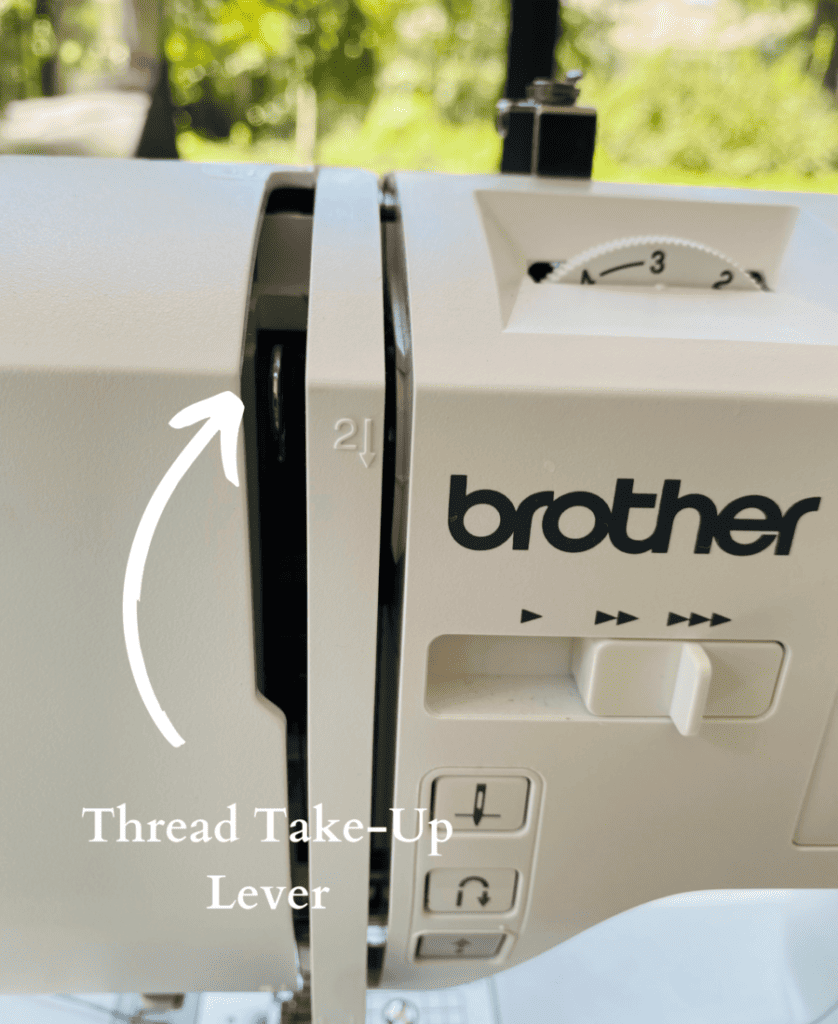
4. Thread Take-Lever
This is where the thread is lifted as the sewing needle moves up while sewing.
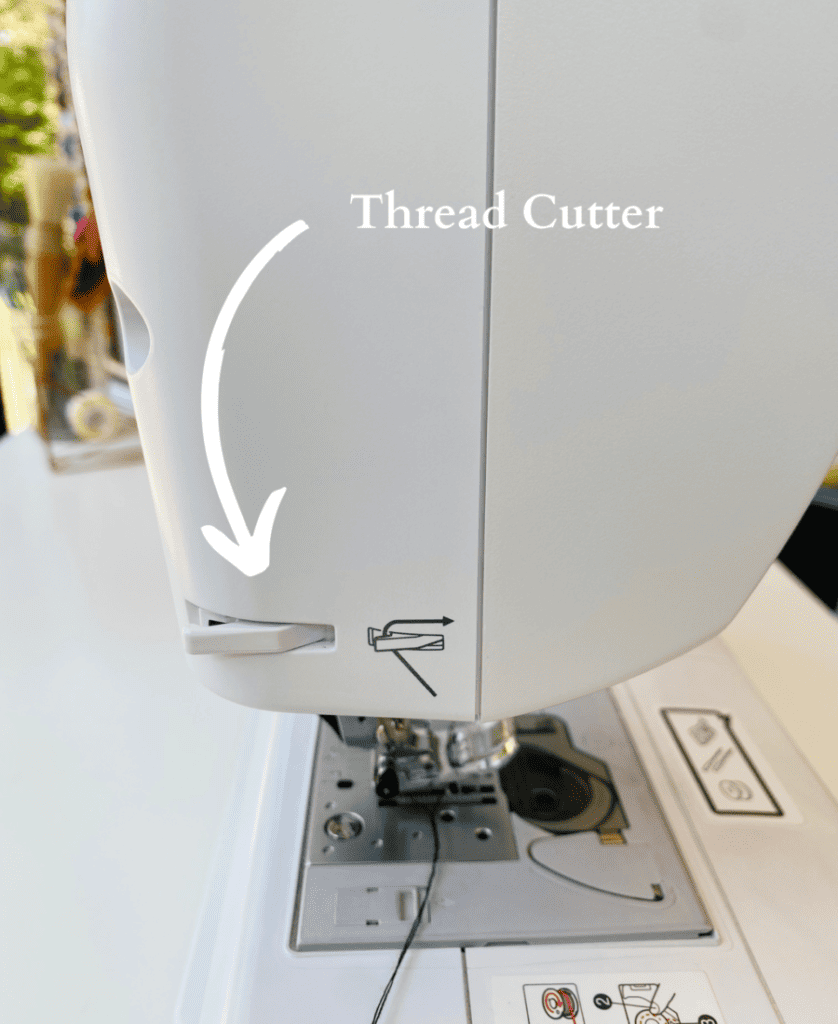
5. Thread Cutter
This is a small blade located on the back of the machine to cut thread.
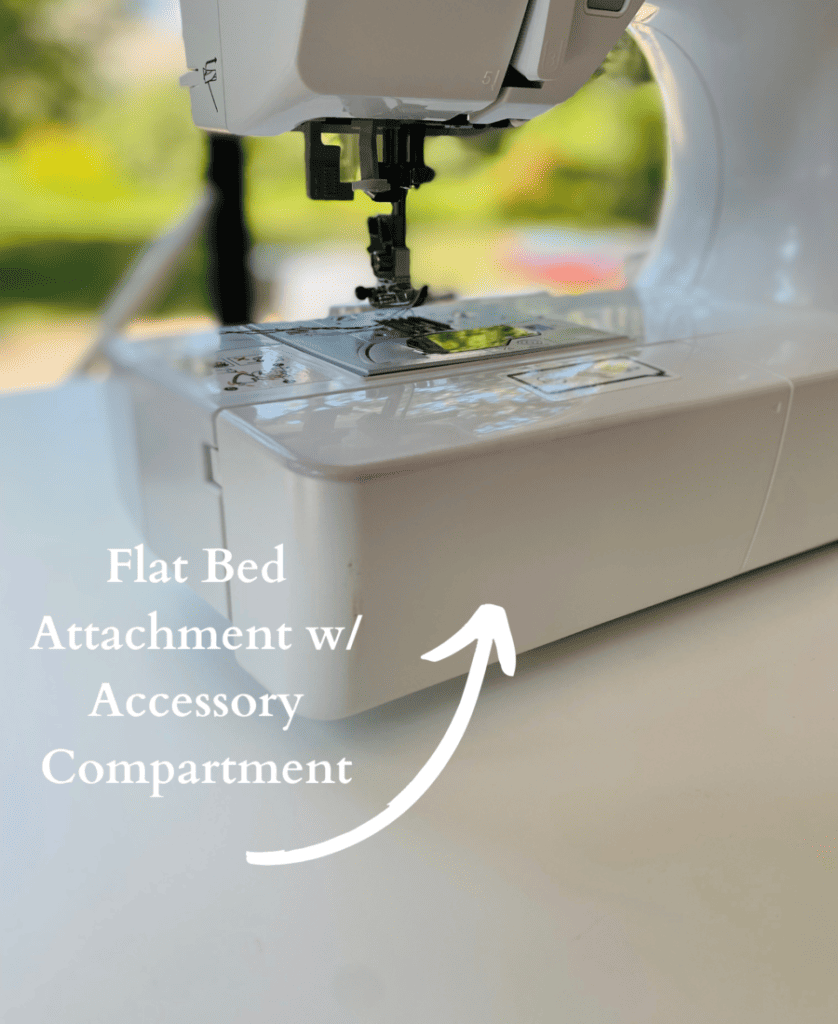
6. Flat Bed Attachment with Accessory Compartment
This compartment contains extra presser foots, bobbins, needles and a seam ripper.
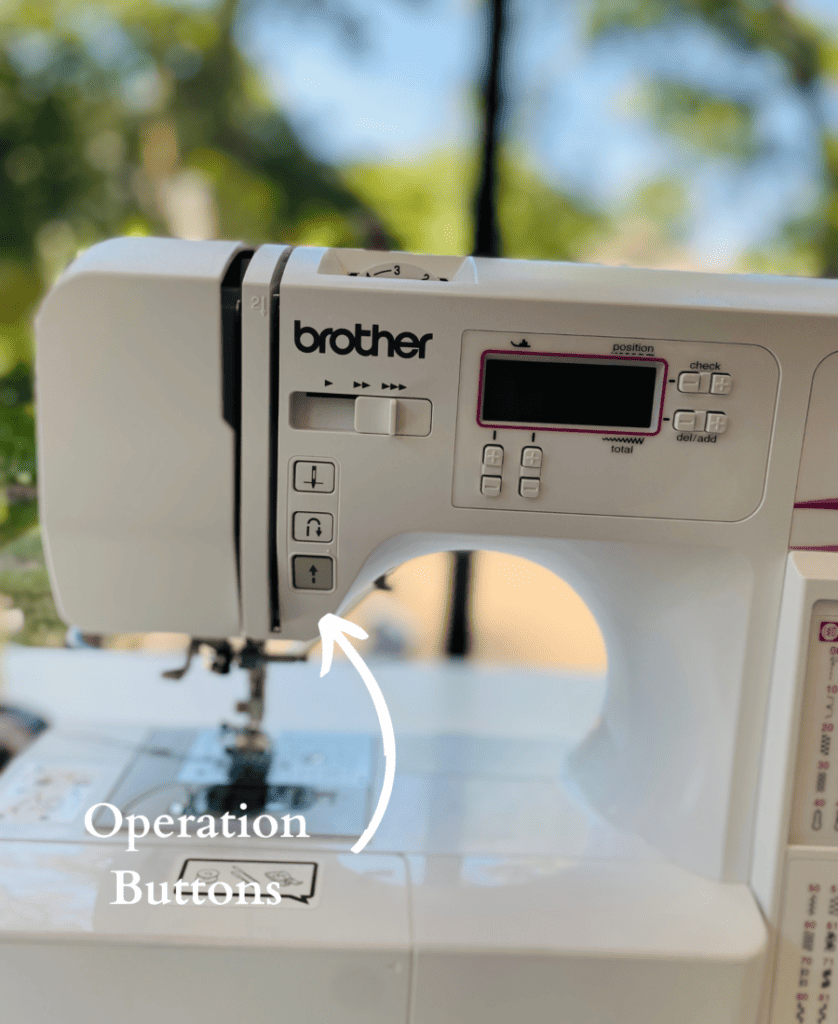
7. Operation Buttons
For this model there are three buttons: Insert needle, Sew backwards, Lift needle
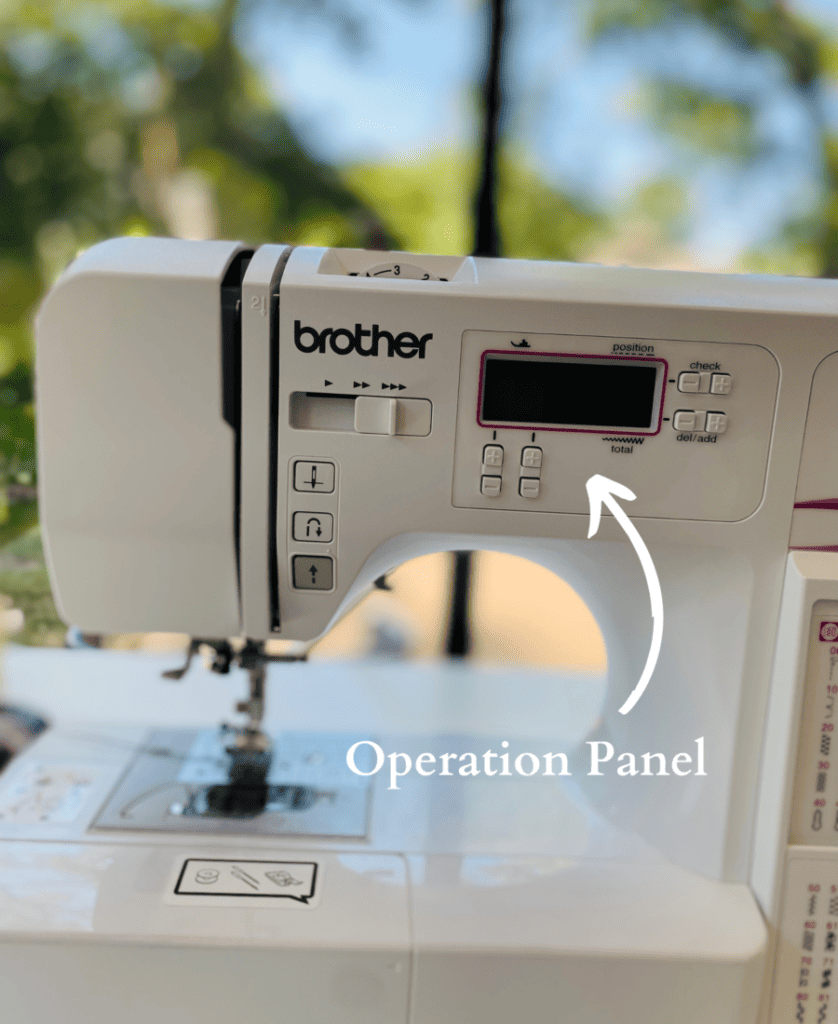
8. Operation Panel
This is where you see your stitch and settings selection. This includes Stitch Selection Keys, Stitch Length Adjustment Key and the Stitch Width Adjustment Key.
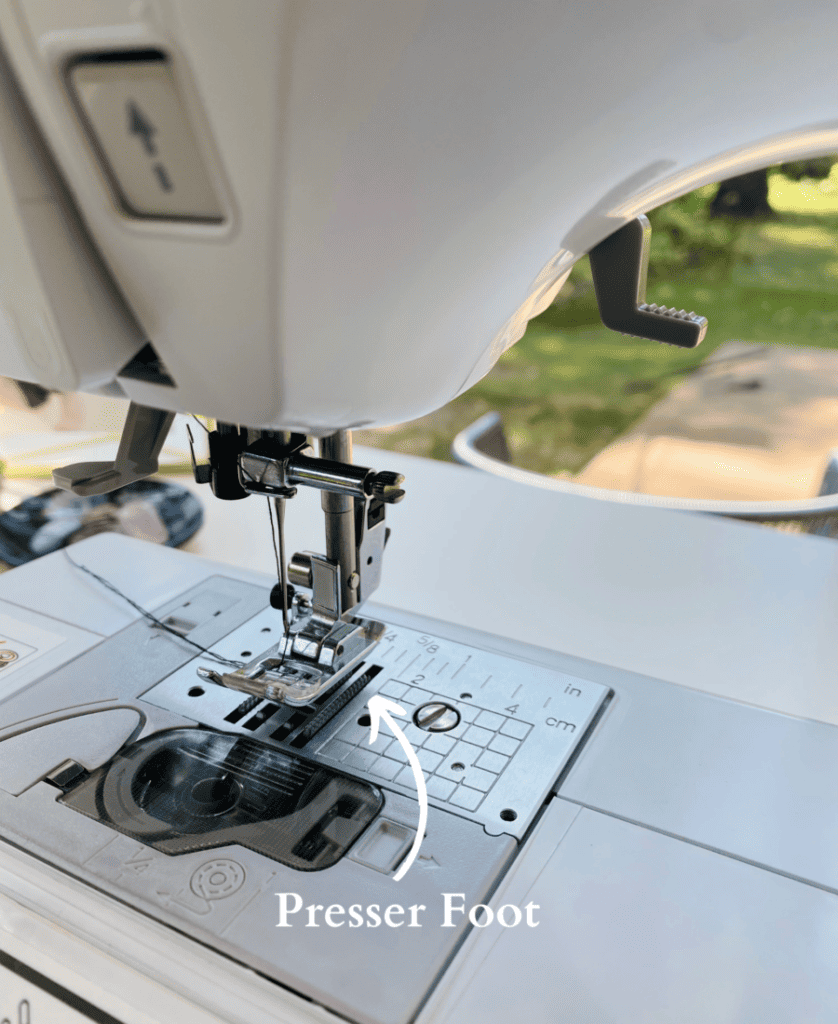
9. Presser Foot
The presser foot holds the fabric in place while sewing
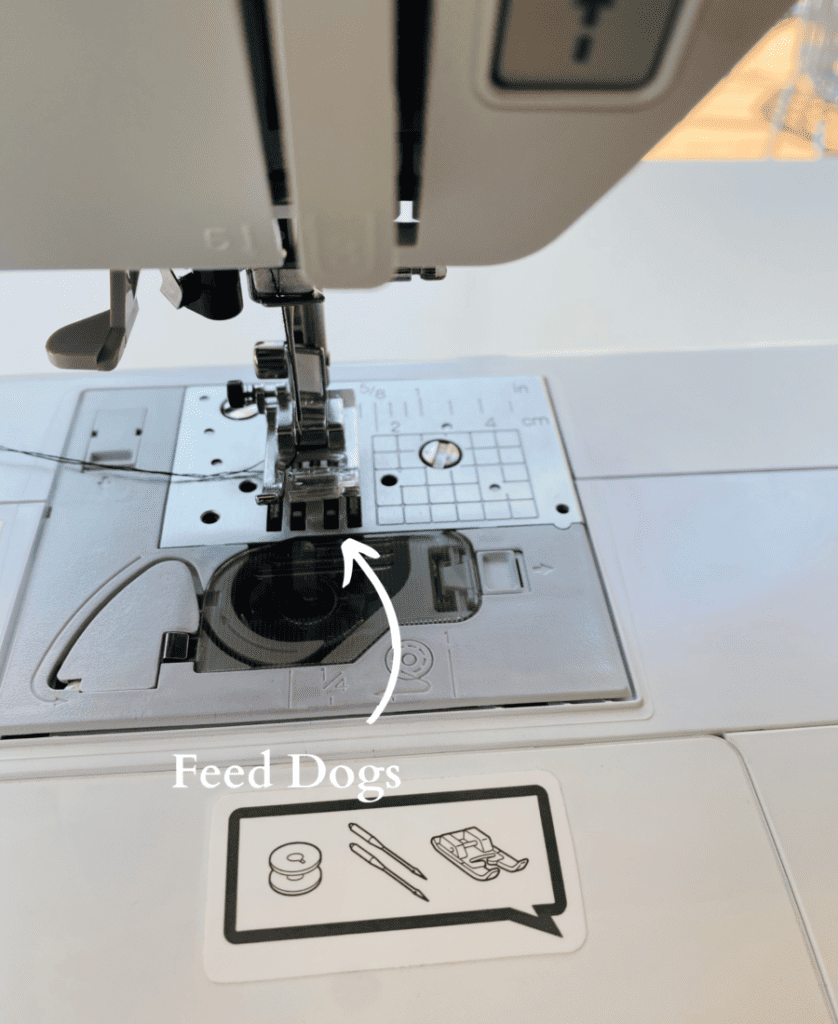
10. Feed Dogs
The feed dogs feed the fabric in the direction of sewing.
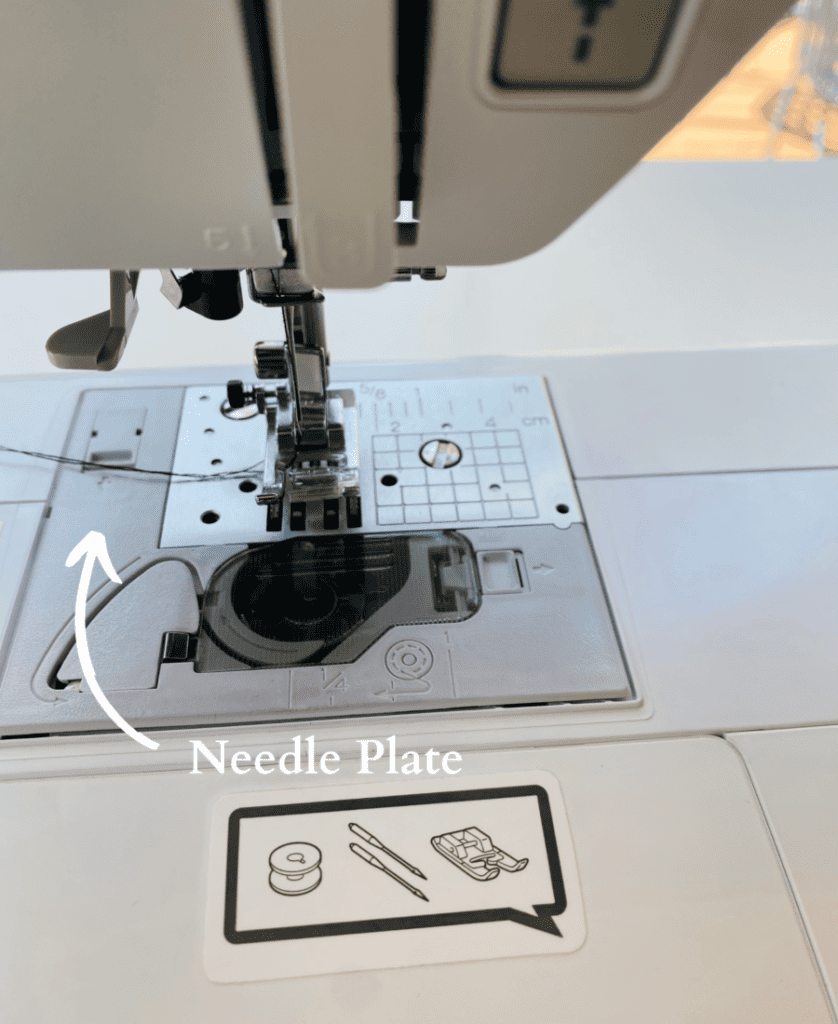
11. Needle plate
This plate indicates seam allowance guides for straight seams.
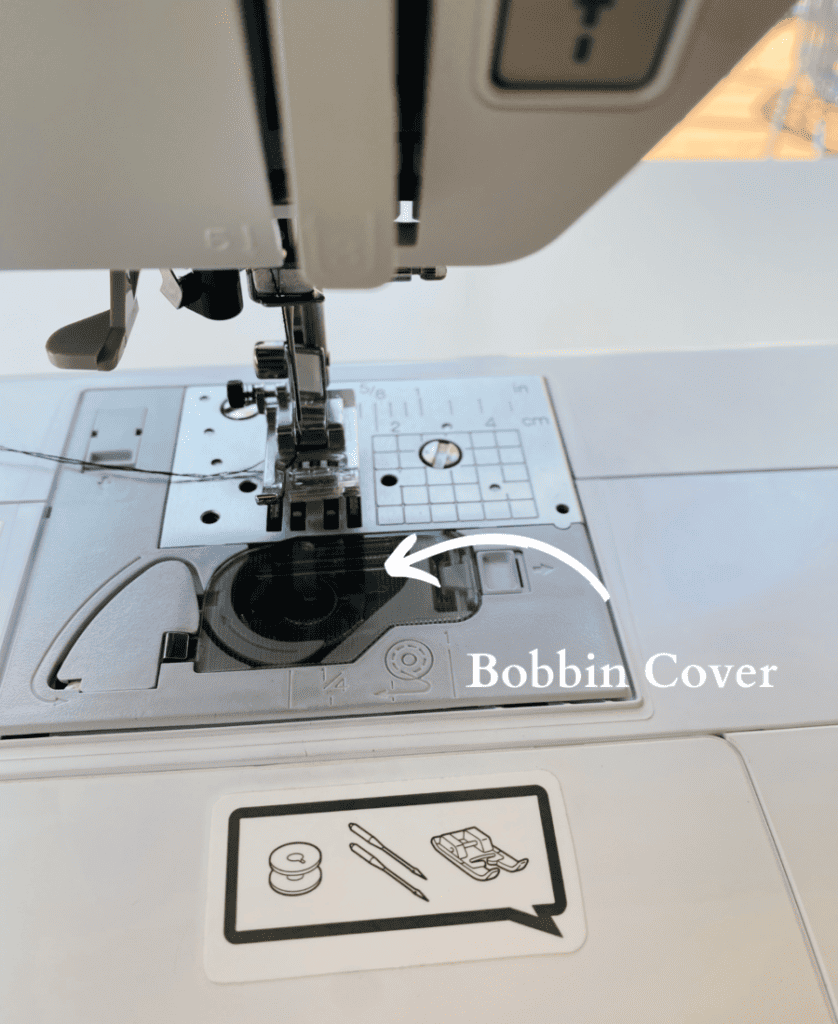
12. Bobbin cover
This is where you insert the bobbin.
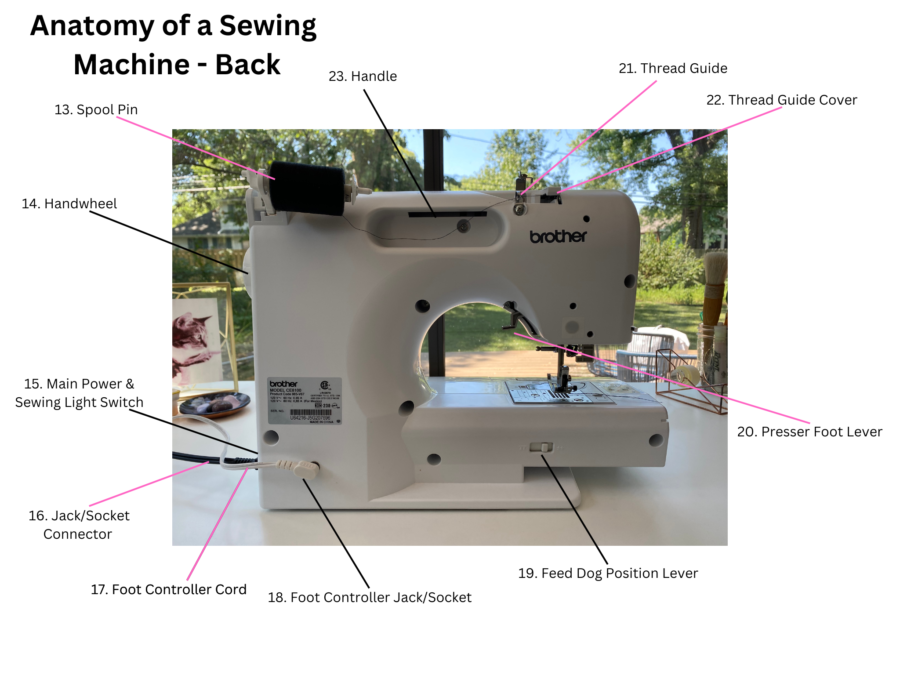
Anatomy of a Sewing Machine – Sewing Machine Back
Sewing Machine Parts – Back
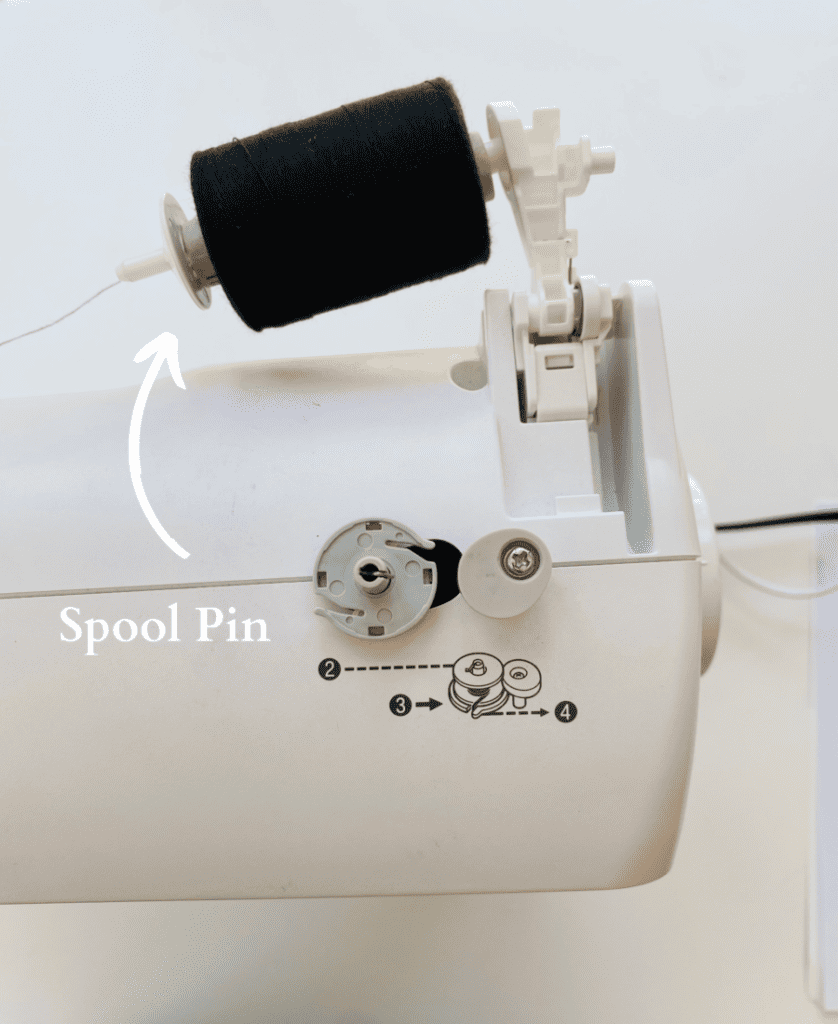
13. Spool Pin
The spool pin holds the spool of thread on the top of the sewing machine.
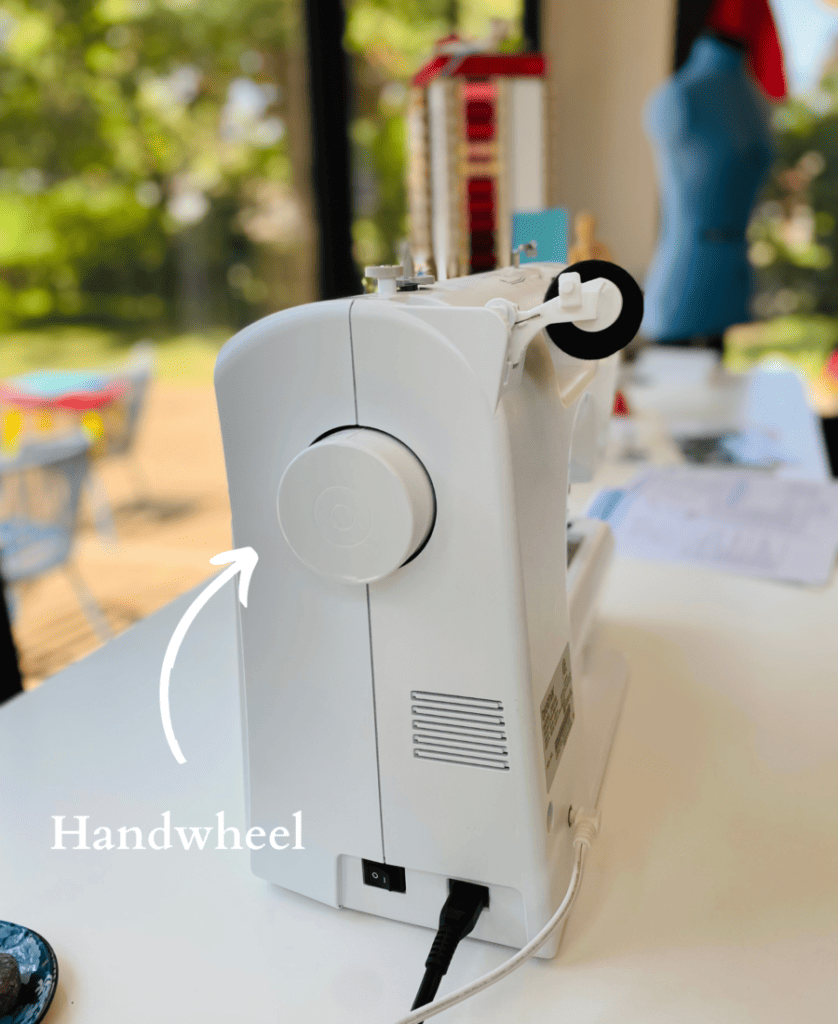
14. Handwheel
This is where you manually raise and lower the needle.
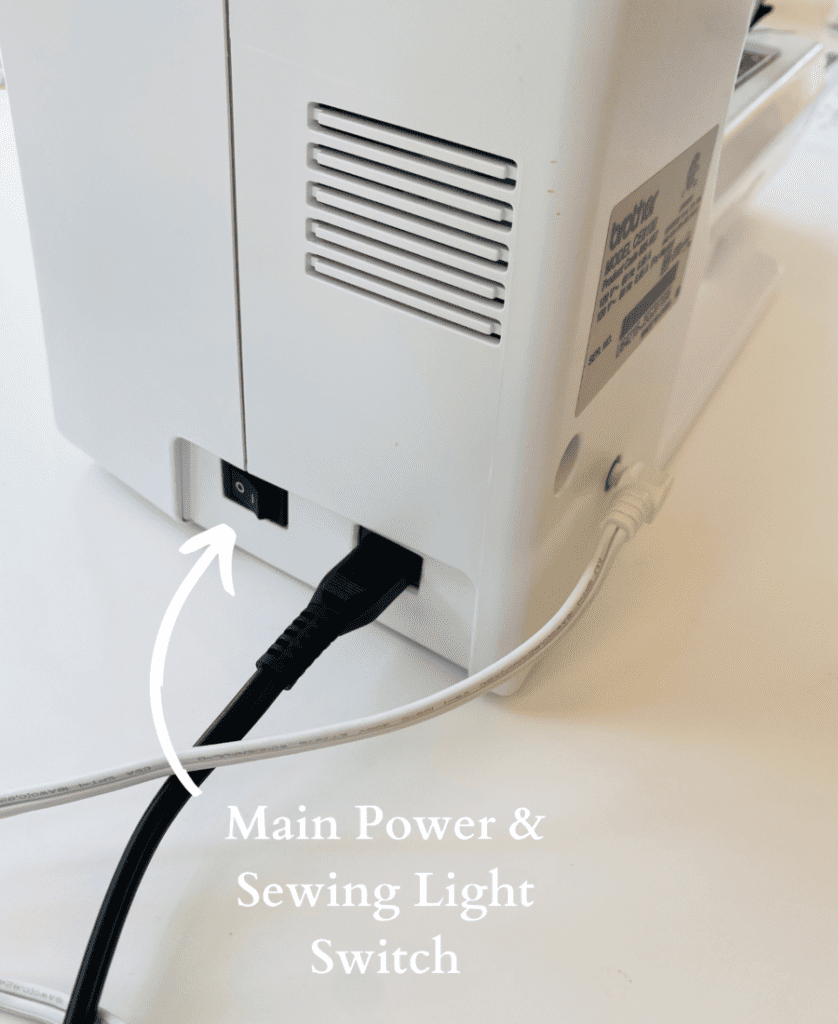
15. Main Power and Sewing Light Switch
Switch off the power and light switch here.
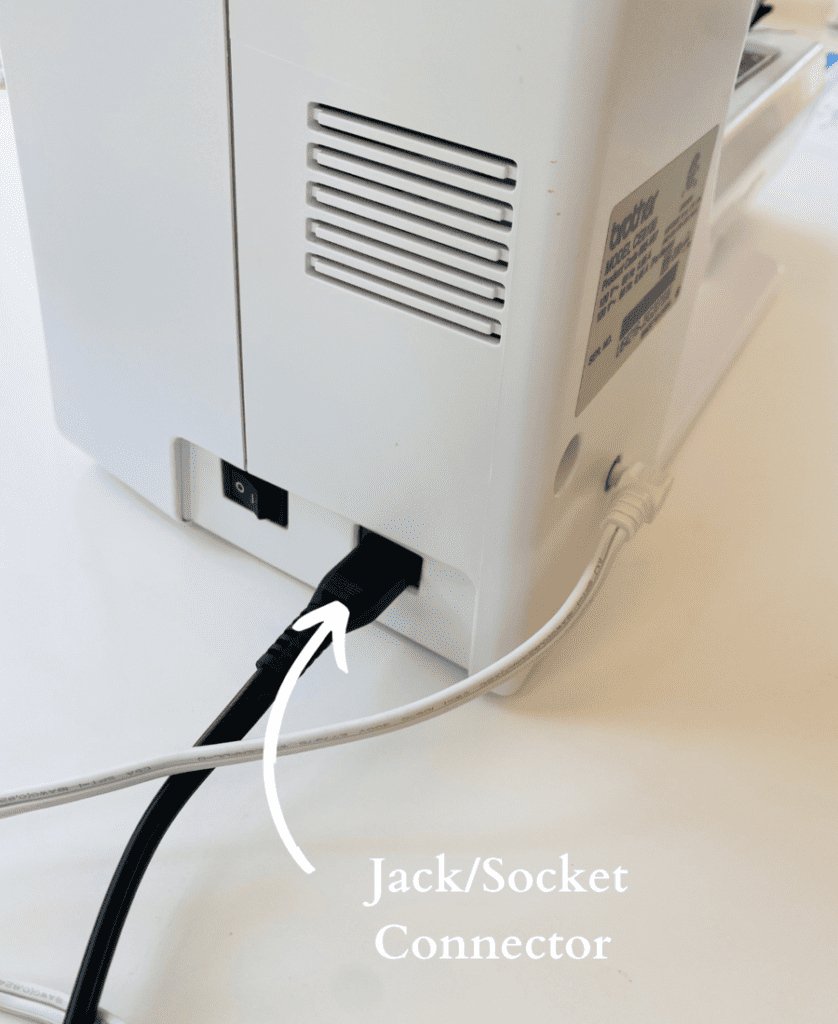
16. Jack/Socket Connector
Insert the plug for the main power here.
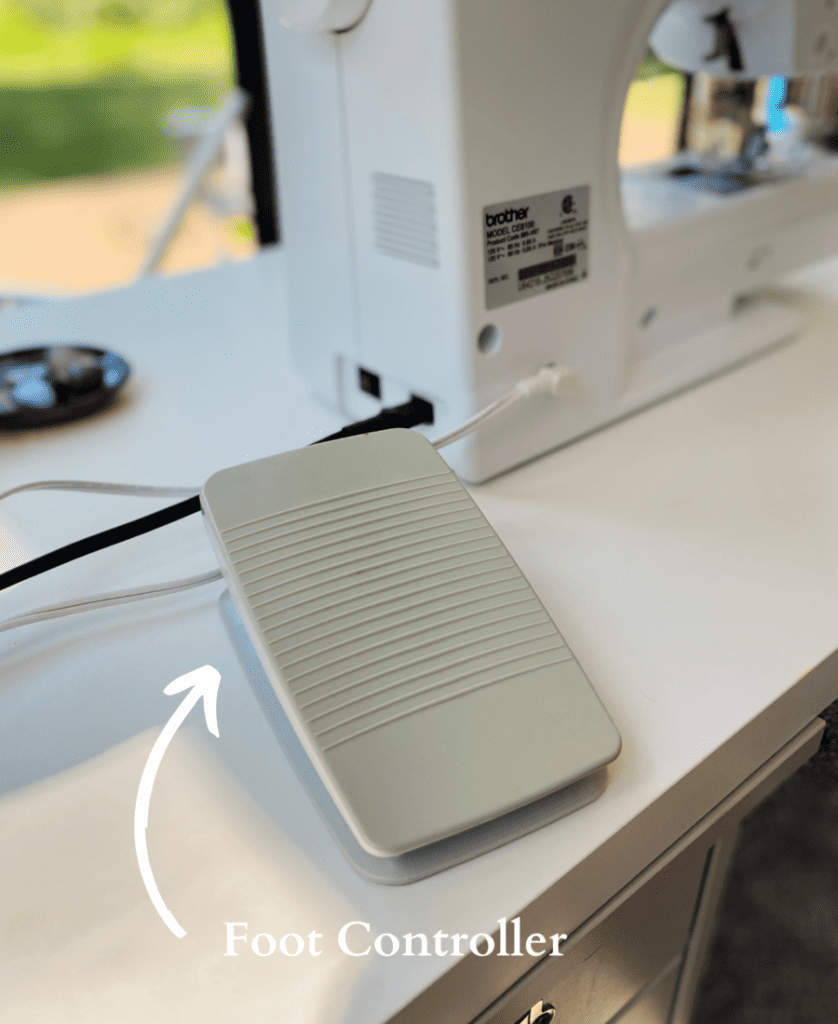
17. Foot Controller
You can control the speed of the needle using the foot peddle.
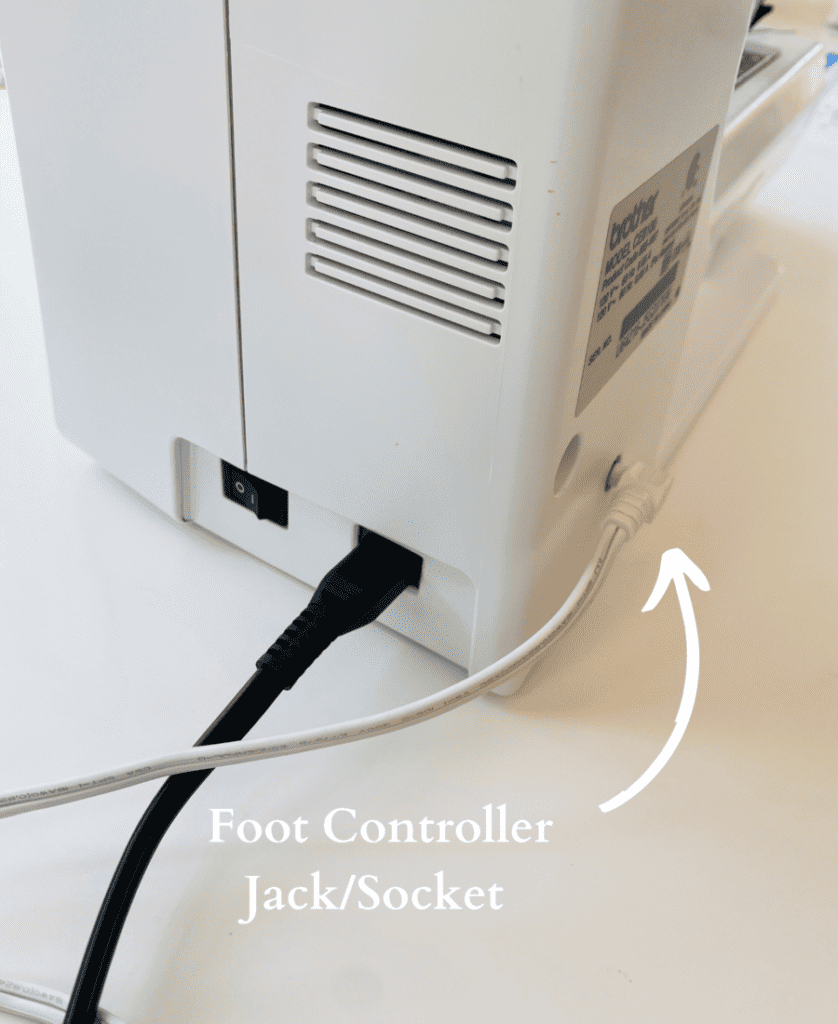
18. Foot Controller Jack/Socket
Insert the foot pedal plug here.
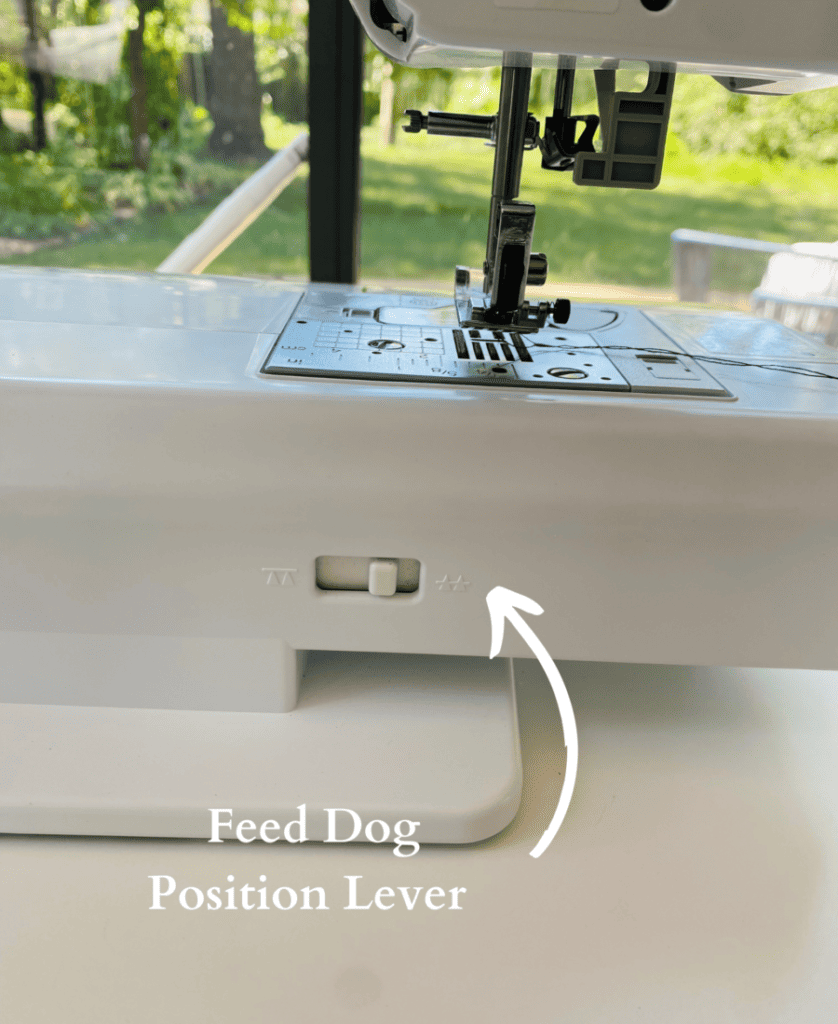
19. Feed Dog Position Lever
Use this to change the position of the feed dogs.
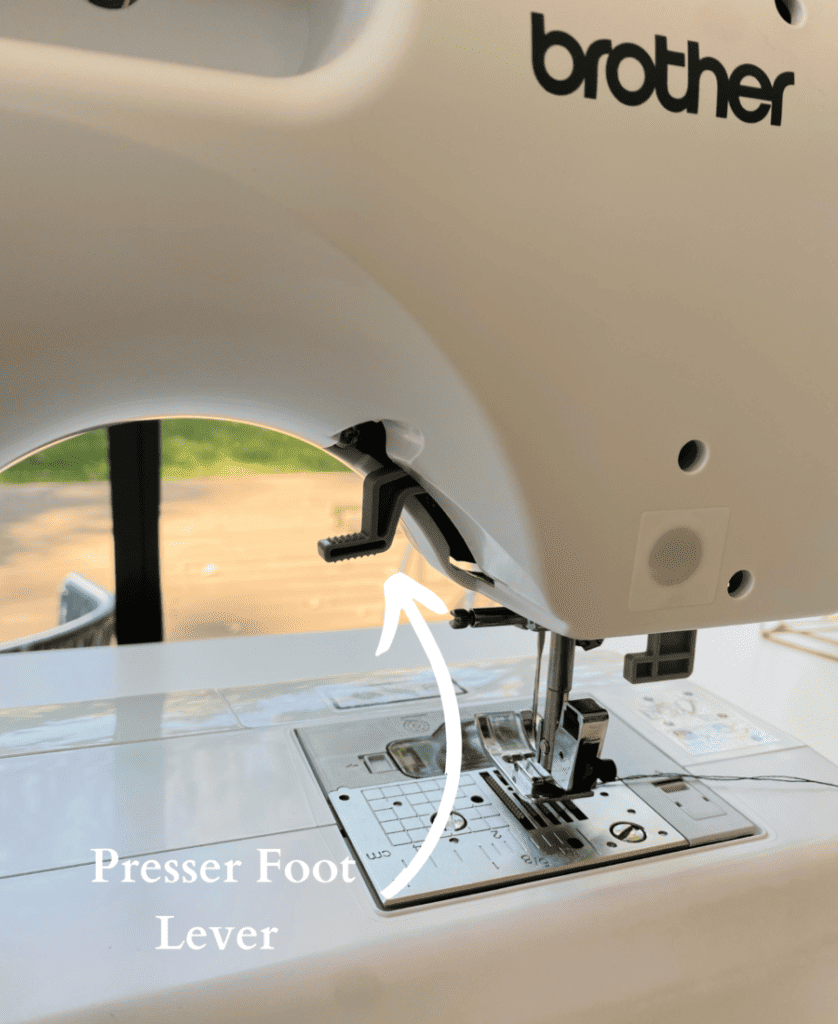
20. Presser Foot Lever
Raise and lower the presser foot here.
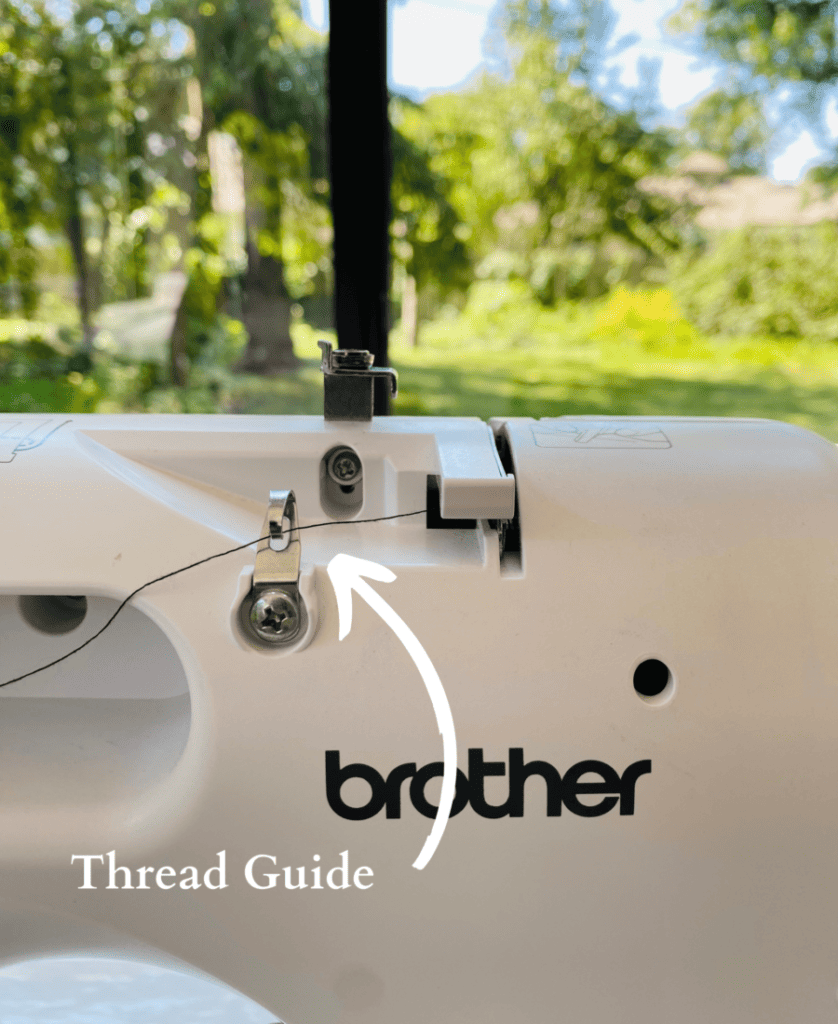
21. Thread Guide
This guides the thread for winding the bobbin and threading the machine.
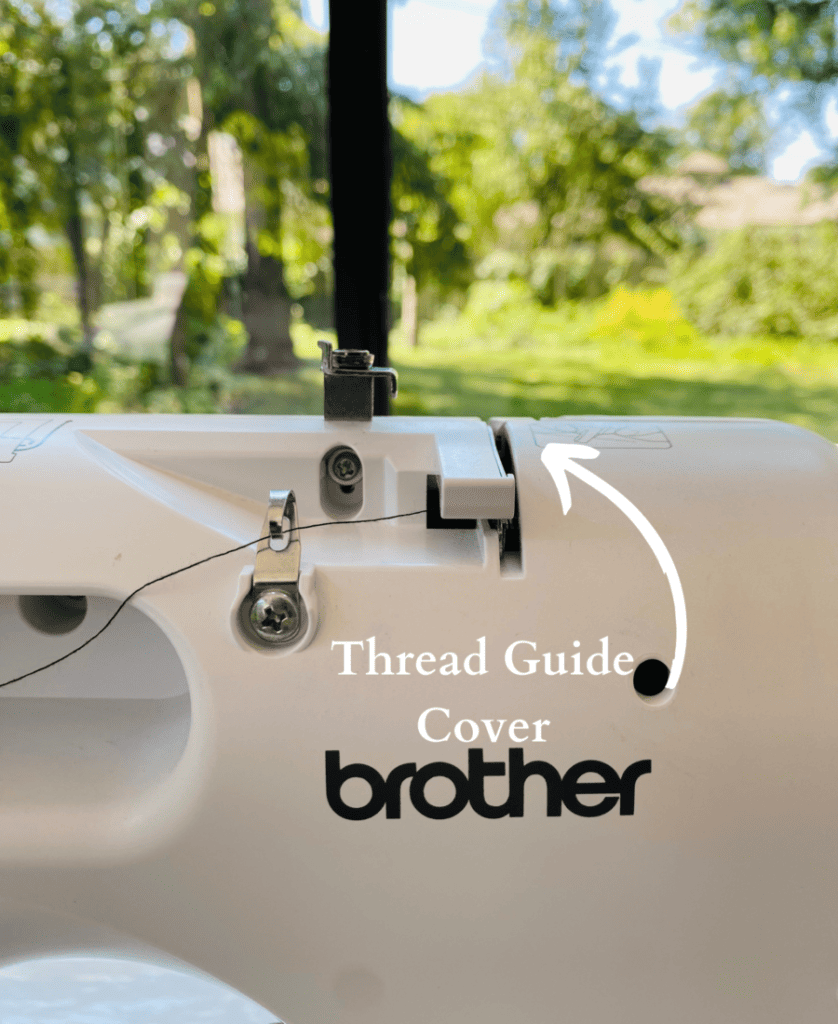
22. Thread Guide Cover
The thread will go under this cover when winding the bobbin and threading the machine.
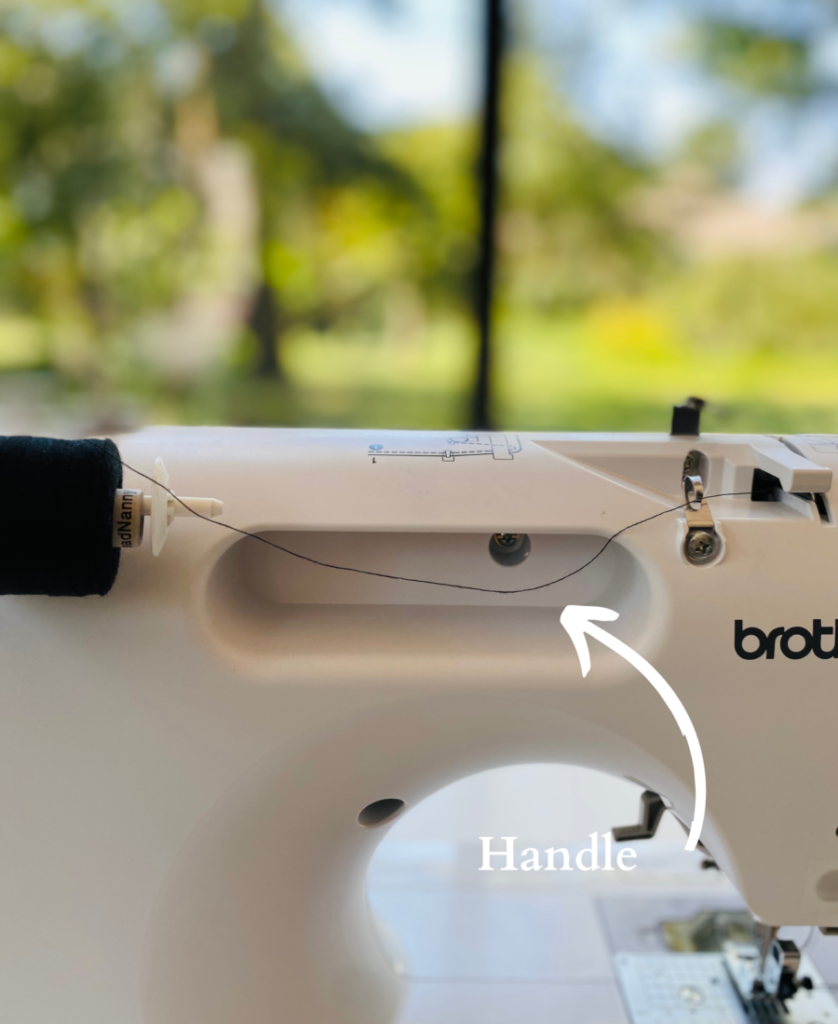
23. Handle
Handle to carry the machine safely.
Related Article: Most Needed Sewing Tools for Beginners
Additional Questions – Anatomy of a Sewing Machine
Where to find domestic sewing machines?
You can easily find domestic sewing machines on Amazon, Walmart and Joann’s. If you need some recommendations check out my Recommended Sewing Machines.
Are all sewing machines the same?
Not all sewing machines are the same. The most common domestic sewing machines are mechanical or electric and computerized. These sewing machines have the same basic functions like sewing straight lines and zigzag stitch which will do you just fine. However, once you get into more complex sewing techniques such as quilting or embroidery you will find a computerized sewing machine handy for its design ability. The next layer of sewing machines will offer more professional stitching such as an overlock/serger machine or a cover stitch machine.
Conclusion – Anatomy of a Sewing Machine
The domestic sewing machine; as simple as the process of sewing a straight line may seem requires a very intricate piece of equipment. The anatomy of a sewing machine I detailed above offers a lot of features you will see on a computerized home sewing and quilting machine. It is easy and fun to use while not being overwhelming. Hopefully, the breakdown of the anatomy and function of this Brother sewing machine helps you understand the anatomy of your sewing machine a little better. Once you become more comfortable with your machine the more you will want to sew and the more skills you will build.
Pin this idea for later!
