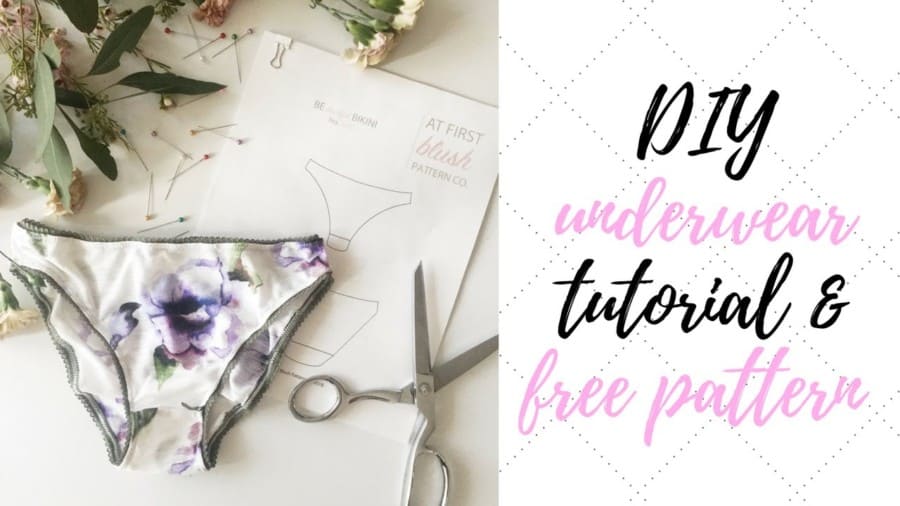
If you are a sewist like me you are always looking for the next challenge. There are so many things to sew and experiment with but one type of garment that people are most nervous about is lingerie. Even so, many sewist are searching for how to make their own underwear. Well not to worry I have you covered with this DIY underwear tutorial including my free bikini pattern. Enjoy!
What’s in this DIY Underwear Tutorial?
For those of you who may be dabbling into lingerie for the first time using this free underwear pattern I wanted to create a step-by-step photo tutorial to help you sew up Be Bashful. If you prefer to watch me make Be Bashful then click the video below instead.
What is Be Bashful Bikini?
Be Bashful is a free bikini cut underwear pattern available for download on this site. This pattern is free because I would like to encourage sewist (especially first time lingerie makers) to sew lingerie with a simple pattern that they can use to sew something they can wear everyday. Be Bashful is available in sizes XS-XL but hope to expand sizing options with future patterns.
This bikini pattern features a low-rise waistline, high-cut yet modest leg opening and medium coverage for your bottom. It is a flattering everyday cut that is comfortable yet sexy enough to show off. You can even hack this into swimsuit bottoms – but that’s for another post!
Let’s Get Started:
If this is your first foray into sewing lingerie than welcome! If you are a bit more experienced thank you for trying out my pattern. Hope you enjoy it!
Recommended Fabrics:
When sewing Be Bashful Bikini it is recommended that you use a stretch knit fabric, stretch lace or stretch velvet with 60% stretch for the main fabric. You can use other fabric as long as it has a 60% stretch. The lining of Be Bashful Bikini requires a cotton jersey fabric or a similar breathable fabric. The fabric color does not have to match because this will be on the inside of the underwear. This pattern does not use a lot of fabric which makes it a perfect scrap buster.
It’s a win-win – free pattern and you get to use up those oddly shaped fabric scraps!
Recommended Elastic:
The Be Bashful Bikini pattern calls for a ¼” picot elastic or scalloped edge elastic or any decorative edge elastic of your liking with sturdy but similar stretch to your main fabric.
What to look for in your fabric:
Whether you are rummaging through your old fabric scraps or you bought some new fabric for this pattern make sure to use something breathable. The cut of this garment is comfortable but it is also key to use comfortable fabric as well. You don’t want your nether regions to get too hot! Also keep in mind that you want fabric that won’t irritate your skin. A smoother fabric would be a great choice. Think about the weight of the fabric as well – is it durable for several wears or is it to heavy that you would be uncomfortable wearing this underwear in the summertime.
Mainly, think about how you plan on using this garment. It is meant for everyday wear but you may have a different idea, so have fun and make sure you pick something you will want to wear.
Supplies:
- ⅝ yard of stretch knit fabric or similar with 60% stretch
- ⅛ yard of cotton jersey or similar
- 2.5 yards of picot elastic or similar
- Polyester thread
- Ballpoint needle
- Sewing machine
- Pins
- Fabric scissors
- Paper scissors
- Applique/embroidery scissors
- Pattern Weights – can use anything from a coaster to a can to hacky sack balls
Download Your Free PDF Pattern by Subscribing to At First Blush Patterns
For Desktop users fill out the Subscription Form on the Right Side Bra. For Mobile Users scroll to the bottom of this post to fill out the form. You will be sent a link to Be Bashful Bikini where you can download the pattern for free. Thank you in advance for your subscription!
Printing Your Pattern
What is the best way to print your PDF sewing pattern?
Once you have downloaded your pattern open up the file and follow the specific directions laid out. If you are In the United States, you will be instructed to print your pattern on an 8.5” x 11” letter size printer paper. If you are in Europe and other regions that use the metric system, you will be asked to print your PDF pattern on an A4 size printer paper. These two printer paper sizes are essentially the same and should work interchangeably no matter what pattern you are printing.
What printer settings should I check before printing my PDF sewing pattern?
Before printing your PDF pattern look out for these settings and adjust them accordingly.
- Letter size paper (United States)
- A4 size paper (All other regions)
- Under Scaling select Actual Size or 100% (All regions)
- Single-sided paper (All regions)
- DO NOT “scale to fit” or “shrink to fit” or “fit to page”
- Print a “Test” page first
- If the pattern printed accurately then you are ready to print the final copy and cut it out
There is also the option of sending your printable PDF sewing pattern to a local printer. This will be an additional cost so make sure you are very specific on the exact pages you need printed to avoid additional fees. In the United States, printers typically charge per page printed.
You can also use a company like PDFplotting.com in the United States. They will print your PDF sewing pattern on a large format printing press just like the size you receive when you purchase paper patterns. They will do this for a small fee and shipping. Printing in a large format means you will not have to tape together your letter size or A4 size pieces of paper together to create your full pattern. Once you receive your long format printed pattern all you have to do is cut it out in your size.
How do you cut a printable PDF sewing pattern quickly?
If you decide to print your PDF pattern at home or a local print shop you will likely have several pages to cut out. When it comes to underwear patterns you may not have many pages so the cutting process may be minimal. However, one quick trick to cutting your pattern out faster is to use a large base guillotine. Your pattern will likely print in a frame. You can stack your paper in 3-4 pages and cut the frame out this way instead of using a scissor on each page. You can also use the guillotine to cut any straight lines in your pattern. This method isn’t perfect but it will save you some time.
Cutting Out Your Fabric and Elastic
Fabric Cutting instructions:
Before you cut out your fabric, test for the direction of greatest stretch. It could be selvage to selvage, from cut edge to cut edge or diagonal. Once determined, fold the fabric so the direction of stretch matches with the arrows on your pattern. Once you cut out and tape your pattern together, lay it out on your fabric lining up the center fold line on the pattern with the fabric fold. Pin or trace your pattern to the fabric then cut.
Elastic Cutting Instructions:
Note: You may want to come back to this once your underwear is sewn together so you can get a proper measurement of each opening (i.e. circumference of waist opening and leg openings)
Step 1: Measure the waistband opening and the leg openings then subtract 2” from each.
Step 2: Cut your elastic based on these measurements. You will have three pieces of elastic.
Time to Sew!
Sewing Instructions:
1/4” Seam Allowance Included
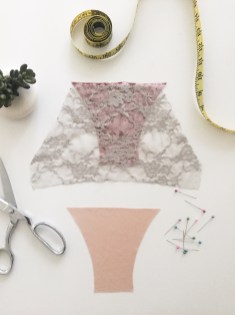
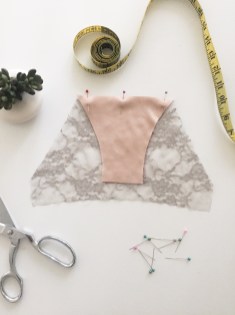
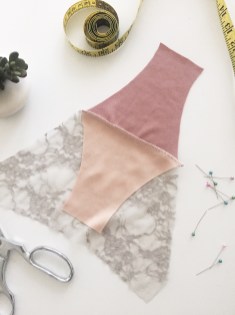
Step 1: Sandwich the Bikini Back between the two lining pieces at the back seam. Make sure the right side of the main fabric lining is facing the right side of the Bikini Back and the right side of the interior lining fabric is facing the wrong side of the Bikini Back. Use a zigzag stitch or overlock to sew the three pieces together.
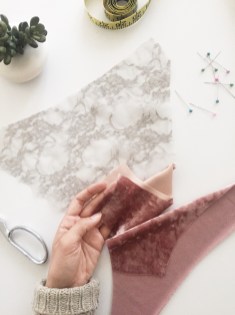
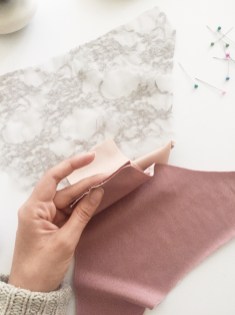
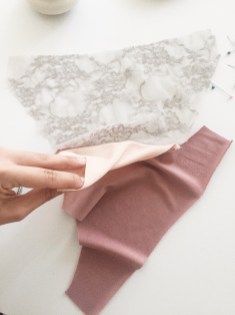
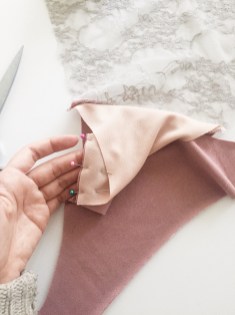
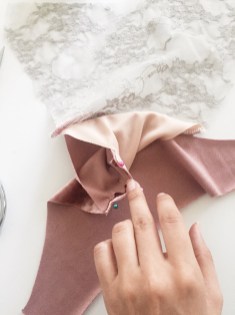
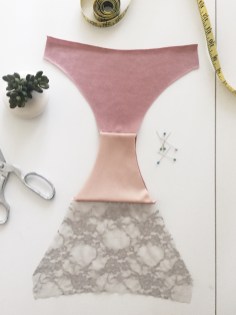
Step 2: Match the right side of the Bikini Front with the right side of the main lining piece at the crotch seam. Twist the interior lining piece so the right side lines up with the wrong side of the Bikini Front at the crotch seam. Pin in place then sew. Your underwear will have a clean seam on the front and the back once you untwist.
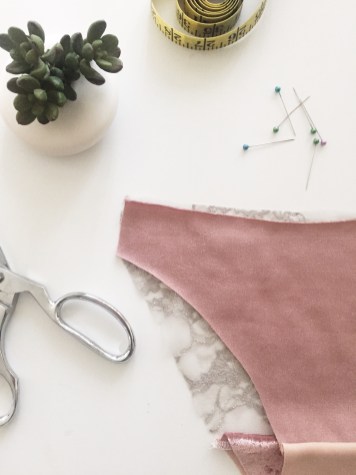
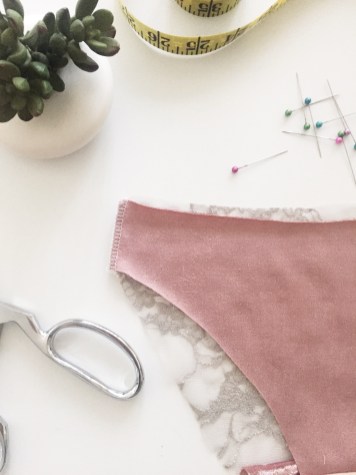
Step 3: Pin the right sides of the front and back side seams together then stitch.
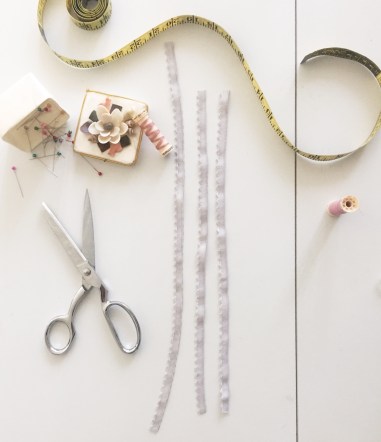
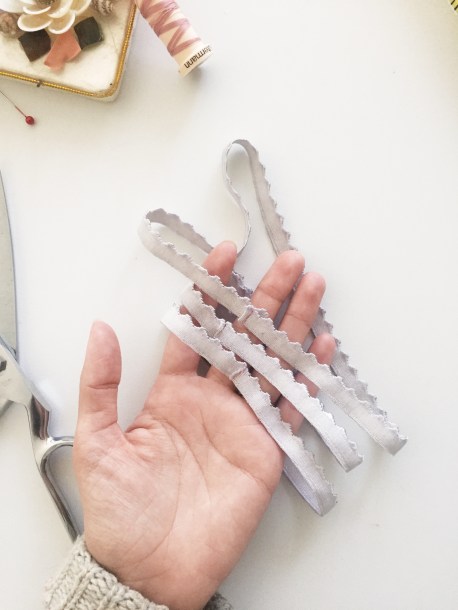
Step 4: Measure the waistband opening and leg openings then subtract 2” from each. Cut your elastic based on these measurements. You will have three pieces of elastic.
Step 5: Overlap the raw edges of the waistband elastic by about 1/2” then stitch. Repeat this on the elastic for each leg opening.
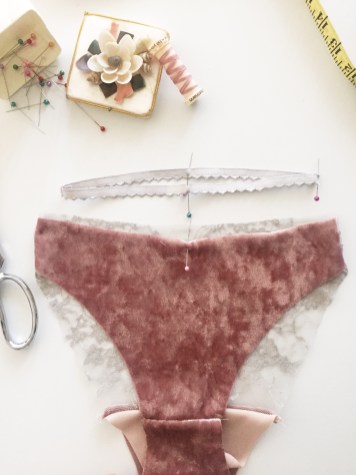
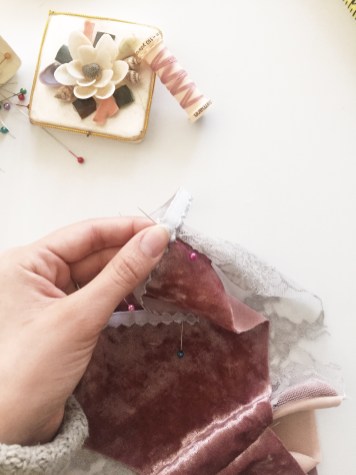
Step 6: Divide the elastic waistband four ways and mark each with a pin. Line up the seam of the waistband with either side seam of the bikini; keep right sides together and the scallop edges of the elastic towards the body of the garment. Stretch the elastic so that the pins match at both side seams and center front and center back. Pin then use a zigzag stitch while making sure to stretch the elastic to match the length of the fabric as you sew. Repeat for both leg openings.
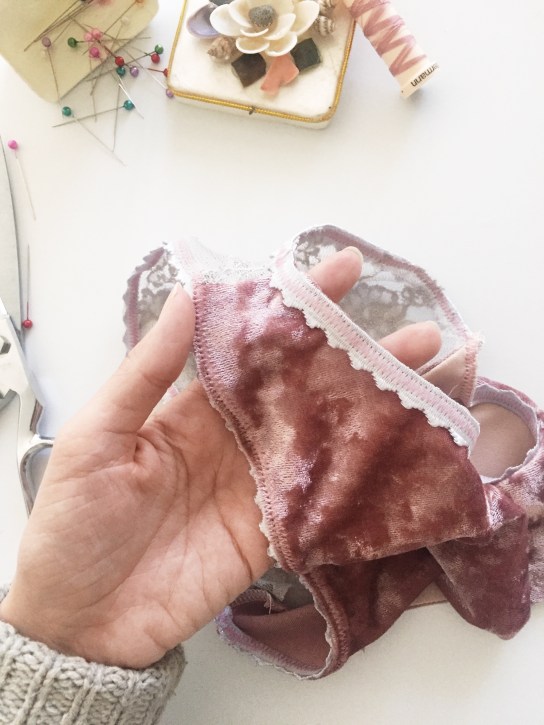
Step 7: Flip the elastic to the wrong side of the fabric so the scallop edge now points away from the body of the garment. Next, zigzag stitch around the perimeter of the waistband and both leg openings on the right side.
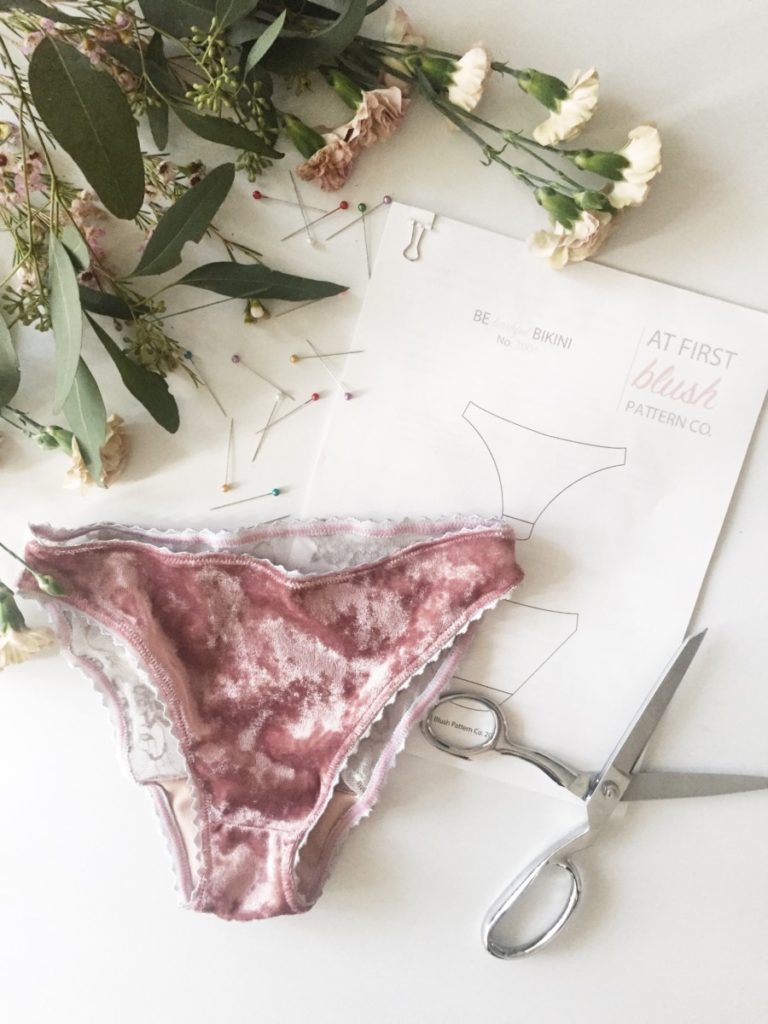
Step 8: Finish and trim off any excess threads.
Extra Sewing Tips for Knits:
Remember you are sewing a knit fabric which can be easily warped if the settings of your machine are not correct.
Here are some quick tips for sewing with knits:
When sewing with stretchy fabrics there are a few things to be aware of to sew a knit garment successfully. First, never stretch the fabric while sewing or the stitch will hold that stretch in place causing the fabric to warp. To avoid this, adjust the pressure on the presser foot to be loose enough to allow the feed dogs to move the fabric gently on their own with minimal guidance from you. Another tip is to sew in the direction of least stretch if possible. Also, be sure to adjust your thread tension to a low setting and lower your length and width stitch to achieve a narrow zigzag stitch.
When sewing with knits keep the following in mind:
- Using the correct machine needle – ballpoint needle
- Using the proper thread – polyester thread
- Setting your machine for the proper stitch – zig zag stitch
- Low thread length and width settings
- All-purpose or straight stitch presser foot
- Troubleshooting your machine when problems arise
If you need more guidance check out this article here: How To Sew a Bra and Other Lingerie at Home
Conclusion
I hope this DIY Underwear Tutorial was able to get you started on your journey of lingerie making. This is a simple pattern but it can be used time and time again. If this is your first time sewing in general this I hope you found this to be a good introductory pattern. Feel free to refer to this article if you need tips on how to print a PDF pattern or if you need guidance on how to sew with knits. Now that you are equipped with this knowledge you can DIY your underwear wardrobe. Feel free to hack this pattern and create something truly unique!
Don’t forget to share your bashful panties on social media! Tag @atfirstblushpatterns and use #bebashfulbikini #atfirstblushpatterns
For pattern support please email: atfirstblushpatternco@gmail.com
© At First Blush Pattern Co. 2023
Pin this idea for later!
