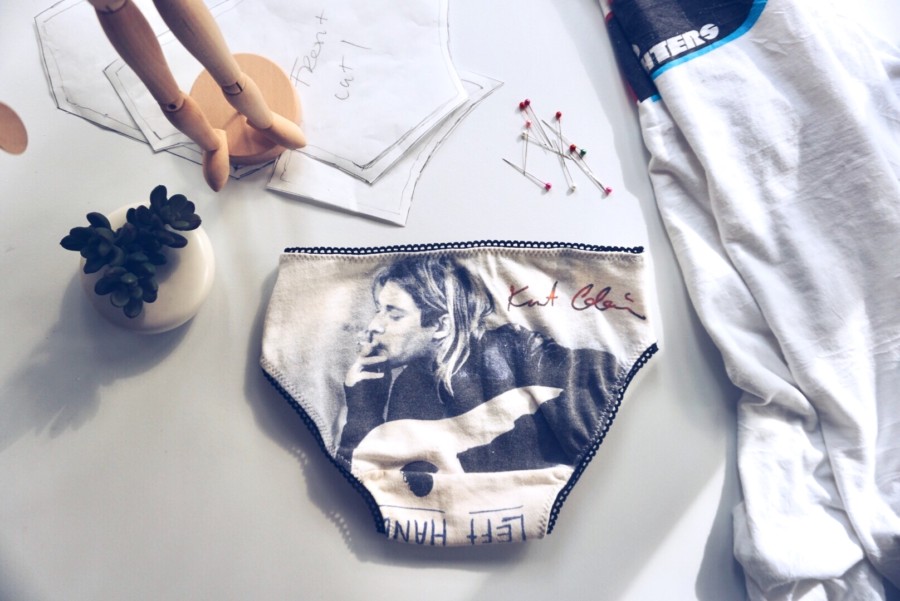
Do you know how to make underwear out of a t-shirt? Do you have a t-shirt that you absolutely love but can no longer wear because it may very well fall apart at the seams? How about a favorite pair of underwear that you would love to have more of? I have been cleaning out my closet and I came across some of my old band t-shirts that always brings up a bit of nostalgia. I have no intention of ever wearing them again but they are hard to let go of. I remember seeing some tutorials online about how to recycle your old t-shirts- one being making them into underwear. I decided to give it a try!
How to make underwear out of a t-shirt?
- Find an old stretchy t-shirt
- Find your favorite pair of underwear with similar stretch to your t-shirt
- Trace your underwear out with seam allowance
- Cut out your new pattern
- Lay your new pattern pieces on your t-shirt and cut them out
- Sew together!
I would say I’m more of a traditionalist when it comes to underwear. My criteria for the perfect underwear includes comfort, durability, attractiveness, and a flattering fit. I like a classic bikini cut underwear or a hiphugger cut underwear.
I like a bikini cut because it has an adequate amount of coverage without feeling like a pair of briefs. You can wear this type of underwear comfortably under almost any garment and it likely will not ride up the back. Hip huggers are similar in this sense. There is slightly more coverage and the ones I own don’t use elastic around the leg openings so there is no risk of unflattering fleshy rolls popping out from beneath your clothing. What type of underwear will you use?
Why would you want to use an old t-shirt to make underwear anyway?!
- The chance to upcycle something you love and give it new life
- It’s a fun project
- It’s inexpensive
- You can design your underwear any way you like
- Your underwear will be custom to your size
- You will have a one of a kind garment
- Satisfaction of making your own lingerie
What to look for in t-shirt fabric
I wish I could tell you that you can use any old t-shirt for your new underwear but unfortunately you can’t! You may have not put much thought into the type of fabric your underwear is made of but it is likely something stretchy and breathable. You will want to use a t-shirt with similar stretch properties as the underwear you are copying. Underwear needs to be able to stretch to conform to the contours of your body whether your are sitting still or in motion. It also needs to stretch enough so you can pull it over your thighs and butt and still hold tight enough at the waist so it doesn’t fall down. If the fabric you are using is not stretchy enough you may not be able to fit it over your thighs to even wear it. If by chance you do get it over your thighs normal motion could cause the seams to break. Clearly that is not a comfortable situation to be in, hence the importance of the stretch of the t-shirt.
What to look for in your RTW (ready to wear) underwear
The most important thing to look for in your ready to wear underwear is how similar the fabric is to the t-shirt you will be using. Your underwear does not have the exact measurements of your body. It is likely smaller to accommodate for stretch. This stretch is what will hold your underwear to your body and allow it move with your body when you are in motion. Underwear is made of all sorts of fabric so try to get the closest stretch possible to your t-shirt fabric or this tutorial will not work for you.
Another consideration is if your underwear has elastic on the leg openings or waistband. You want to be sure you have similar elastic to replicate this style. You can potential not use elastic but there is a reason the designer added elastic to that specific underwear garment. Likely this is extra reinforcement to keep your underwear in place. If you really don’t want to be bothered with elastic then pick a different pair of underwear all together. The most important factor is that the fabric of your underwear and of your t-shirt are very similar in stretch.
Supplies – what you will need to get started:
- 1 t-shirt with good stretch similar to the stretch of your underwear
- 1 pair of your favorite underwear with similar stretch to your t-shirt
- Polyester thread
- Ballpoint needle
- Sewing machine
- Medical paper for tracing (you can use kraft paper or tracing paper as well or be creative with whatever you have on hand)
- Pencil for tracing
- Eraser
- 18” clear ruler
- French curve
- Pins
- Fabric scissors
- Paper scissors
- Applique/embroidery scissors
- Tailor’s chalk
- Pattern Weights – can use anything from a coaster to a can to hacky sack balls
- Measuring Tape
- Elastic: Picot elastic or fold over elastic just make sure it matches with the underwear you are copying.
Drafting Instructions- How to Make Underwear Out of a T-Shirt:

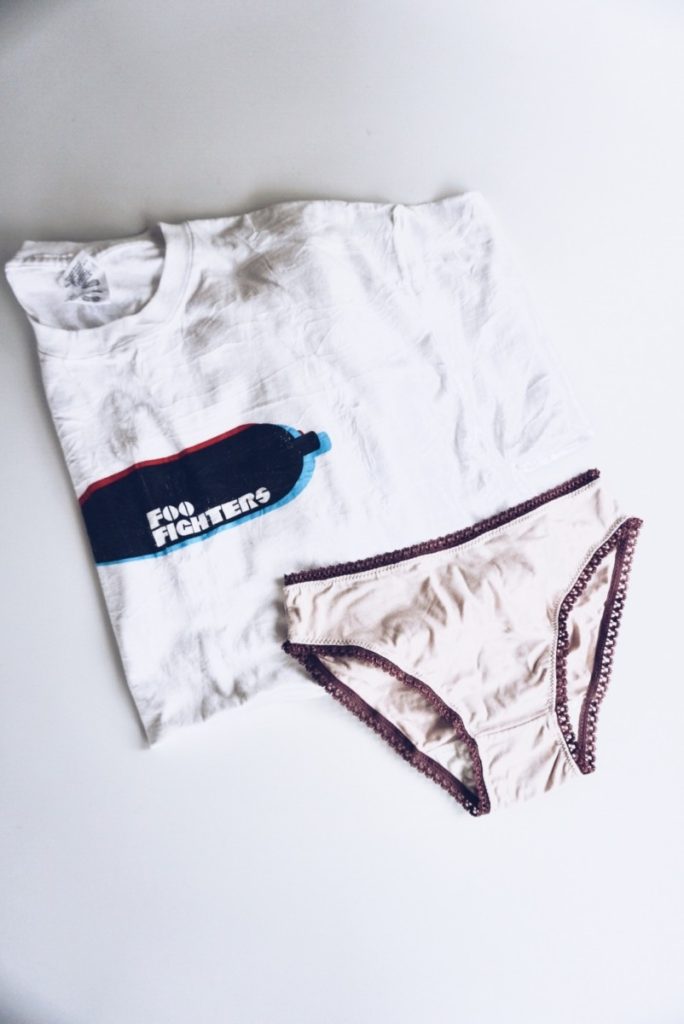
Step 1: Gather your tracing paper, pencil, eraser, clear ruler and pattern weights
Step 2: Pull out your favorite undies and make sure they are not wrinkled. If they are give them a light iron
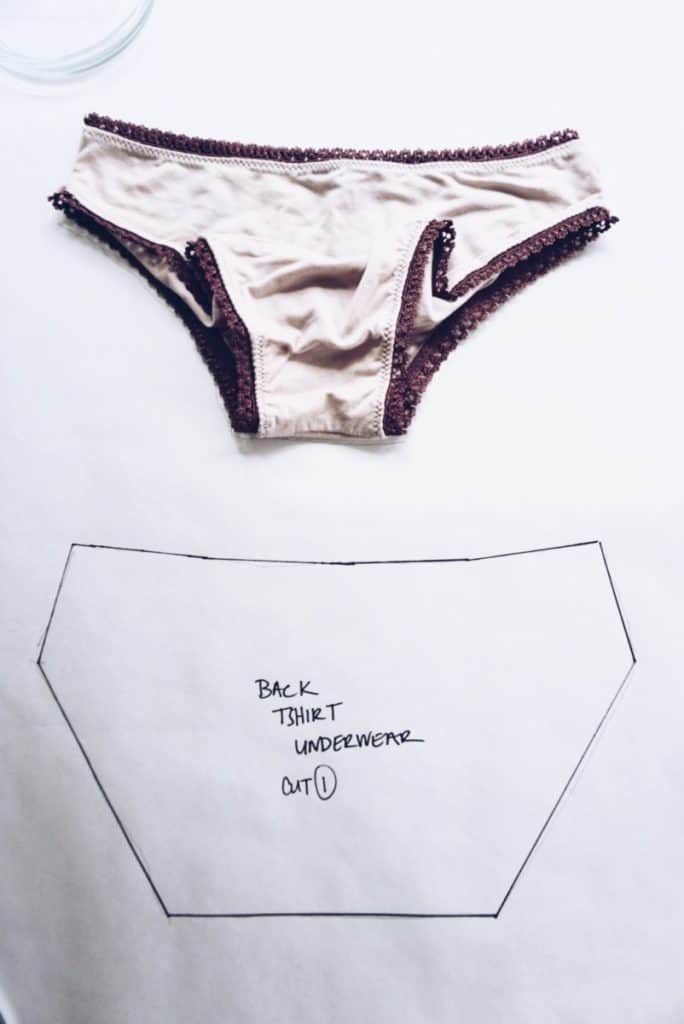
Step 3: Trace the back of your underwear – Place your underwear down on the tracing paper with the front facing you. Tracing around all edges but when you get to the crotch area trace against the seam line. This may mean you need to bunch up the front part of the underwear to see the back crotch seam.
Step 4: Next, trace the front of your underwear – Place your underwear down on the tracing paper so the back of the underwear is facing you. Bunch up the fabric so you can see the outline of the front of the underwear without bunching up the front fabric. Tracing around all the edges. When you get to the front crotch area trace against the seam line just as you did with the back. Again this will require that you bunch up the fabric to see this line.
Step 5: Now it is time to trace the lining. Expand your underwear so the outside of the lining is facing you when you lay your underwear down on the tracing paper. You will only be able to trace the sides at this point. Once you remove the underwear, close off the openings on each side with a straight line.
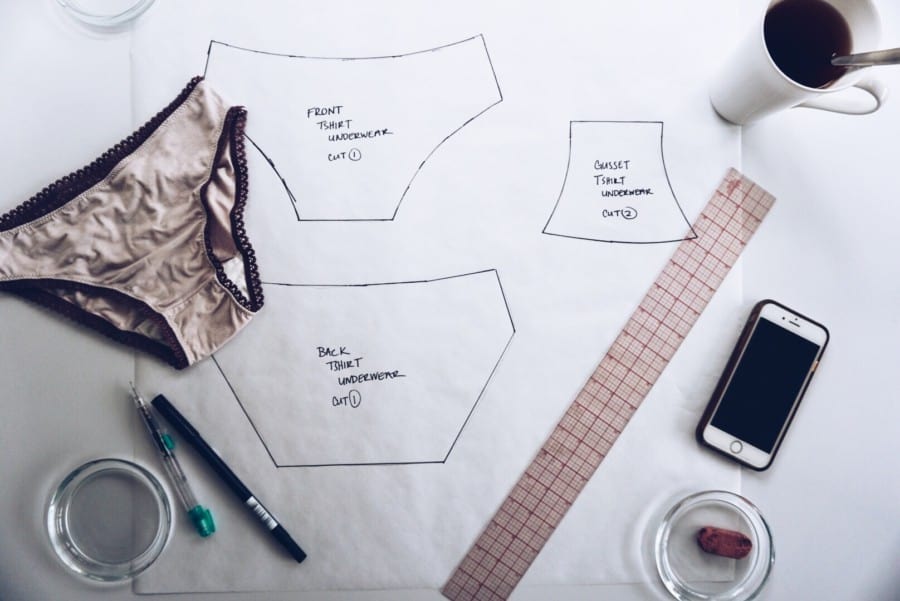
Step 6: Smooth out all your lines with a marker or a pen
Step 7: Mark your pattern – The front piece should be labeled “Front – Cut 1”, the back piece should be labeled “Back – Cut 1” and the lining should be labeled – “Lining – Cut 2”.
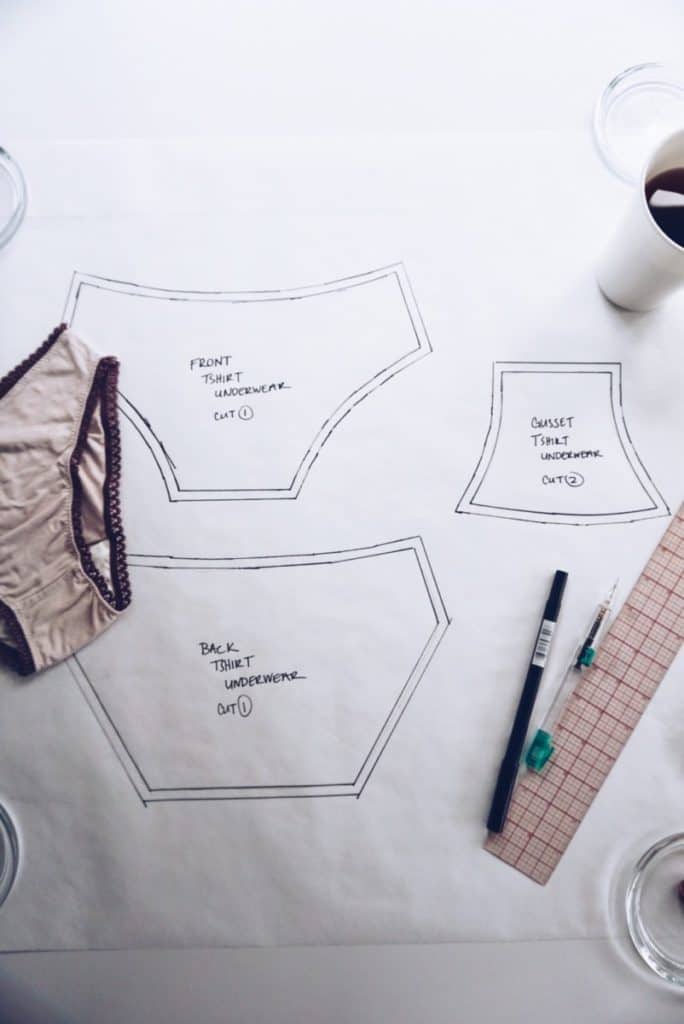
Step 8: Time to add seam allowance! 1/4”-3/8” should suffice on all sides – remember you’re adding elastic to the waistband and leg openings so your seam allowance depends on the width of your elastic.
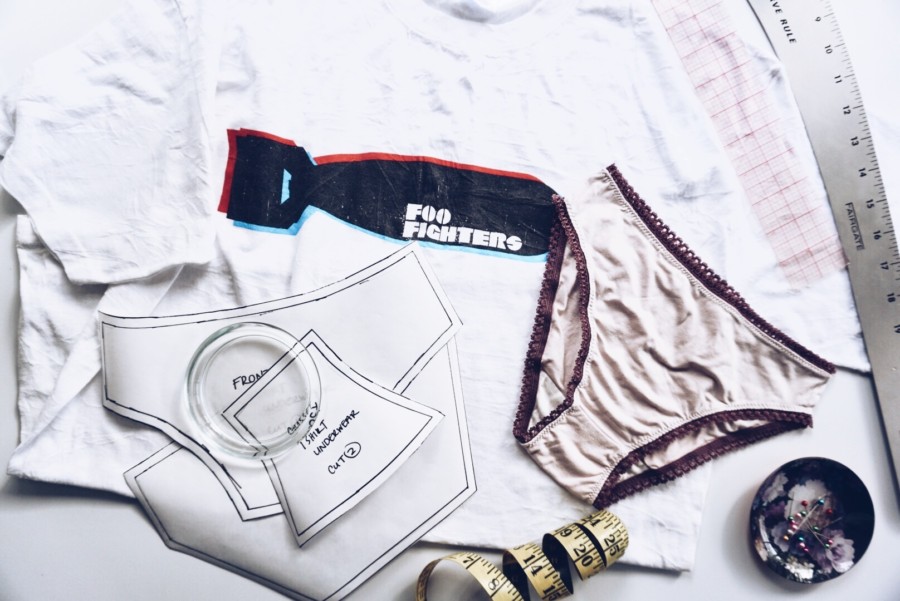
Step 9: Cut out your new pattern – remember to use your paper scissors and NOT your fabric scissors!
Cutting Instructions- How to Make Underwear Out of a T-Shirt:
Step 1: Layout your t-shirt
Step 2: If you notice that your t-shirt is wrinkled then press it lightly with your iron on a low setting. If it’s not wrinkled then skip this step
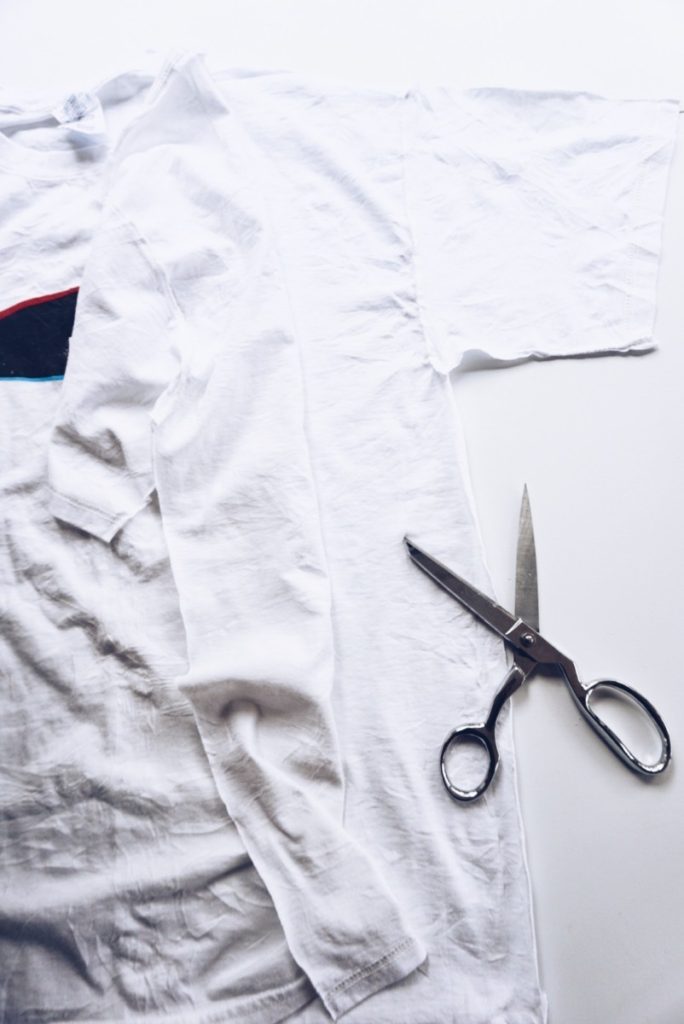
Step 3: Cut your t-shirt at the side seams from the waist/hip line up the side and through the sleeve opening
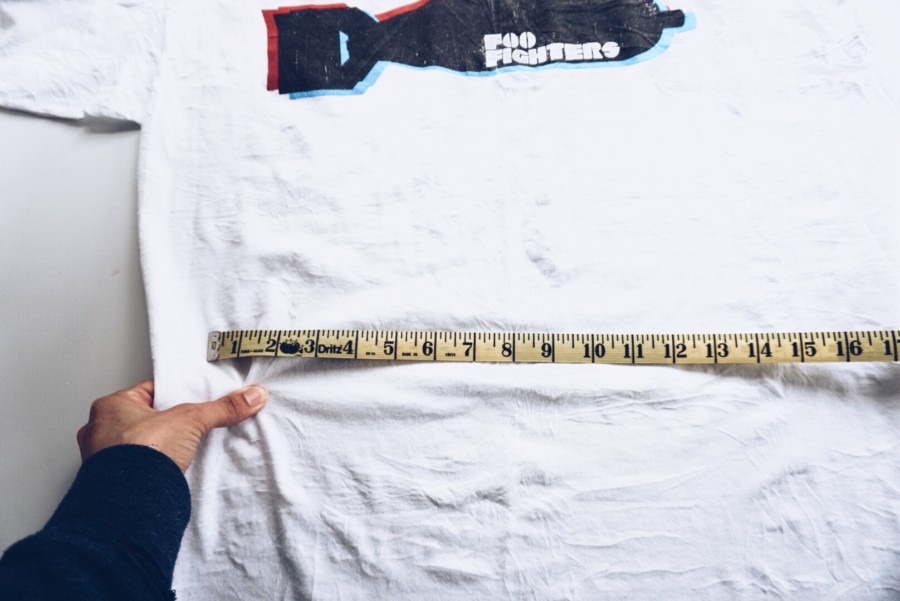
Step 4: Lay your t-shirt out flat and look for the direction of greatest stretch. Do this by holding two opposite ends and pulling them away from each other. The way that stretches the most is the direction of greatest stretch.
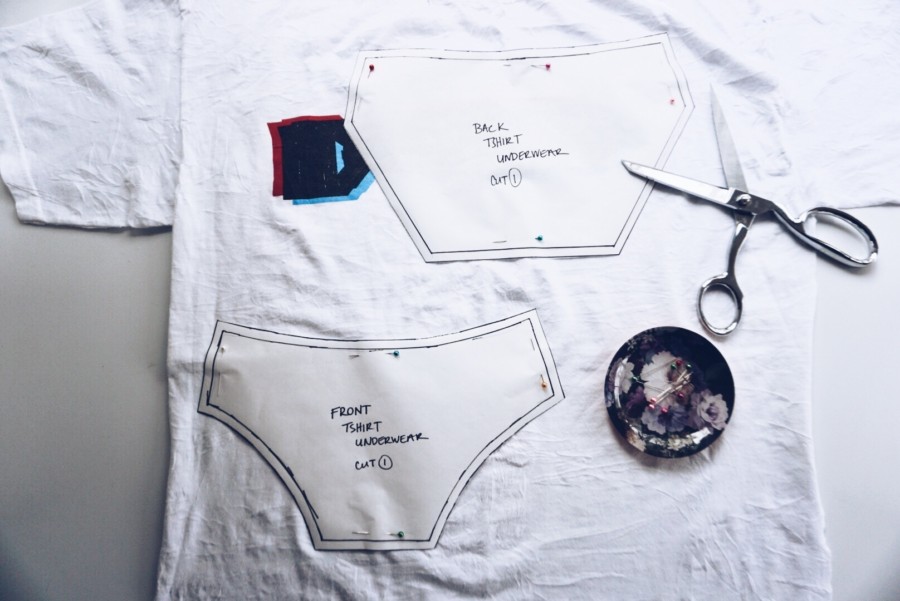
Step 5: Lay your pattern down on your t-shirt. Make sure your lay your pattern down following which area you would like to have the direction of greatest stretch. Likely, the width (from side seam to side seam) will follow the direction of greatest stretch.
Step 6: Pin your pattern to your t-shirt or use pattern weights
Step 7: Optional – you can use tailor’s chalk to outline your pattern and then you can cut or you can cut it out directly. Remember to use your fabric scissors!
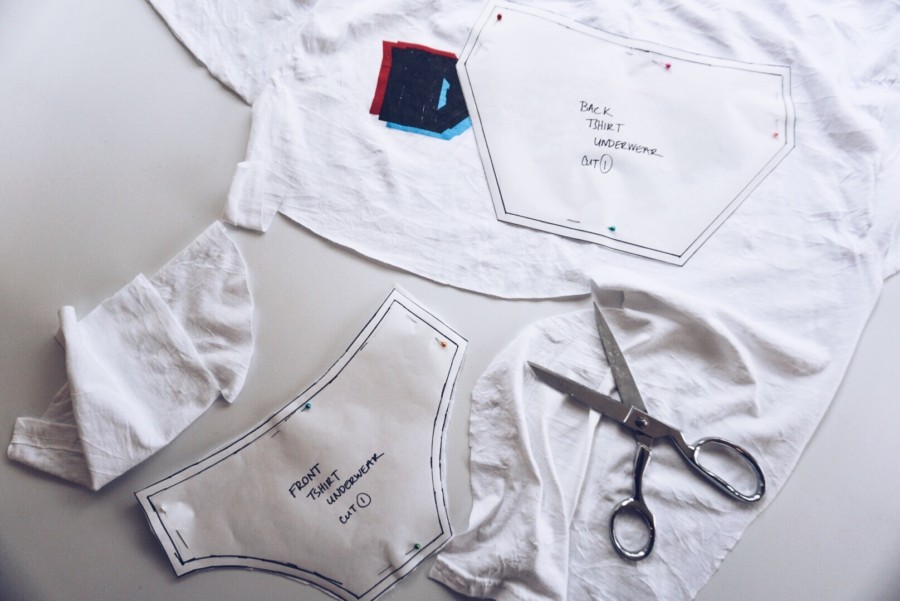
Step 8: Make sure you have all your pieces cut out – 1 front piece, 1 back piece, and 2 lining pieces. Of course this depends on your specific underwear so your piece assortment may be different from mine.
Cutting Out Your Elastic:
Note: You may want to come back to this once your underwear is sewn together so you can get a proper measurement of each opening (i.e. circumference of waist opening and leg openings)
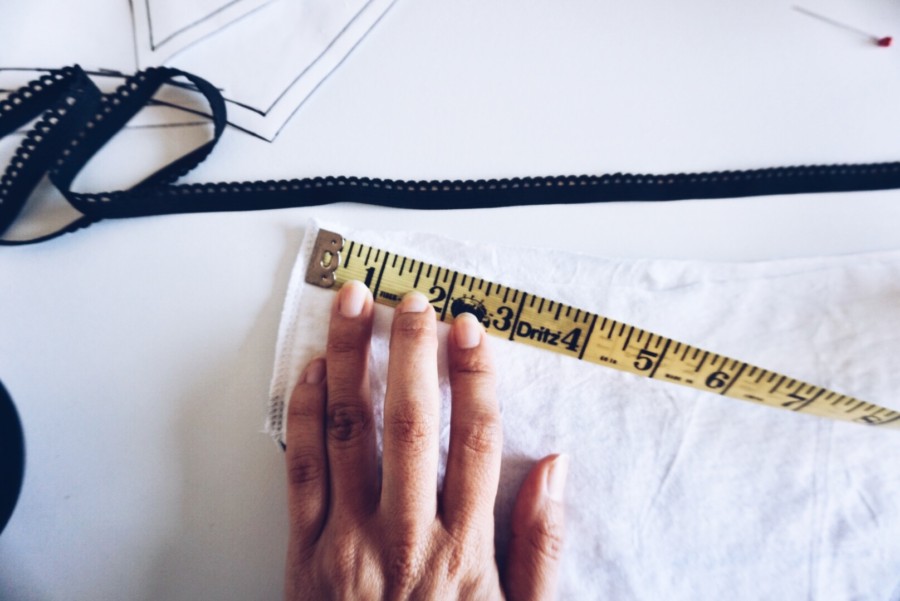
Step 1: Measure the waistband opening and the leg openings then subtract 2” from each.
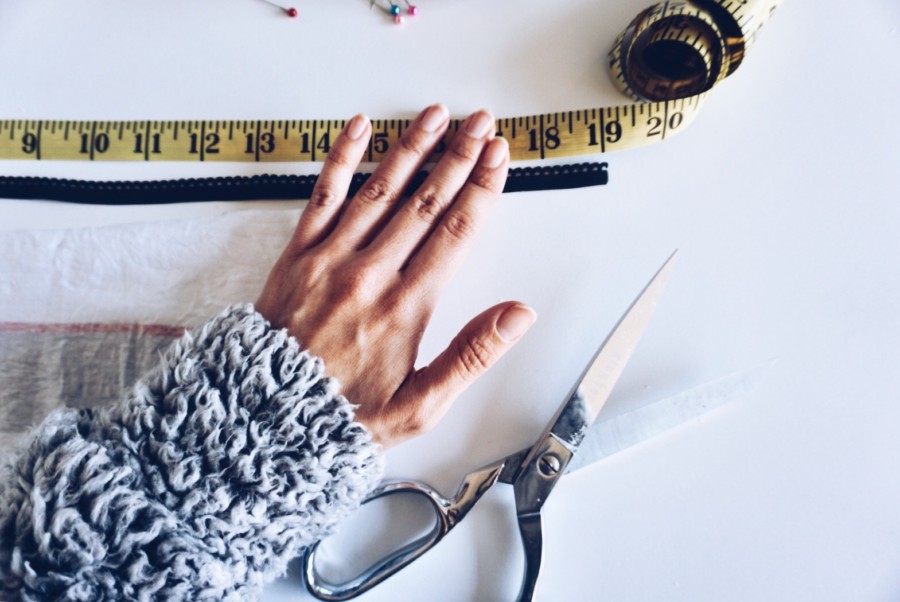
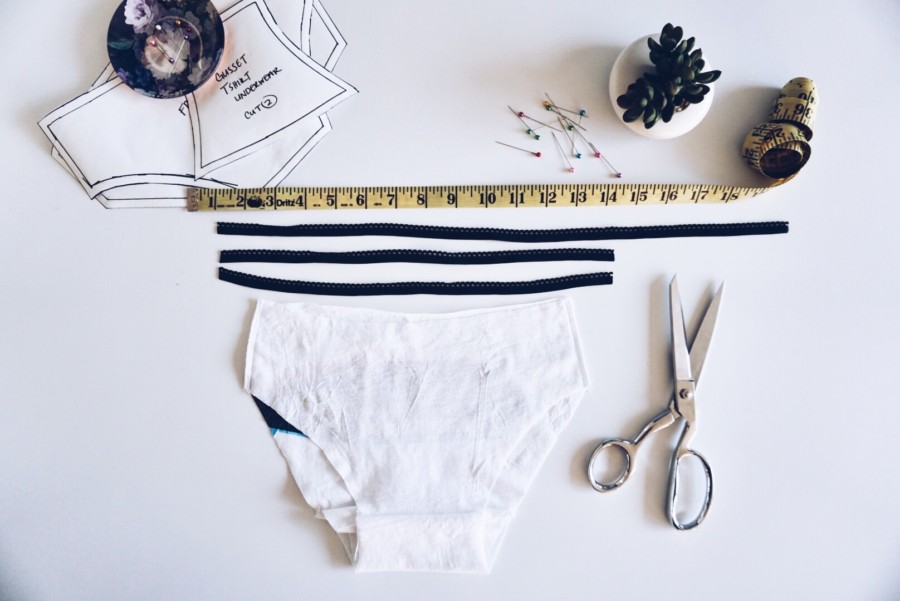
Step 2: Cut your elastic based on these measurements. You will have three pieces of elastic.
Sewing Instructions- How to Make Underwear Out of a T-Shirt:
Remember you are sewing a knit fabric which can be easily warped if the settings of your machine are not correct.
Here are some quick tips for sewing with knits:
When sewing with stretchy fabrics there are a few things to be aware of to sew a knit garment successfully. First, never stretch the fabric while sewing or the stitch will hold that stretch in place causing the fabric to warp. To avoid this, adjust the pressure on the presser foot to be loose enough to allow the feed dogs to move the fabric gently on their own with minimal guidance from you. Another tip is to sew in the direction of least stretch if possible. Also, be sure to adjust your thread tension to a low setting and lower your length and width stitch to achieve a narrow zigzag stitch.
When sewing with knits keep the following in mind:
- Using the correct machine needle – ballpoint needle
- Using the proper thread – polyester thread
- Setting your machine for the proper stitch – zig zag stitch
- Low thread length and width settings
- All-purpose or straight stitch presser foot
- Troubleshooting your machine when problems arise
If you need more guidance check out this article here: How to Sew a Bra and Other Lingerie at Home
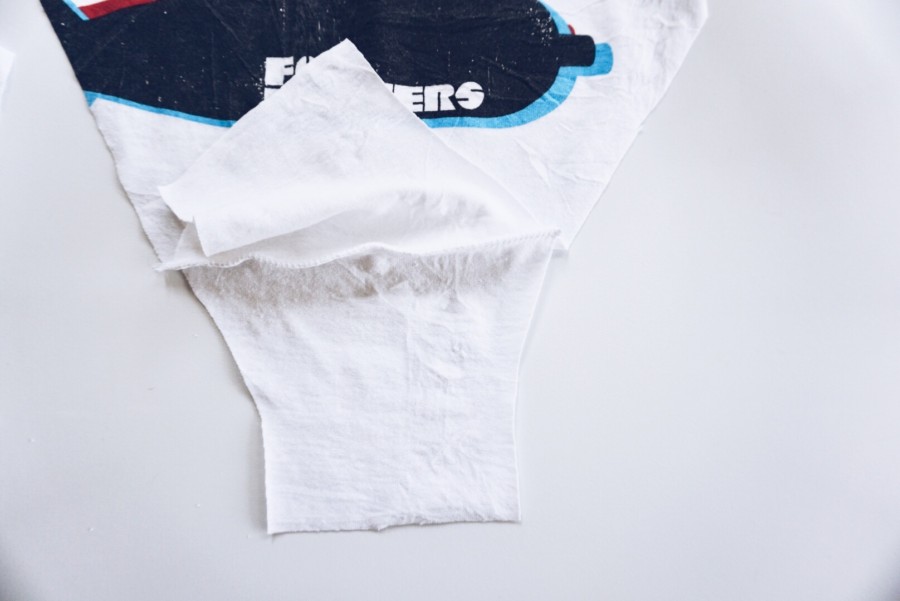
Step 1: Sandwich the underwear back between the two lining pieces at the crotch. Make sure the right side of the main fabric lining is facing the right side of the underwear back and the right side of the interior lining fabric is facing the wrong side of the underwear back. Use a zigzag stitch or overlock to sew the three pieces together.
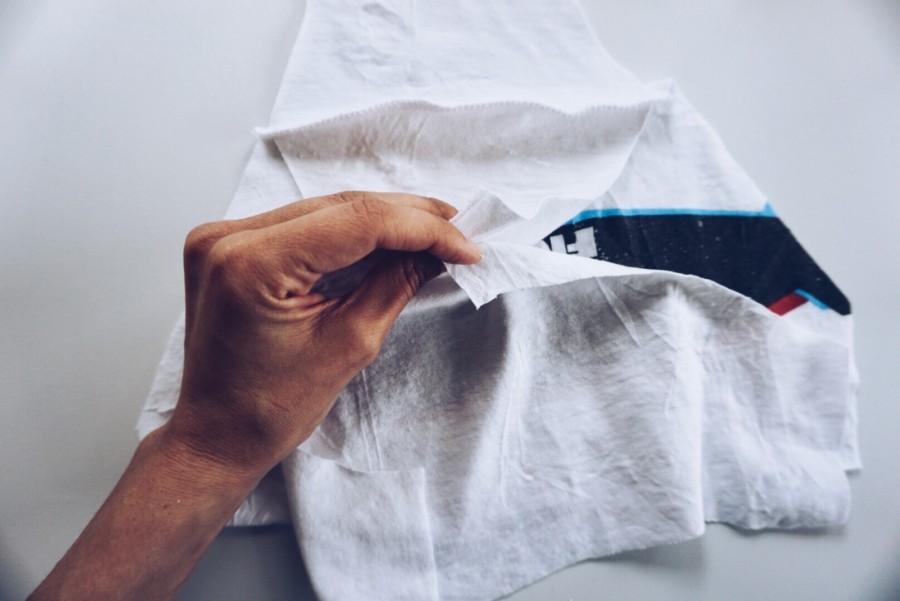
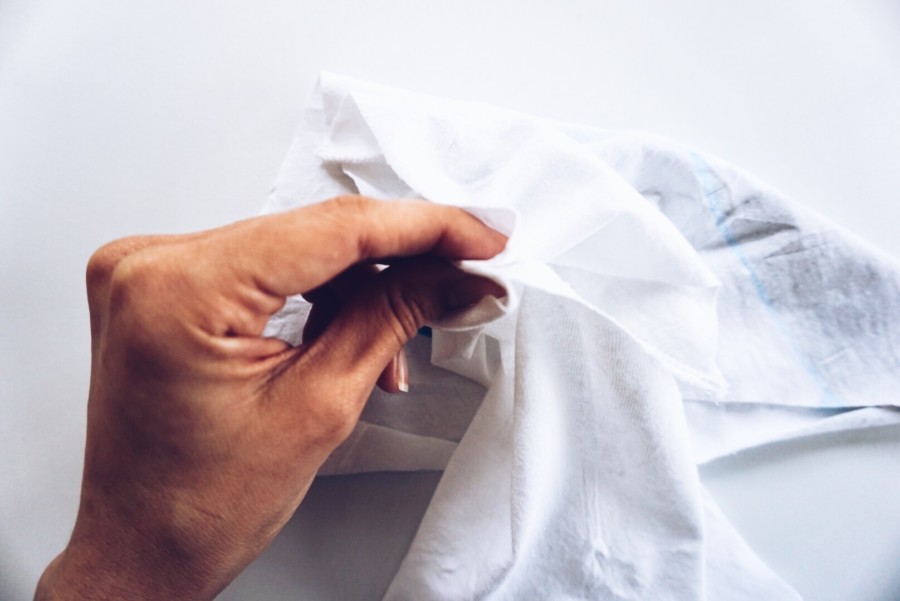
Step 2: Match the right side of the underwear front with the right side of the main lining piece at the crotch seam. Twist the interior lining piece so the right side lines up with the wrong side of the underwear front at the crotch seam. Pin in place then sew. Your underwear will have a clean seam on the front and the back once you untwist.

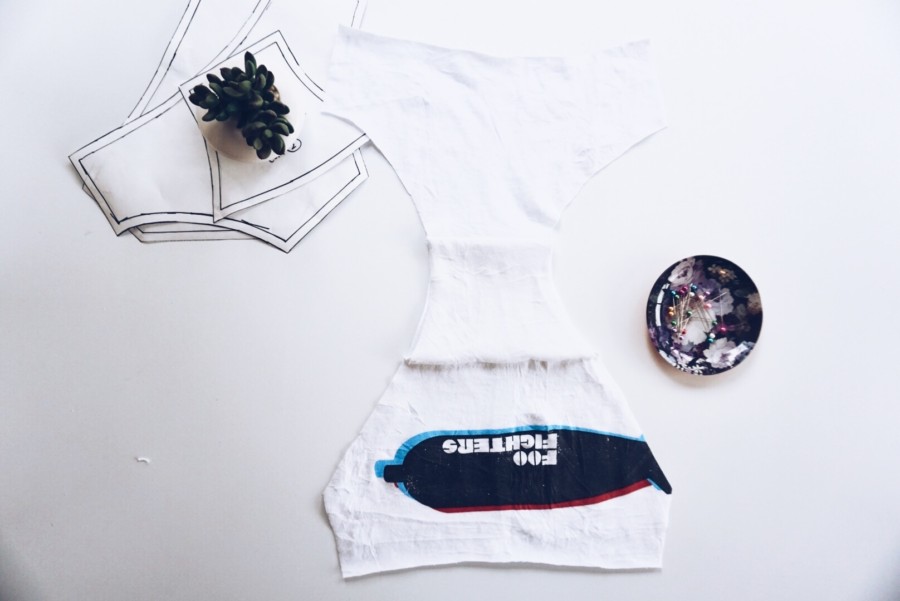
Step 3: Pin the right sides of the front and back side seams together then zig zag stitch or overlock.
Step 4: If you haven’t cut out your elastic now is the time. Measure the waistband opening and the leg openings then subtract 2” from each. Cut your elastic based on these measurements. You will have three pieces of elastic.
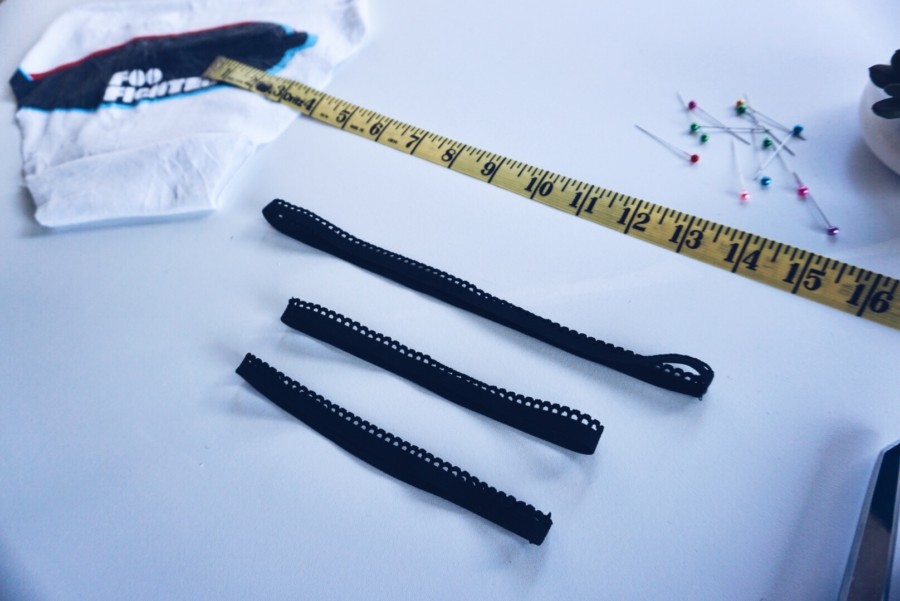
Step 5: Overlap the raw edges of the waistband elastic by about 1/2” then stitch. Repeat this on the elastic for each leg opening.
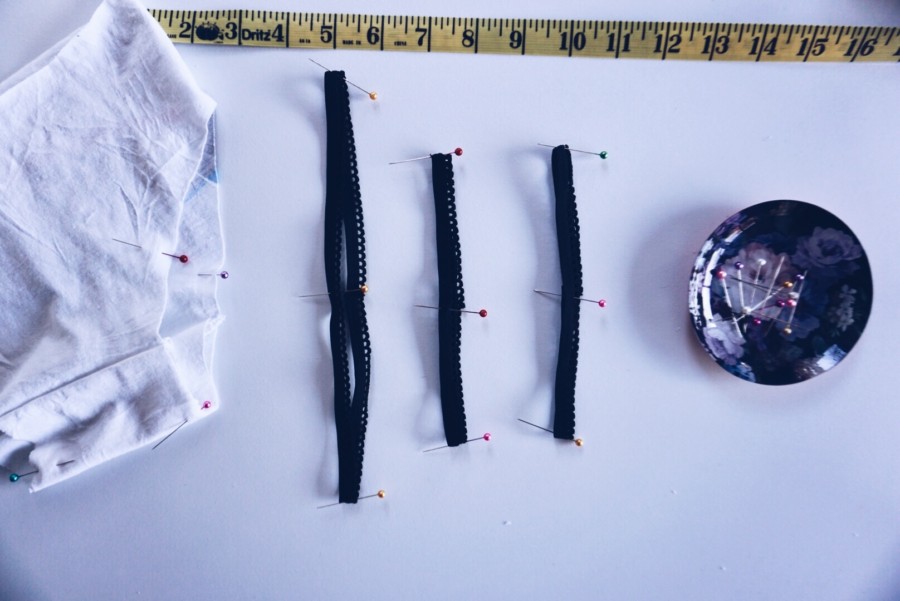
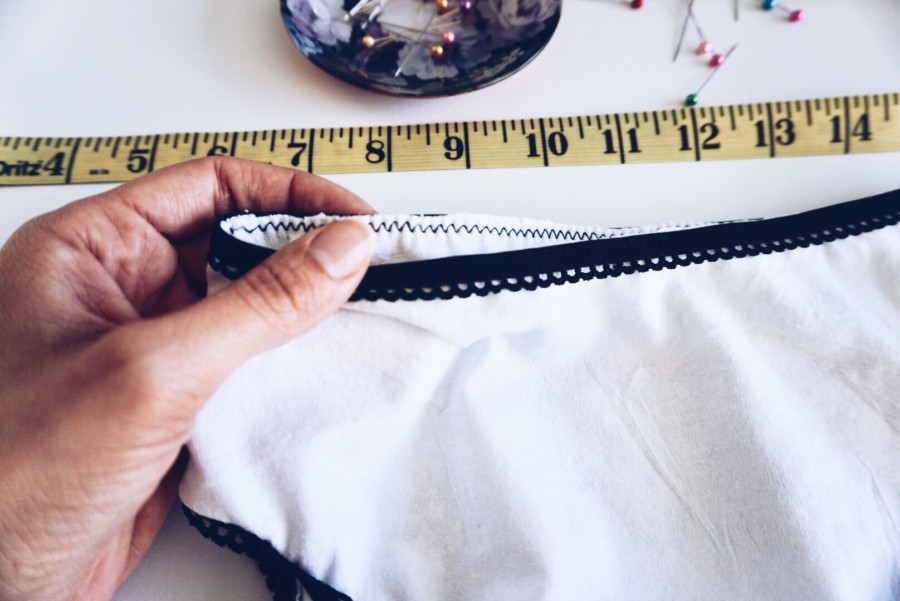
Step 6: Divide the waistband four ways and mark each with a pin. Line up the seam of the waistband with either side seam of the underwear; keep right sides together and the scallop edges of the elastic towards the body of the garment. Stretch the elastic so that the pins match at both side seams and center front and center back. Pin then use a zigzag stitch while making sure to stretch the elastic to match the length of the fabric as you sew. Repeat for both leg openings.
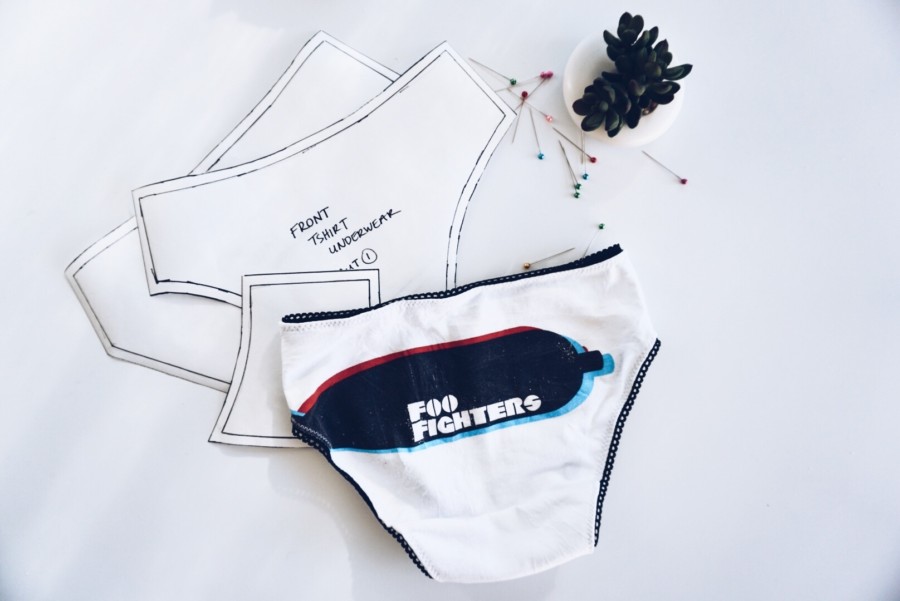
Step 7: Flip the elastic to the wrong side of the fabric so the scallop edge now points away from the body of the garment. Next, zigzag stitch around the perimeter of the waistband and both leg openings on the right side.
Step 8: Finish and trim off any excess threads.
Conclusion
This may seem like a lot of instructions for a simple pair of upcycled underwear but now you have a custom pattern, fabric knowledge and some know how on sewing underwear. You can now go through your closets and dressers and bring new life to an otherwise forgotten t-shirt which creates less waste and saves money. It is a win-win situation. I hope you enjoy upcycling your t-shirts and making/experimenting with a variety of underwear styles.
Happy sewing!
