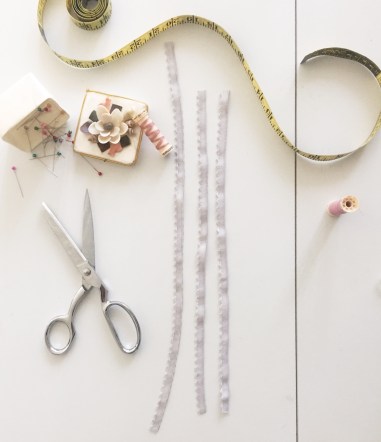
Picot elastic is a commonly used elastic in lingerie sewing. It is functional, attractive and dainty. You will typically see it in a scalloped edge but you can also find more decorative options. Knowing how to sew picot elastic correctly to your lingerie garments is an imperative skill for any lingerie maker. Read on to learn more about this common lingerie elastic.
This post contains affiliate links. When you click and make a purchase from these links, we might get a commission. It doesn’t cost you anything extra!
How to Sew Picot Elastic?
- Measure where you will be adding the picot elastic and cut based on your patterns instructions.
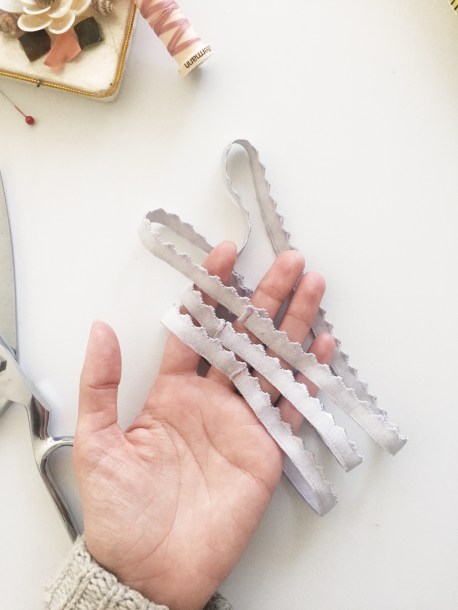
- Join the edges of your picot elastic
- Align your elastic to your garment making sure to divide the elastic up evenly around the perimeter if sewing on the round or along the straight edge if sewing a neckline for example.
- Set your sewing machine to a zigzag stitch along with the proper width and length depending on what your pattern calls for and the width of the elastic being used.
- Stretch your elastic to meet the length of your fabric as you sew on a zigzag stitch
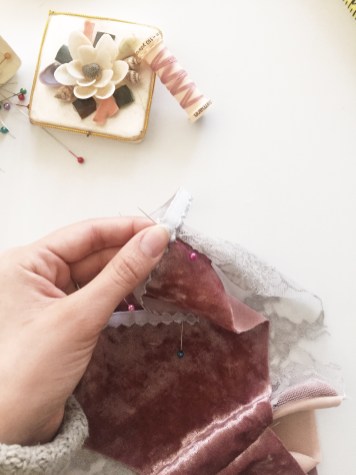
- Flip your picot elastic to the wrong side so the decorative edge now points away from the garment. Zigzag stitch in place to secure the elastic.
Let’s get into more detail about what picot elastic so you have a well-rounded understanding of this common lingerie supply as well as further instructions on how to sew with picot elastic.
What Is Picot Elastic?
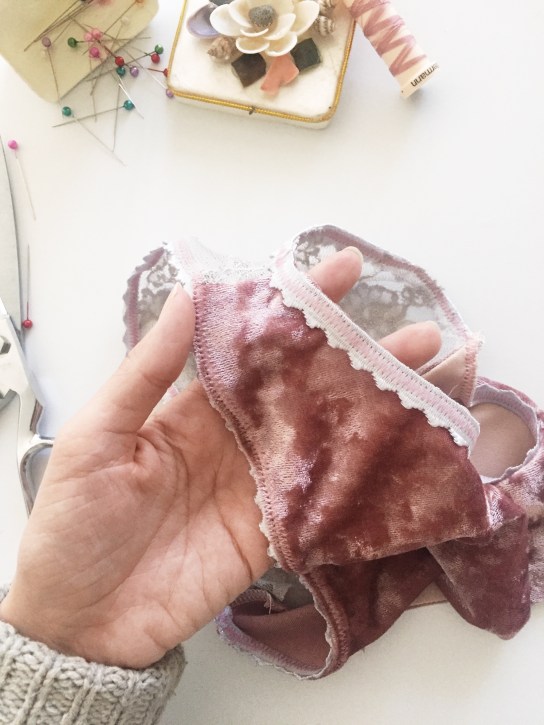
Picot elastic is a narrow elastic with a decorative edge used in lingerie for garments such as bras and underwear. It can be used in other types of clothing or crafts as well. Picot elastic can come in a variety of decorative edges but typically will have a single looped edge that looks similar to a scallop design. Picot elastic comes in a variety of widths including ¼”, ⅜”, ½”, ¾”. Not only does picot elastic come in a variety of decorative edges but it also comes in a variety or colors and weights. If you are purchasing a more unique decorative edge elastic be sure to test the stretch as the elastic may have more or less weight than your standard picot elastic. Having an elastic that is too heavy or too thin can distort your lingerie project.
What Is Picot Elastic Used For?
Picot Elastic is commonly used on the leg openings and waistband on a pair of women’s underwear. It is also used on bra bands and bra necklines. You can find picot elastic on pajamas for a more decorative touch. It is also commonly used in crafts and other diy projects such as children’s headbands. However, picot elastic is commonly referred to as lingerie elastic.
What Size Picot Elastic Do I Need?
The size picot elastic you need depends on what your pattern calls for. If you are sewing underwear or a bra your pattern should give you instructions on the width that the pattern was intended to use. Picot elastic comes in a variety of widths but some common widths include ¼”, ⅜”, ½”, or ¾”. If you are not sure look at the seam allowance that is on the pattern in the area you will be placing the elastic. Match the width of the seam allowance to the width of the picot elastic. Remember, the decorative edge of the picot elastic is all that will be seen once the elastic is sewn to the garment.
How to Sew Picot Elastic?
Step by Step Instructions for sewing on the round:
Before you begin, set your sewing machine to a zigzag stitch or 3-step zigzag stitch. Adjust the length and the width of your thread to your preference.
Step 1: Measure the waistband opening and leg openings then subtract 2” from each. Cut your elastic based on these measurements. You will have three pieces of elastic.
Step 2: Overlap the raw edges of the waistband elastic by about 1/2” then stitch. Repeat this on the elastic for each leg opening.
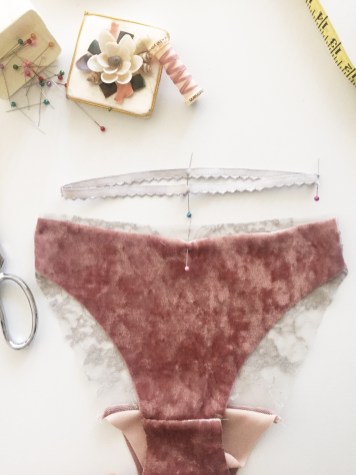
Step 3: Divide the elastic waistband four ways and mark each with a pin. Line up the seam of the waistband with either side seam of the bikini; keep right sides together and the scallop edges of the elastic towards the body of the garment. Stretch the elastic so that the pins match at both side seams and center front and center back. Pin then use a zigzag stitch while making sure to stretch the elastic to match the length of the fabric as you sew. Repeat for both leg openings.
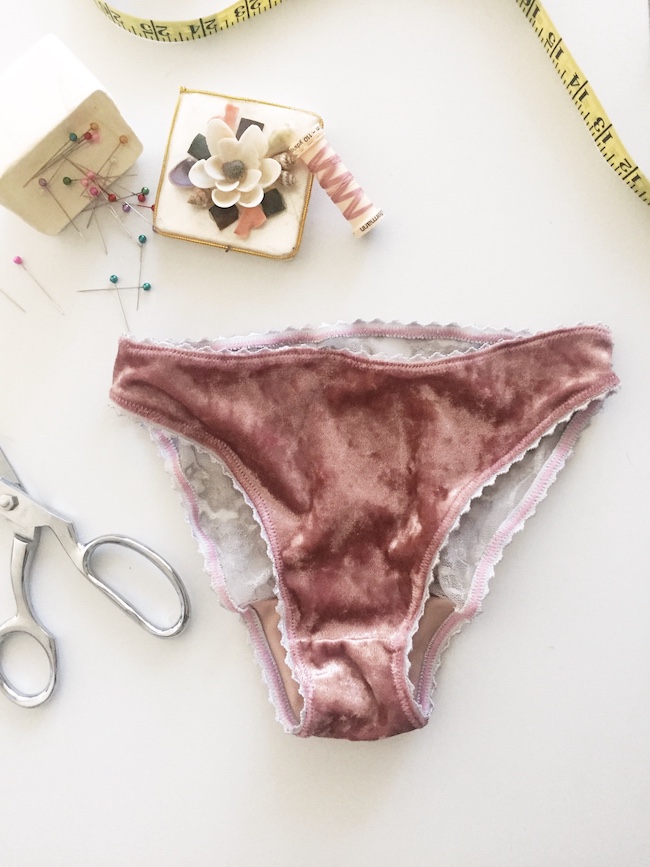
Step 4: Flip the elastic to the wrong side of the fabric so the scallop edge now points away from the body of the garment. Next, zigzag stitch around the perimeter of the waistband and both leg openings on the right side.
Step 5: Finish and trim off any excess threads.
Tips and Tricks for Sewing with Picot Elastic
- Some picot elastics have two sides: a plush side which is the “wrong” side and is comfortable against the skin and the “right” side which looks like regular elastic.
- Whenever sewing with any type of elastic including fold over elastic make sure to stop the machine with the needle down as to not distort the stretch. It also allows for easier adjusts to your elastic.
- Always check the weight of your elastic. Too firm and you may not be able to stretch it over your body. Too thin and your garment could fall right off.
- Do not overstretch your elastic while sewing. Make sure you match the stretch of the elastic to that of the fabric but be sure you aren’t stretching the fabric while sewing.
How to Join Picot Elastic?
If you are sewing picot elastic in the round like we are in this tutorial then you will need to sew the raw edges together to finish the end. You can use either a straight join or a bias join.
Straight Join
- Cut the elastic as instructed above.
- Place the raw edges together then sew across from edge to edge. Back stitch for extra strength. You can leave the excess or you can trim it down to look like a diamond shape.
Where Can I Buy Picot Elastic?
You can buy Picot Elastic at a variety of online retailers. Here is an affiliate link to standard picot elastic sold by Porcelynne on Amazon.com in black.
Also head over to my article on 18 Must Have Supplies for Bra Makers and scroll down to Picot Elastic. I have a handy chart of several online retailers that offer fold over elastic across the world.
Conclusion
You’re first foray with sewing picot elastic may be a little tedious and messy but just put in a little practice and you will easily get a hang of it. Picot elastic a staple in lingerie making so take your time and get comfortable with it. Knowing how to properly sew with this type of elastic will open you up to many more lingerie sewing projects.
Happy Sewing!
