The Kwik Sew 3167 pattern has been sitting on my sewing table for quite some time now. I was originally planning on sewing these with my girlfriends but we were only able to get through one and we haven’t been able to reschedule another session. Luckily, due to a recent long weekend and lots of sewjo I finally completed my lingerie set.
Kwik Sew 3167 Review:
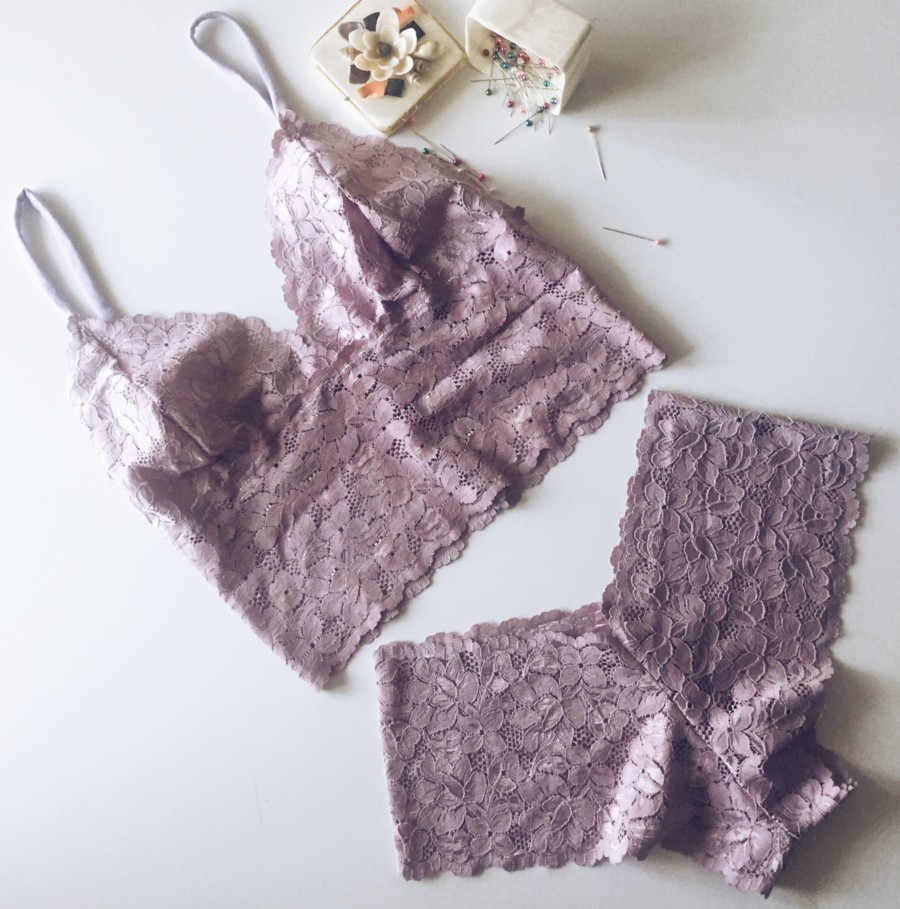
The Kwik Sew 3167 Misses Lingerie Lace Bra Camisole and Panties pattern comes with two camisole versions and four panty versions. The camisole can be sewn in all lace or with stretch edging lace. There is an option for boy-cut panties that can be sewn in all lace or with a stretch edging lace. They can also be sewn in two thong styles with either a lace back or string back.
I sewed up version B for the camisole and version C for the panties all in lace.
One major modification I made was to use narrower stretch lace at 6″ for the panties as I could not find many colors I liked in the 8″ width the pattern called for but ultimately it worked out very well. I just had to adjust the pattern slightly.
Materials:
- Recommended fabrics: Lightweight fabric with Spandex Lycra, cotton Lycra, sheer Lycra, stretch lace.
- All-purpose polyester thread
- Bobby pin
- Optional: If you trace your pattern you will need tracing paper (I use medical pattern paper), markers, and a ruler.
Purchased from:
I purchased my materials from the Downtown Los Angeles Fabric District
The Process – Kwik Sew 3167:
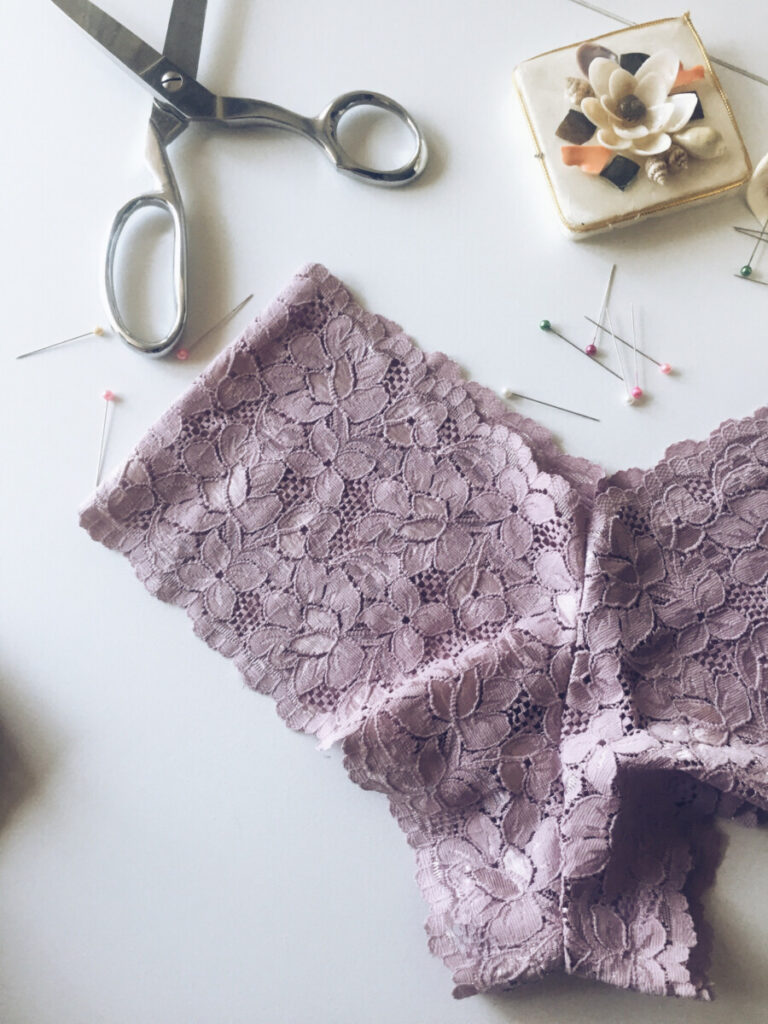
I started with the panties because they are extremely simple. You just sew one seam and secure the cotton lining. It literally takes less than 10 minutes. Talk about a satisfying sew!
I moved onto the bra cups which is also one seam down the middle- you just need to be sure you don’t mix up the inner cup and the outer cup. They look very similar. After you secure the two together at the midpoint you sew two baste stitches along the bottom edge of the bra cups. You then pull the loose threads on each side so the cups tighten or scrunch up evenly and fit between the notches on the camisole band. You simply sew the cups on making sure to align the center front and notches then you sew the back seam and remove the baste stitches.
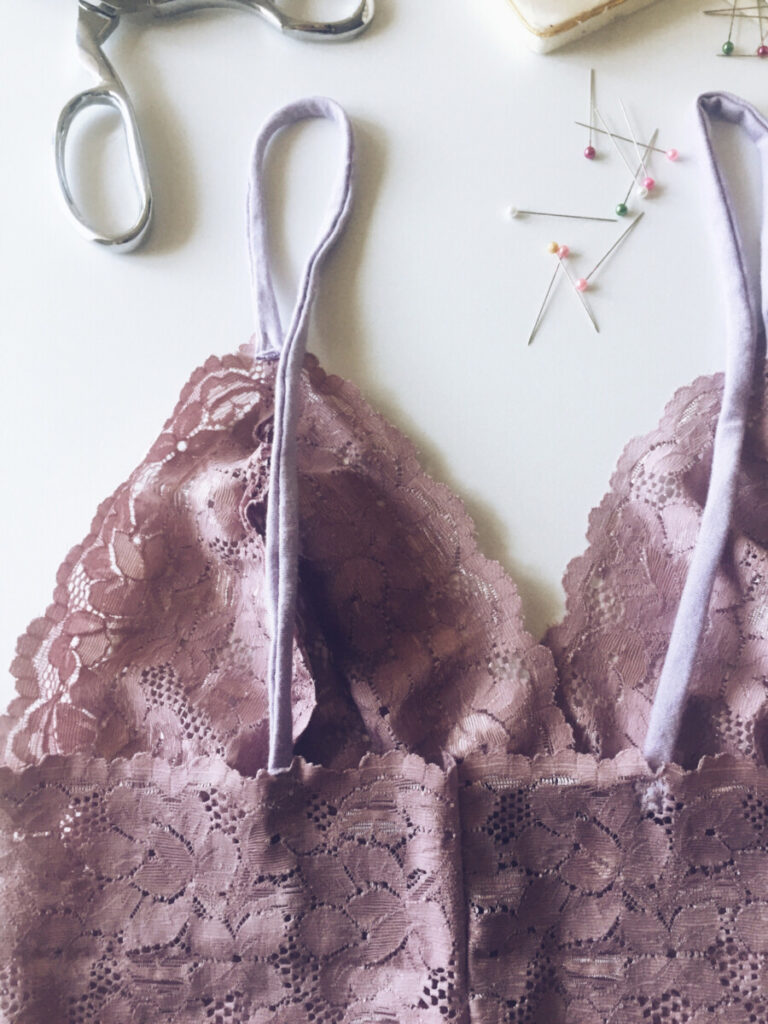
Your next step is to make the straps and sew them on. This part was difficult the first time around to be quite honest. After sewing up the straps they were still inside out and we struggled to turn them right side out without ripping the fabric. Luckily the manual shows you how to turn it right side out using a bobby pin and a small cut in the fabric. See the handy photo directions. This was a life saver and made it so easy the second time around! After you just make sure to measure the straps to fit your frame and attached them at the notch points.
There you have it! A very simple camisole set that you can complete in an afternoon. 🙂
Hiccups:
- My straps ended being slightly longer so I had to re-adjust them which wasn’t too bad
- I also sewed one side of the lace on the wrong side. I didn’t notice it until sometime after I finished sewing it. It’s very subtle luckily.
Recommendations – Kwik Sew 3167:
- Use the bobby pin method! It saves so much time
- Trace out your pattern to make more for others
Happy Sewing!
More Lingerie Sewing Articles:
DIY Underwear Tutorial | Free Pattern | Be Bashful Bikini