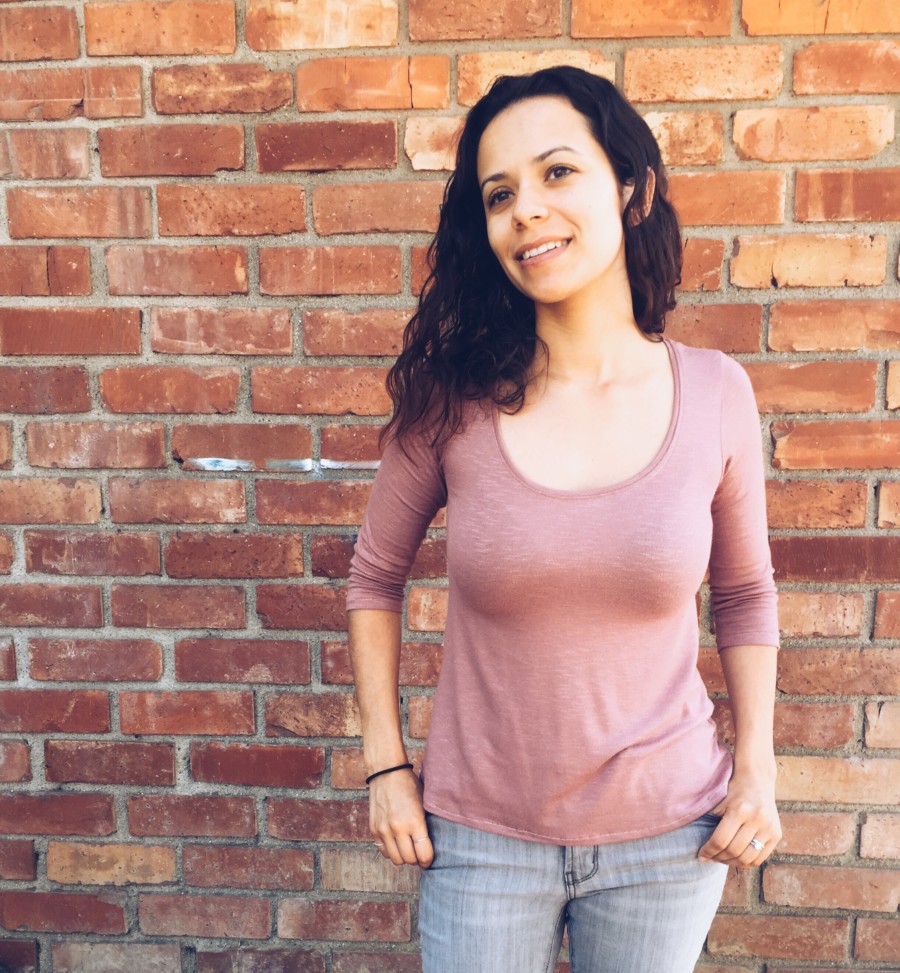
I’m currently on a kick to sew up practical pieces for my work wardrobe. There is so much to sew and so little time so I kicked off my first work wear pattern with the Deer and Doe Plantain Shirt Pattern with a ¾ sleeve and no elbow patches.
I recently was able to enjoy a three-day weekend at home and while I was planning on sewing up a different pattern I realized I didn’t print it out. Luckily, while I was looking through my pattern stash I found the Deer and Doe printout that I almost forgot about. I continued on to my fabric stash and found I had some extra fabric from making my Valentine and Stitch Angelina dress. Time to make a new shirt!
The Low Down:
I haven’t even mentioned that this pattern is FREE! You can download the PDF pattern by clicking here: Deer and Doe pattern shop.
It comes in short, three quarter and long sleeve options. The latter two having an optional elbow patch. It is fitted at the shoulder and around the bust then flares at the waist. It’s very flattering!
Materials:
- Recommended fabrics: Lightweight jersey knit (cotton, rayon, linen, wool) with 40-50% stretch
- Optional: 10” clear elastic and twin needle
Purchased from:
I used leftover fabric from my V&S Angelina project that I bought in Downtown Los Angeles.
The Process:
The Plantain T-Shirt is a quick sew. If you have a couple hours to spare, you’ll be able to get this done and wear it right away.
The directions are straightforward. I’m not used to European measurements so I measured myself and went with a size 38. It fits perfectly.
I cut my fabric out using pinking shears although it isn’t necessary with a jersey knit since it won’t fray. Since I was using spare fabric I didn’t have enough matching thread so I went with a softer pink. It is more visible especially if you mess up but not noticeable unless you are looking for it.
Also, this pattern calls for a 5/8” seam allowance which is pretty substantial. You end up trimming the allowance down per the directions.
There are a total of 4 steps. Shoulders/neckband, sleeves, side seam, hem. Finished.
I’m hoping to wear this tucked in and un-tucked with work trousers or a mid-calf skirt and a fitted knit blazer with loafers.
Hiccups:
I had to undo some stitching around the neckband that got a little wonky but no other issues otherwise.
Recommendations:
Definitely measure yourself beforehand as this is a form fitting blouse. You want to be comfortable around the underarms and bust when wearing it.
Take it slow when pinning the neckband, sewing it on and finishing it. I cut a small clip on the center front neckband to make attaching it to the neck easier.
Look! I even made a second one just a few days later!
Happy Sewing!

