You made your bra straps and now you are reading through your pattern booklet for directions on how to attach a bra strap onto a bra. There are several ways to go about it but of course follow your pattern and use this tutorial for some extra guidance and reassurance. We will discuss all the different ways to attach a bra strap and more!
This post contains affiliate links. When you click and make a purchase from these links, we might get a commission. It doesn’t cost you anything extra!
How to Attach a Bra Strap?
There are 4 methods which include:
- Attaching the Adjusters in the Front with a Strap Extension
- Attaching the Adjusters in the Back with a Strap Extension
- Attaching the Adjusters in the Front with No Strap Extension
- Attaching the Adjusters in the Back with No Strap Extension
How many ways are there to attach a bra strap? More than we probably realized until we started bra making! Well that just means we have options to find and make our custom fit. Read on to learn more about bra strap elastic and then let’s dive into a detailed step-by-step tutorial on how to attach bra straps in a variety of different ways. Hopefully one of these examples fits your current pattern and helps you move on to the next step.
What is Bra Strap Elastic?
Bra strap elastic is high quality elastic with minimal stretch and good recovery. Bra straps should be strong in order to properly hold up the breasts but still allow them some natural movement and breath-ability within the bra. The standard width for bra straps is ½” but many retailers offer a variety of widths. Bra straps can be found in ¼”, ⅜”, ½”, ⅝”, ¾” and even up to 2” width. As mentioned above, you don’t have to use the standard elastic bra strap for your bras. There are non-stretch options available although less common because they lower the lifespan of your bra due to little recovery from stretch after repeated wear. There is also an option of dividing the strap into half non-stretch and half bra strap elastic. This has a more decorative element as the non-stretch fabric is typically a fabric that matches with the main fabric of the bra. If you like the non-stretch route but find that your straps are no longer supporting your bra well you can save your non-stretch strapping by removing it from the bra and cutting away the excess then sewing it back to your bra as an option to extend the life.
Types of Bra Strap Elastic – How to Attach a Bra Strap:
Plush Elastic: Also known as plush back elastic or simply bra strap elastic. This type of elastic has one plush side and one matte or shiny side. The plush side is worn against the skin for comfort.
Satin: Also known as strapping plush elastic. This elastic has two smooth shiny sides.
Matte: This type of elastic is plush on both sides of the elastic so there is no “right” or “wrong” side.
Decorative: This elastic has a decorative finish on the right side of the elastic. Finishes include lace designs, pleating, ruffles and borders. The wrong side of this elastic is typically a matte plush finish.
Picot: This is a lighter-weight elastic with a scallop edge design typically used on the neck of the bra and sometimes on the bottom of the band. Picot elastic is also great for underwear. It is functional and decorative for a nice clean finish to your bra and panty projects.
What are Bra Straps Made of?
Bra straps are typically made of elastic. They do have other non-elastic fibers woven to provide structure and support. Some bra straps are purely woven and can be made of a variety of fabrics including twill or bias tape. Some bra strap elastics will just have elastic on one side with a decorative woven design on the other side.
When we think of bra straps we have to mention bra strap rings and sliders. These are the hardware that attach to a bra strap to make it adjustable or to simply attach the strap to the bra itself. Bra rings and sliders come in metal and plastic and are offered in the same widths as bra straps. These widths include ¼”, ⅜”, ½”, ⅝”, ¾” and even up to 2”.
How to Attach a Bra Strap – 4 Methods Explained
But First! Does your pattern have a strap extension?
The bra strap we are sewing is for a cup with a strap extension. A strap extension refers to the bra cup designed in a way that a portion narrows into the size of the bra strap so that you can attach the bra strap to the bra cup directly.
Some bra patterns do not have a strap extension. If you are sewing a bra without a strap extension you will simply sew a loop of elastic to the area of the cup where you would like to attach your strap. Within this loop you will add a ring before you secure it with stitching. You can make the same bra strap in this tutorial and just loop the raw end of the bra strap through the ring that is attached to your cup. Be sure to sew your strap with the “right” side facing outward.
Technique 1A: Strap Extension
Attaching the Adjusters in the Front with a Strap Extension
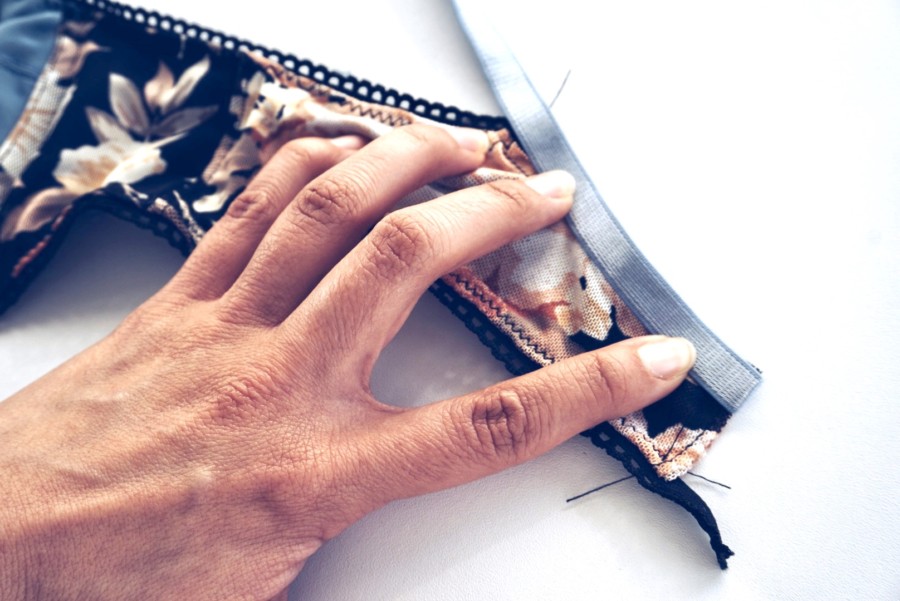
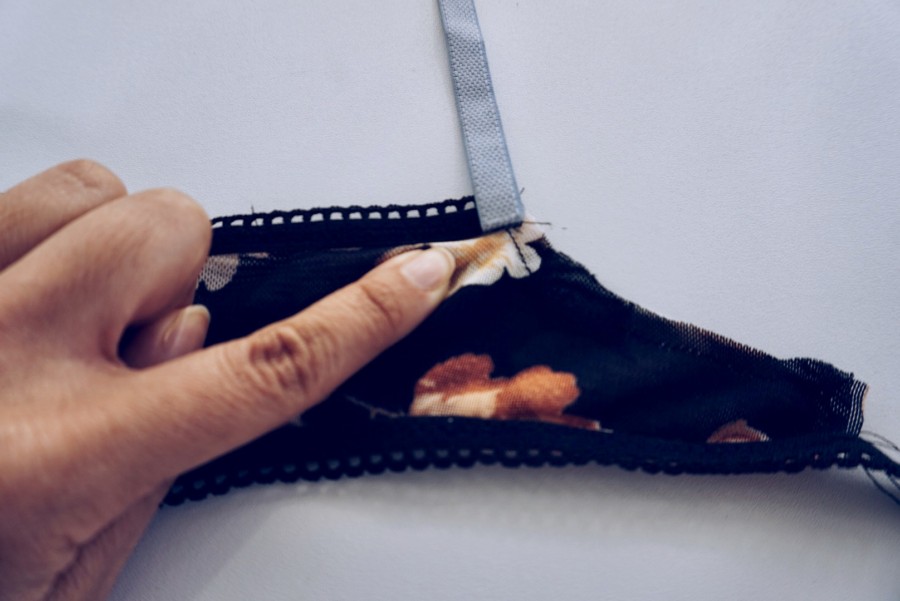
Step 1: Attach the raw edge end of your strap to the back of your bra either by sewing the strap following the back curve or attaching the raw edge of your bra strap where your pattern instructs or based on your personal preference. It should be at least ¼” down the back band. Bartack or narrow zigzag to secure in place.
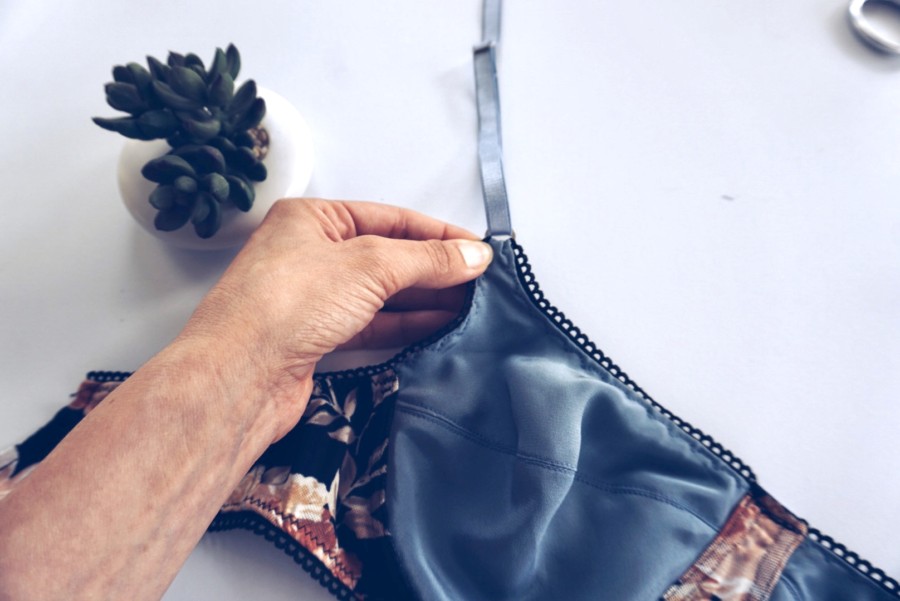
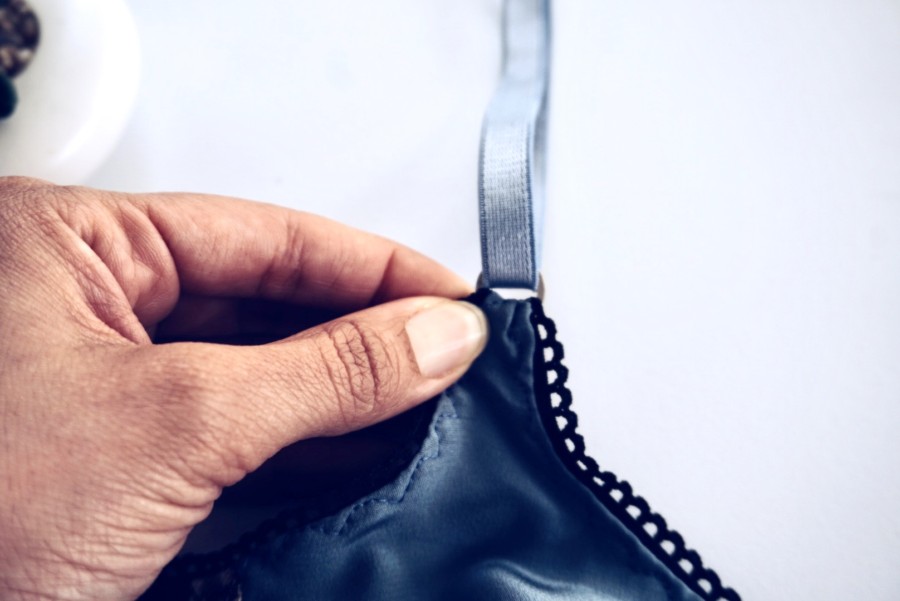
Step 2: With the sliding adjuster facing you and the looped ring pointing downward insert the strap extension into the ring and fold it over toward the inside of the bra to enclose the ring. Bartack or narrow zigzag stitch in place to secure the ring.
Step 3: Repeat for the other strap
Technique 1B: Strap Extension
Attaching the Adjusters in the Back with a Strap Extension
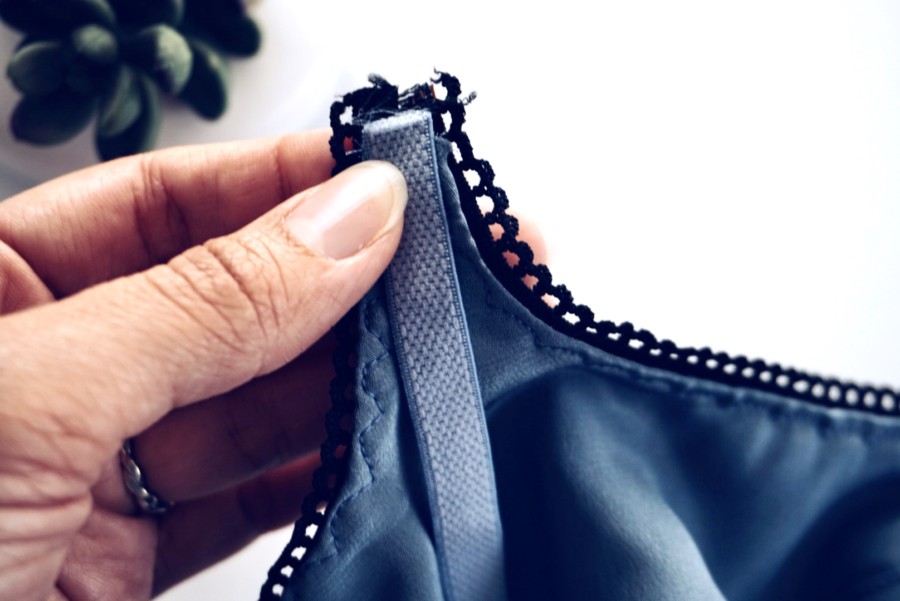
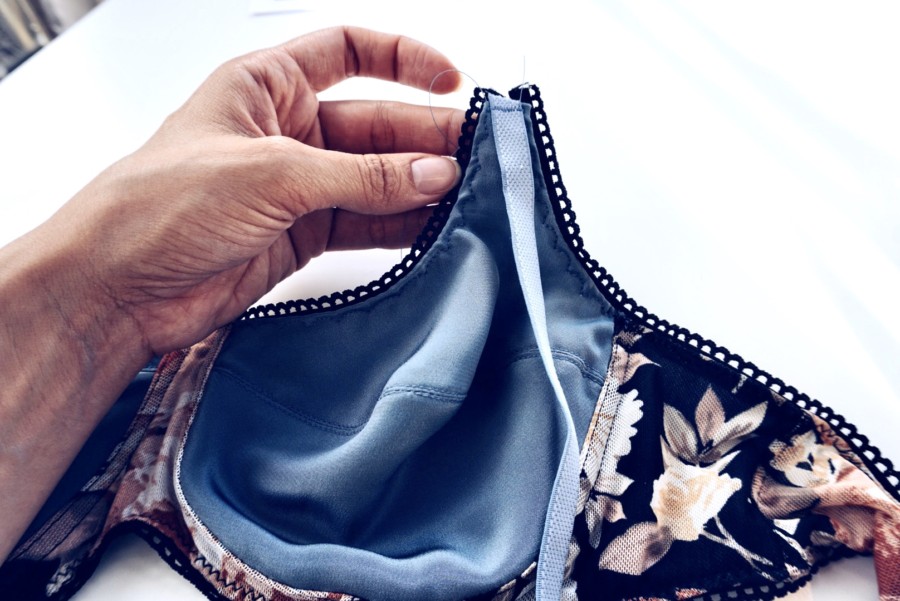
Step 1: Attach the right side of the front strap extension with the right side of the bra strap that has the raw edge using a straight stitch.
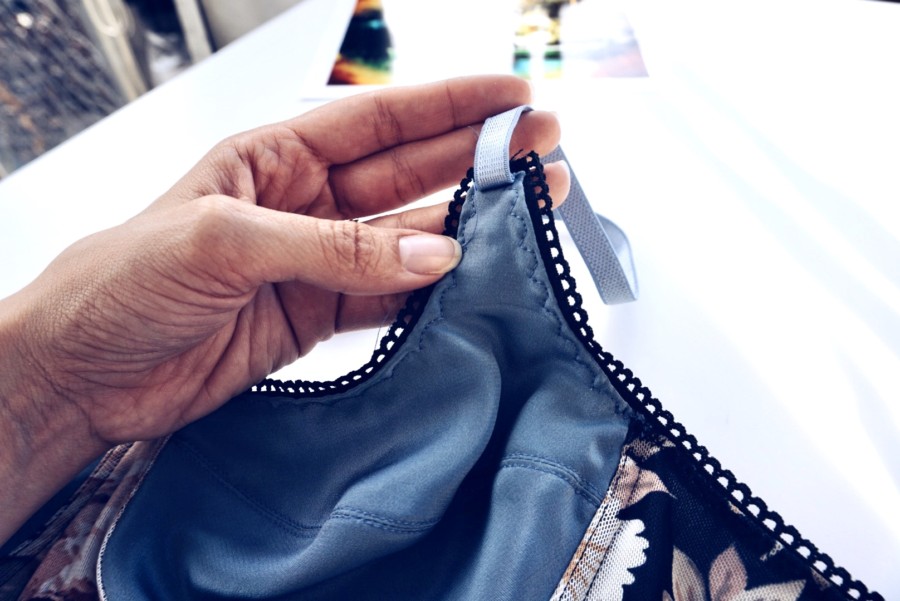
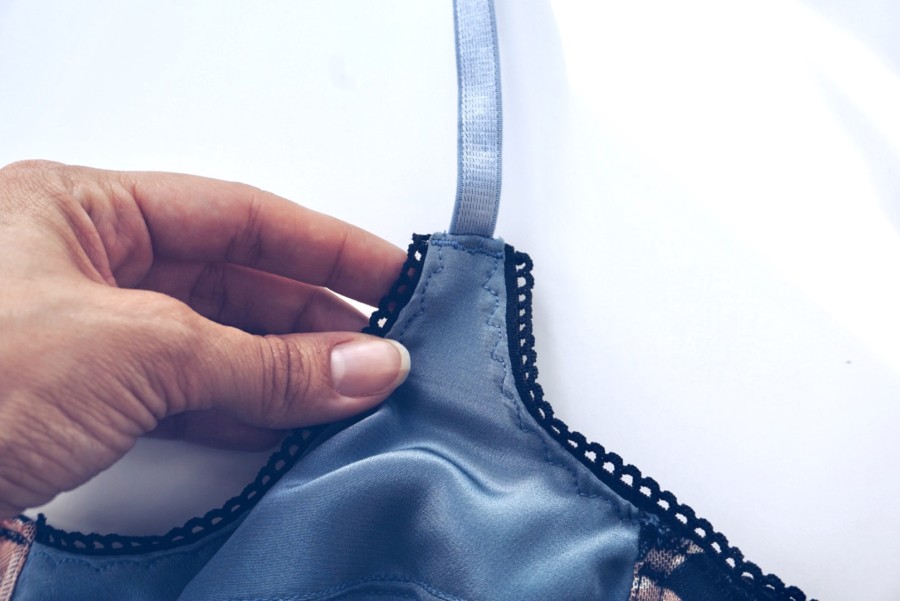
Step 2: Lift your bra strap and push the seam allowance down toward the inside of the cup. Bartack or narrow zigzag stitch to secure the strap.
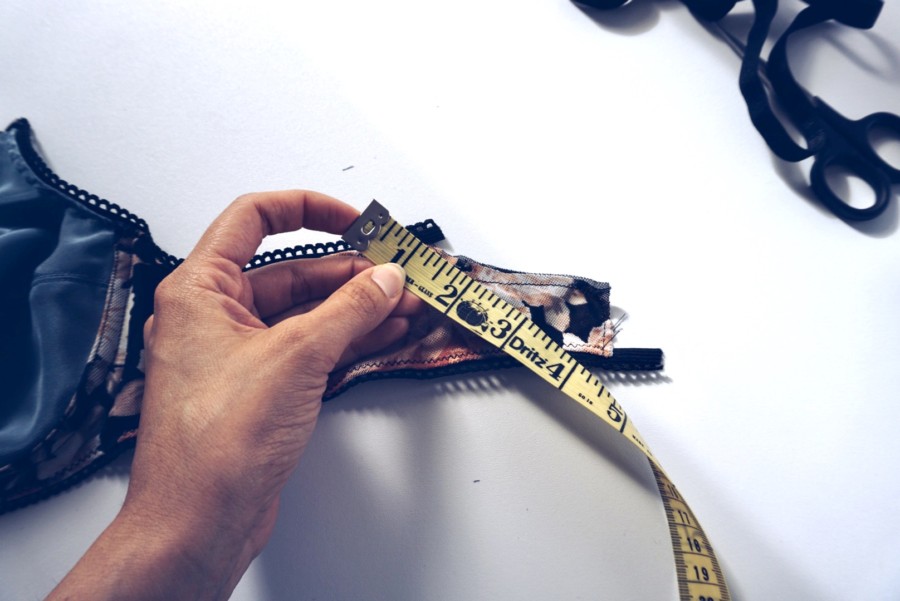
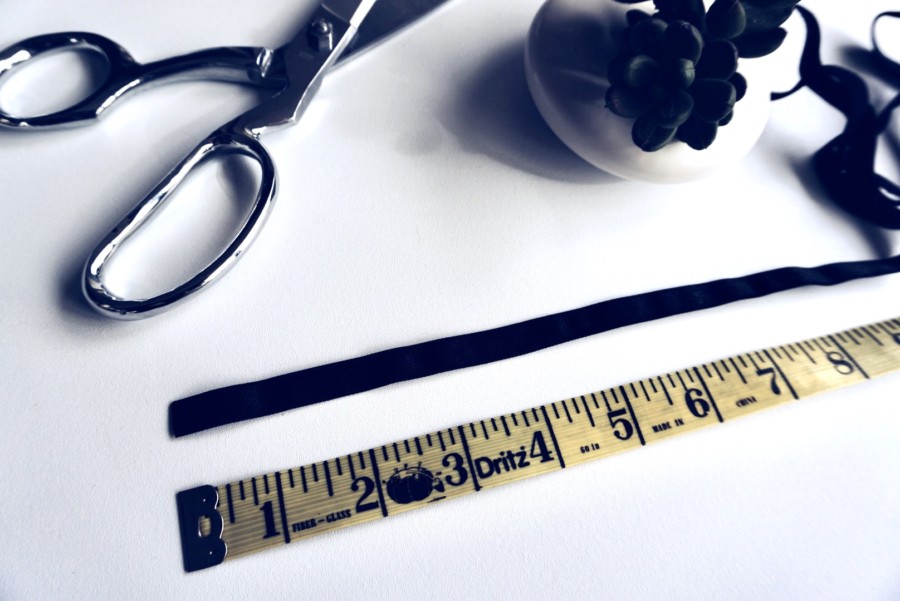
Step 3: Cut out a piece of bra strap elastic that is the width of the back band where the strap will be positioned plus ½”.
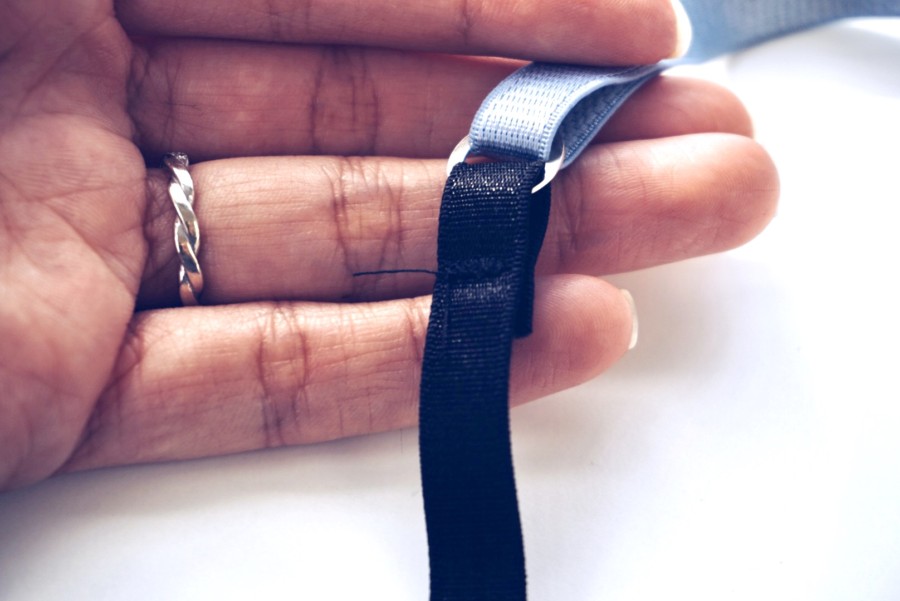
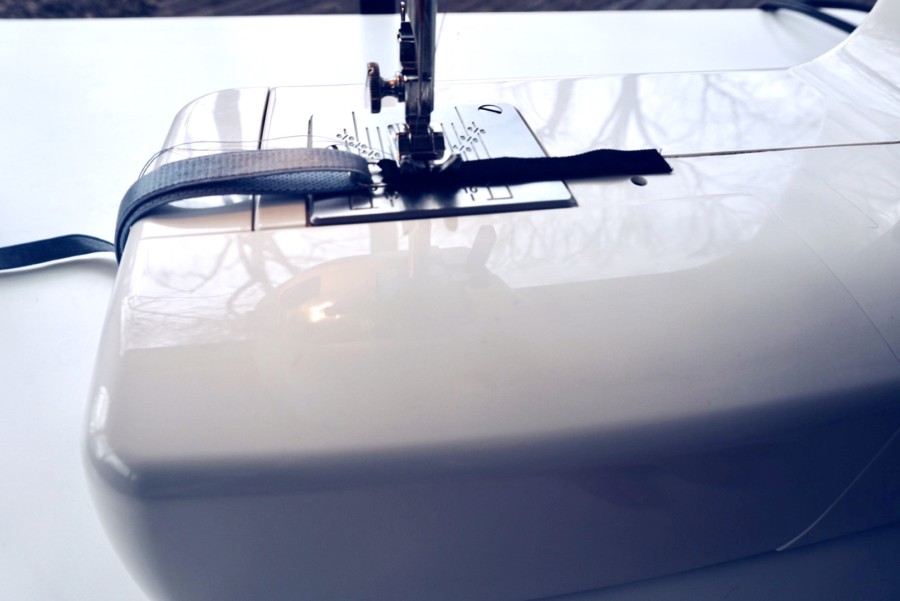
Step 4: Insert the new strap piece into the ring of your bra strap. Fold the new strap piece over the ring with the right side facing out by about 1/2”. Bartack or narrow zigzag stitch the flap making sure the folded side will face the inside of the bra.
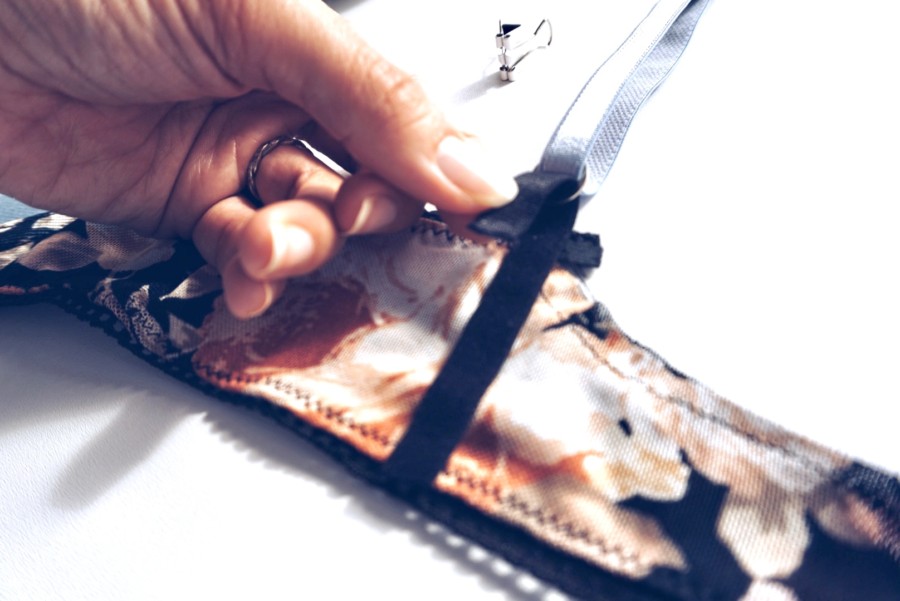
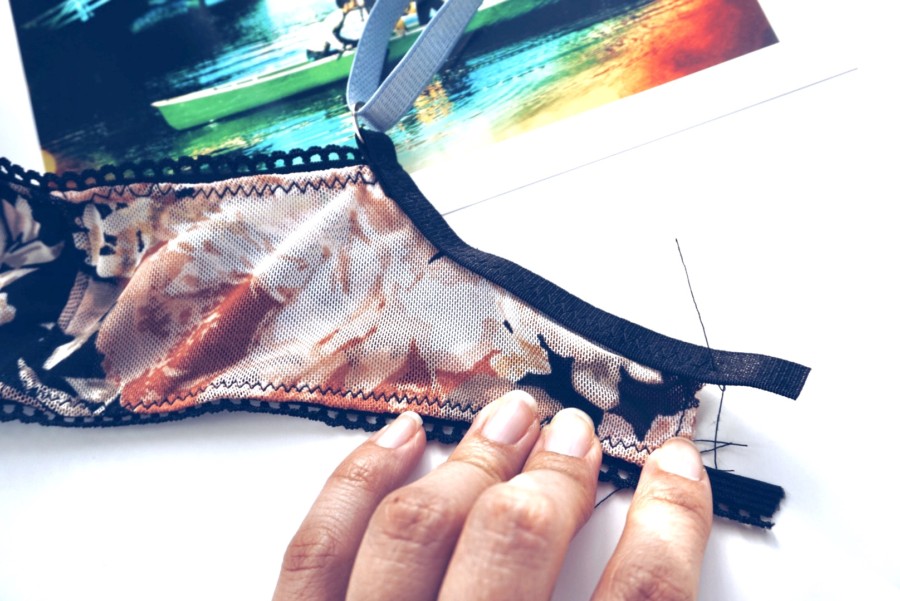
Step 5: Attach this small strip of elastic to the inside back band where the strap will be located. Sew with a bartack or narrow zigzag stitch on the top and bottom of the band to hold the strap securely in place for Option 1. For Option 2, sew the elastic along the back curve with the right side of the bra elastic facing outward. Trim the seam allowance peeking out from behind. Do not fold over and sew again.
Technique 2A: No Strap Extension
Attaching the Adjusters in the Front with No Strap Extension
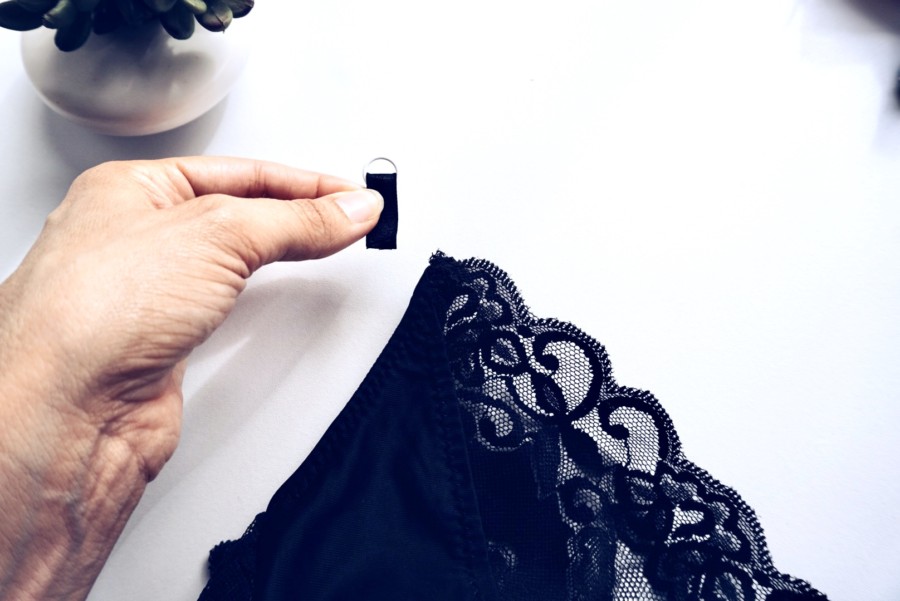
Step 1: Cut out a small piece of bra strap elastic long enough to create a loop around your ring and to attach to the front of the bra. 2” long would be a good place to start.
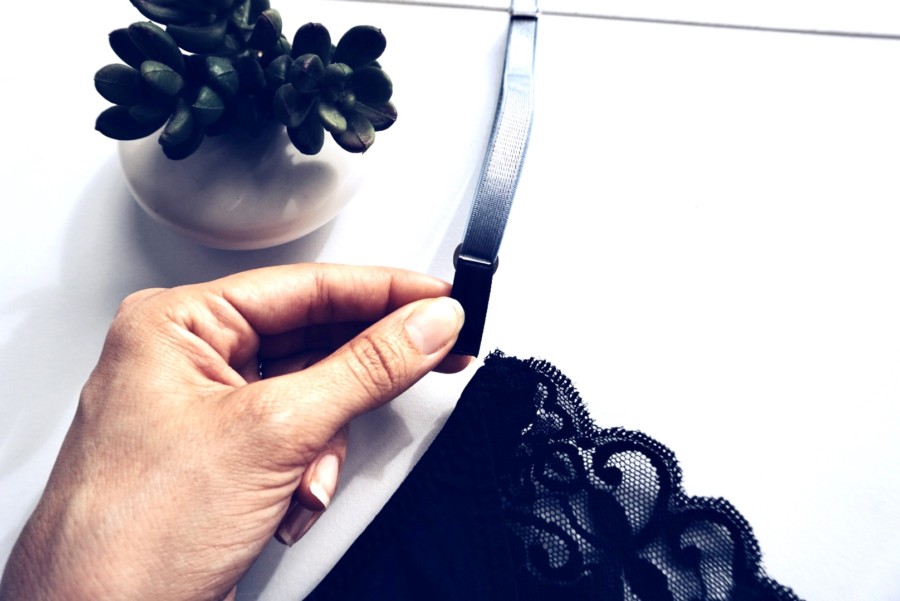
Step 2: Insert the small piece of bra strap elastic into the ring attached to your finished bra strap making sure that the right side is facing outward. Stitch this closed.
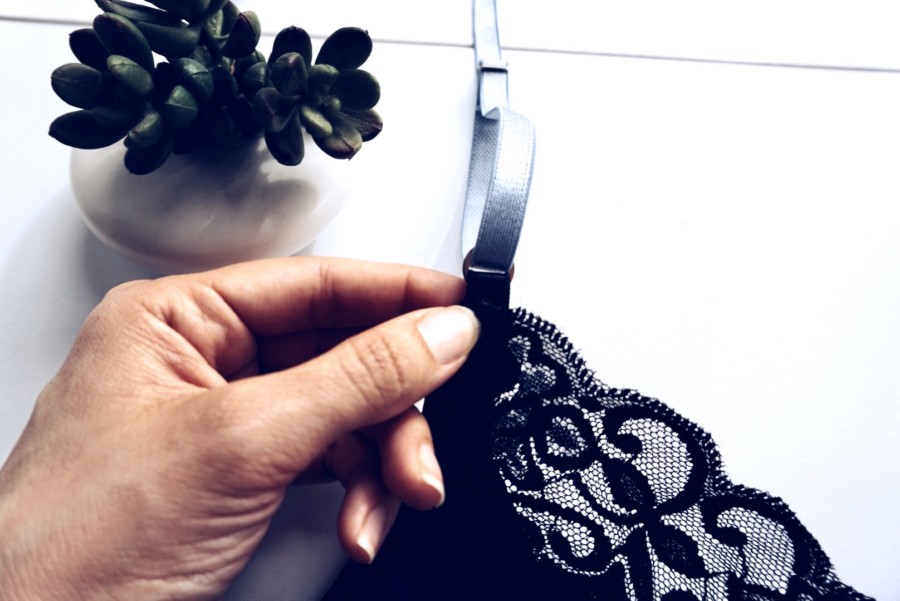
Step 3: Position the small folded piece of elastic at the top of the bra cup on the narrowest point. The ring will be just above the fabric cup at this point. Secure the small piece of bra strap to your bra cup using a bartack or narrow zigzag stitch. Be careful to sew in a place that does not damage the bra cup.
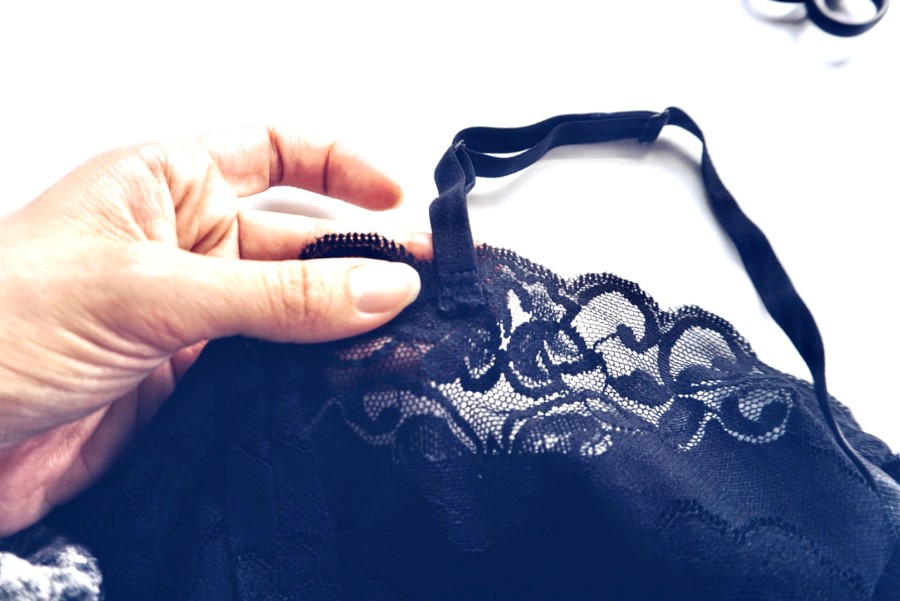
Step 4: Loop the bra strap all the way to the back band where you will sew the unattached end. Take the raw edge of your bra strap and position it where your pattern instructs or based on your personal preference. It should be at least ¼” down the back band. Bartack or narrow zigzag to secure in place.
Step 5: Repeat for the other strap
Technique 2B: No Strap Extension
Attaching the Adjusters in the Back with No Strap Extension
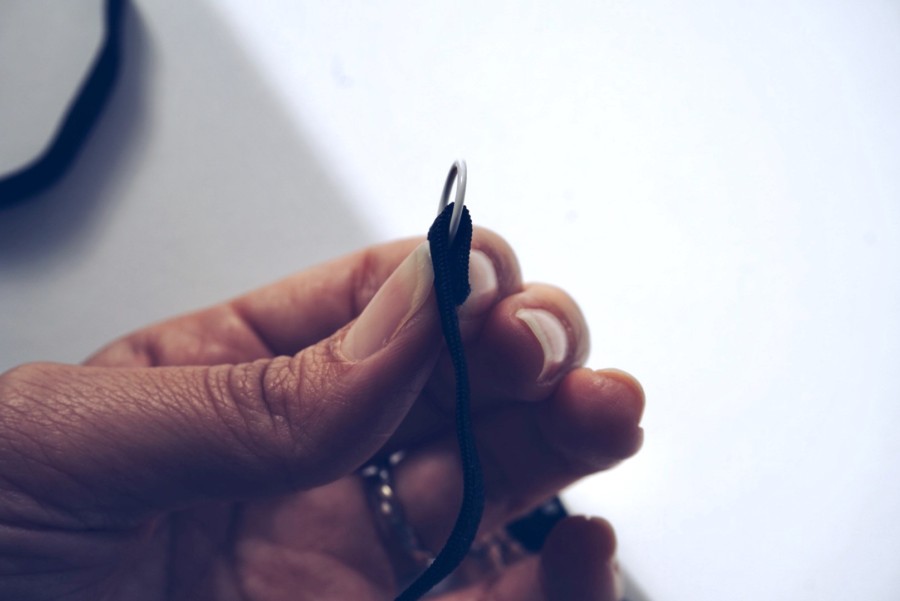
Step 1: Cut out a small piece of bra strap elastic at about 2”. Take a free ring and loop it through the elastic with the right side facing out. Fold the bra strap over about 1/2” then bartack or narrow zigzag stitch.
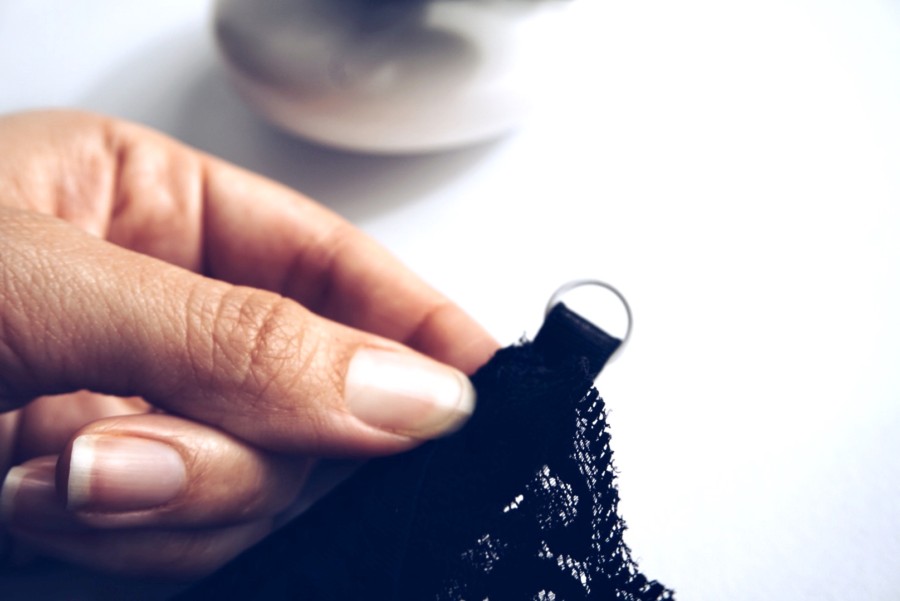
Step 2: Attach this small piece of bra strap elastic to the narrowest point of the bra cup with the right side facing out. Bartack or narrow zigzag stitch. Be sure not to damage the cup fabric.

Step 3: Cut out a piece of bra strap elastic that is the width of the back band where the strap will be positioned plus ½”.
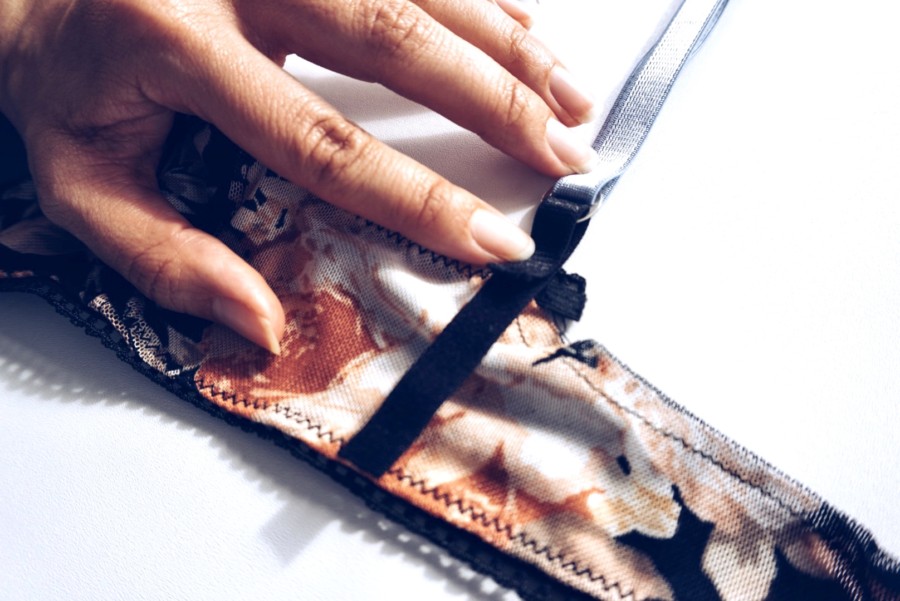
Step 4: Insert the new strap piece into the ring of your bra strap. Fold the new strap piece over the ring with the right side facing out by about 1/2”. Bartack or narrow zigzag stitch the flap making sure the folded side will face the inside of the bra.
Step 5: Attach this small strip of elastic to the inside back band where the strap will be located. Sew with a bartack or narrow zigzag stitch on the top and bottom of the band to hold the strap securely in place.
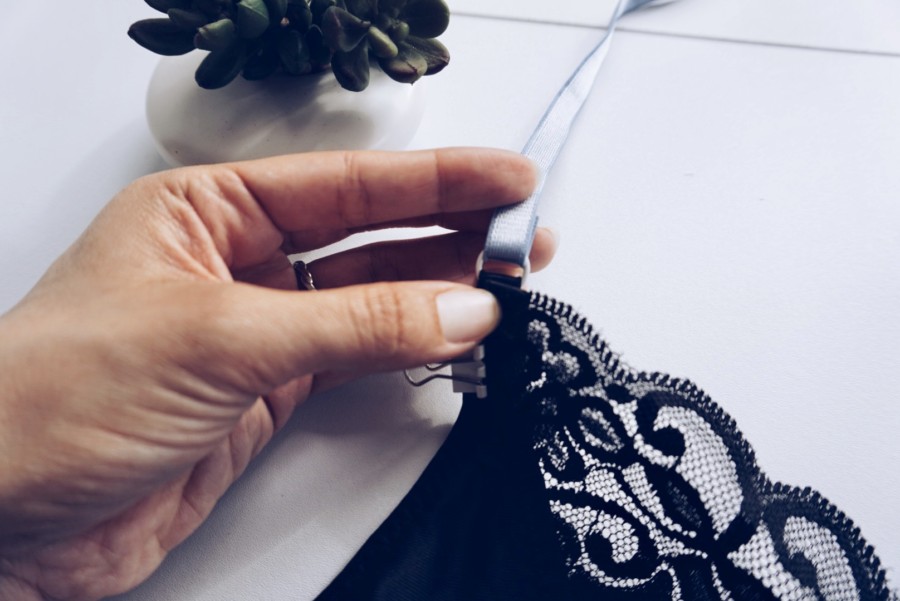
Step 6: Loop your bra strap to the front of your bra. Take the raw edge of your bra strap and insert it into the ring with the right side facing outward. Fold the strap over the ring and bartack or narrow zigzag stitch.
Step 7: Repeat for the other strap.
Tips & Tricks for Bra Strap Elastic – How to Attach a Bra Strap:
Even though there is a “wrong” side and a “right” side to your strap it is up to you based on your tastes to decide what side of the strap you would like to be “right” or “wrong”.
If you are having little luck with finding the right color of bra strap elastic and rings and sliders then you can always buy them in white and dye them to your desired color. Check out my tutorial on How to Dye Your Lingerie Fabric and Findings.
Always be very careful to slide the bra strap elastic through your ring or slider with the side you intend to be the “right” side. Triple check this step before you stitch anything down as the elastic will not recover well from removing stitches.
Where Can I Buy Bra Strap Elastic and Rings and Sliders?
Check out my recommendations for where to find Bra Strap Elastic and Rings and Sliders on my Recommended Notions page.
Conclusion – How to Attach a Bra Strap:
I hope you will sew enough bras to try out each of these bra strap attachment methods then find your favorite. Once you find your favorite practice it a few times until it comes easily to you.
Happy bra-making!
